foodsofjane
  • Home
  • Recipes
  • CLE
  • Contact
  • Home
  • Recipes
  • CLE
  • Contact
Search

Pad Thai

7/21/2020

0 Comments

 
Pad Thai, but make it allergy friendly. It's actually vegan and gluten free if you don't use eggs or meat as the protein because I took the fish sauce out of it!!

While pad see ew is my favorite Thai dish, Pad Thai is more common I feel like and a close second. I mean, of course I love it- it's noodles!! It's always been harder for me to eat at restaurants though since there's usually fish sauce and peanuts all up in it and I have so many unfortunate food allergies!! I started making my own version of the dish at home a while ago and it's def not authentic but it's as close as I can get - still v good in my opinion. :)
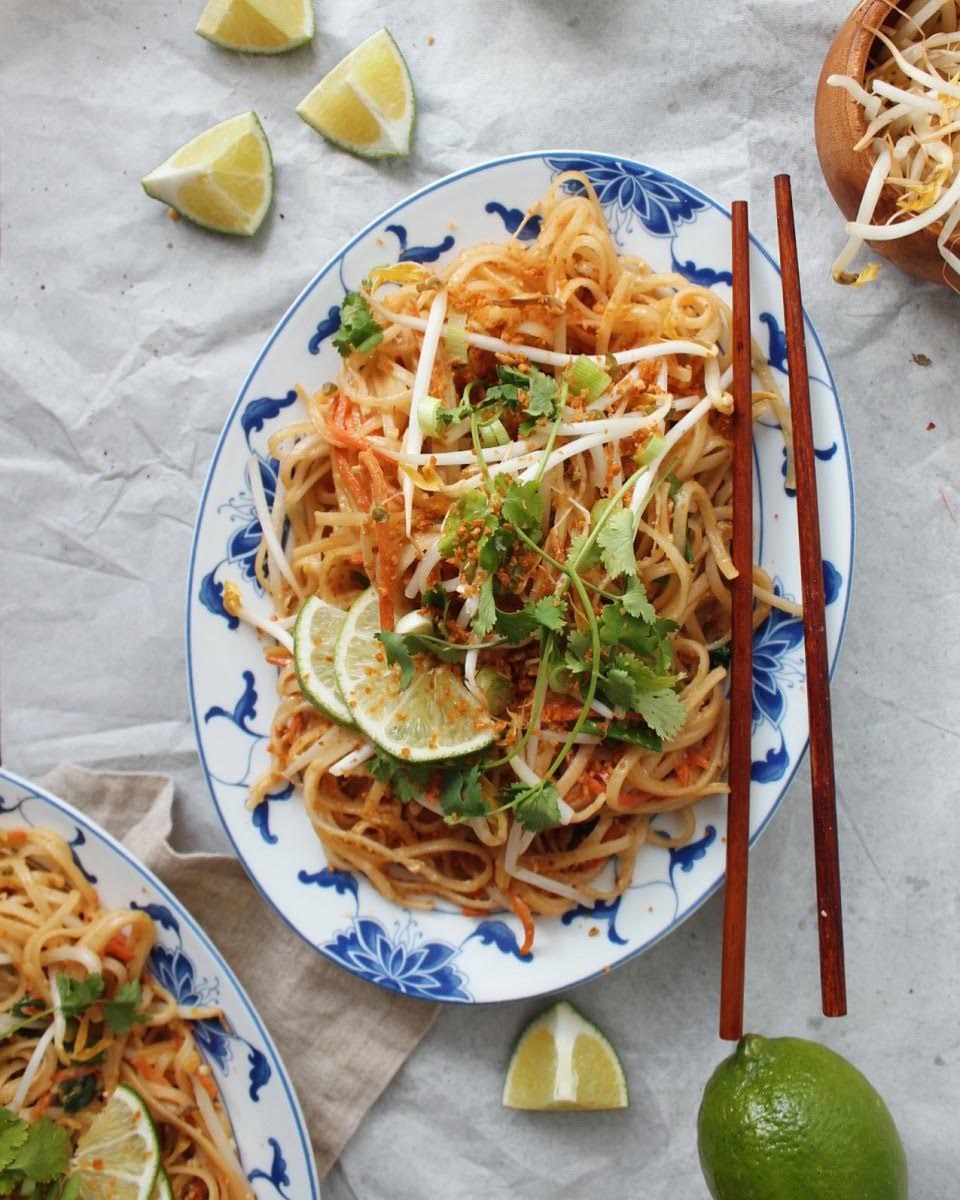
Picture
What you need:
  • 1/2 lb rice noodles (enough for 2)
  • 6 garlic cloves, minced
  • 1/2 cup matchstick carrots
  • 1/4 cup roughly copped shallot
  • 4-5 scallion stalks, cut into 1 inch pieces
  • 2 tbsp soy sauce
  • 1 tbsp rice vinegar or mirin
  • 4 tbsp Tamarind paste
  • 3 tbsp water
  • 3 tbsp palm sugar, tightly packed (or light brown sugar)
  • 1 cup bean sprouts
  • Optional: 1-2 eggs
  • Cilantro for topping
  • Fresh lime wedges for topping
What to do:
  1. Bring a large pot of water to a boil and cook the rice noodles according to package instructions.
  2. Fry 4 of the minced garlic cloves in vegetable oil until golden brown and crispy. Be careful not to burn them, the transition happens fast. Set them aside on a paper towel until the end.
  3. Heat the oil in a wok or large deep skillet and add the carrots, shallot, and two minced garlic cloves. Let simmer for a few minutes until translucent. Don't let the garlic burn! If you're going to add chicken or shrimp I would cook in the wok/skillet here until done.
  4. While the veggies are simmering, make the pad thai sauce in a bowl or jar by combining the soy sauce, vinegar, tamarind, water, and sugar.
  5. Add the cooked noodles, rest of the scallions and bean sprouts to the wok with the veggies (and optional protein choice) and then quickly mix them with the pad thai sauce. If you're doing egg, clear a spot for the eggs and quickly scramble/cook them in the wok before mixing them fully into the noodles.
  6. Top with the crispy fried garlic, cilantro and fresh lime juice.
0 Comments

Pancake Ice Cream Cake

7/2/2020

1 Comment

 
It was my friend's birthday last month and she LOVES ice cream so I wanted to make her an ice cream cake without actually having to bake cakes. That's where I came up with the idea to use Pancakes! So this recipe is shamelessly inspired by a lazy feeling but I'm not mad about it at all because it's a game changer.
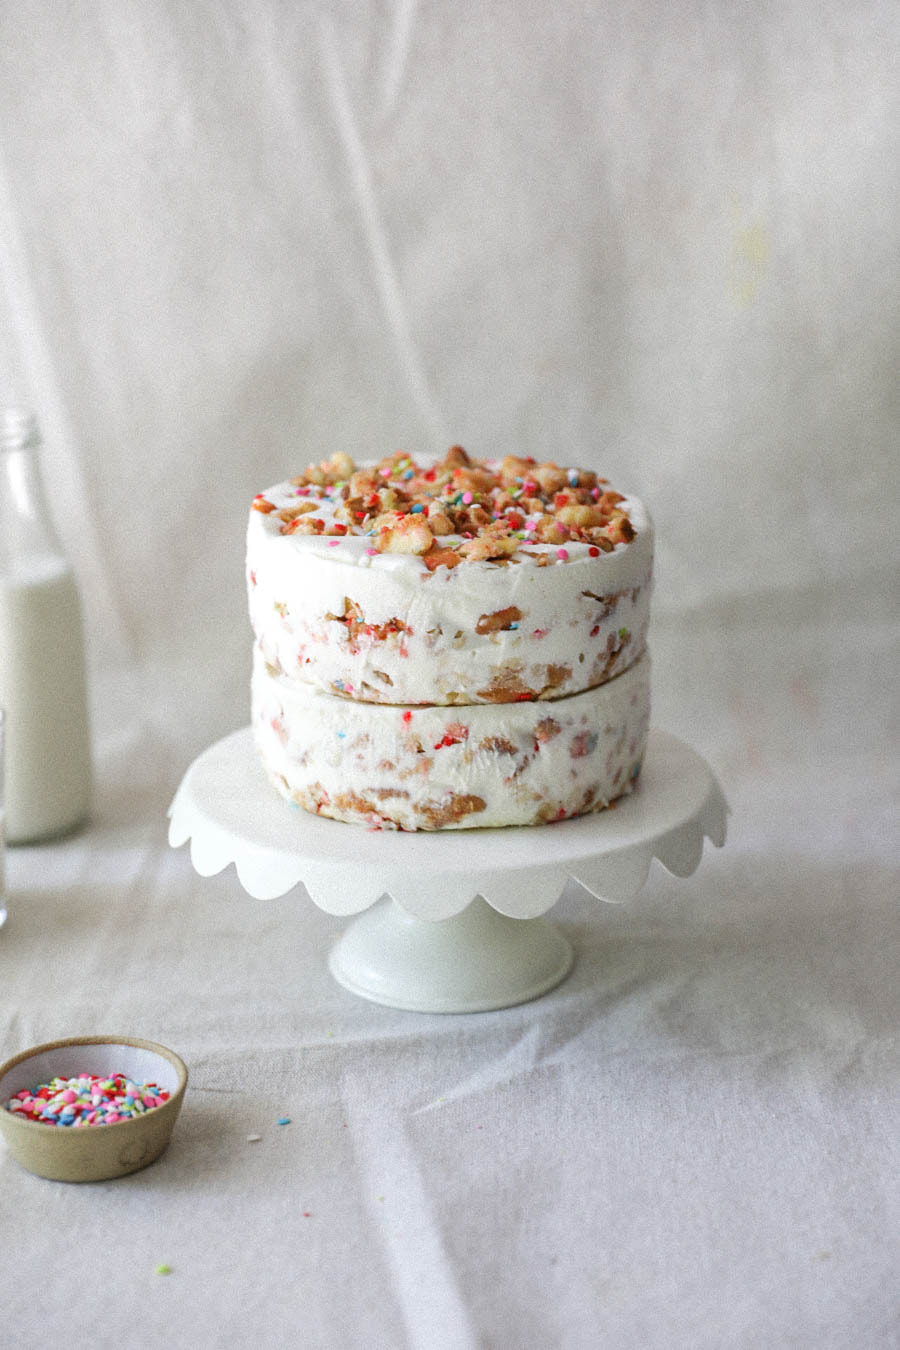
Picture
What you need:
  • A doubled batch of pancake mix, I used Aunt Jemima's the first time and Annie's organic the second time. (Both work great, and both times I doubled the suggested portion and had a little more than what I needed.)
  • 1/4 cup maple syrup
  • 1/2 cup sprinkles (I bought mine from Layered Cake Shop on Etsy - cutest colors and sprinkles ever.)
  • Old Fashioned Vanilla Ice Cream, I used an entire container of Tilamook (1.75 oz)
What to do:
  1. Follow the packaging instructions to make the pancake batter and pancakes. (I used two large skillets at a time and cooked two huge pancakes in each one to make the time go by faster.)
  2. It's important to leave the pancakes somewhat undercooked. They shouldn't be gloopy but I found when they are super dense in the middle and maybe even a little raw, the cake tastes and holds better. It's also okay if you mess up the pancakes while flipping because they'll be turned into crumbs anyways.
  3. You can either use a food processor or two forks to rip the pancakes into pieces. You want pancake "crumbs". The size should be a little smaller than a crouton and a little bigger than bread crumbs. It's okay if they are not all the same size because they get smooshed in the cake mold.
  4. One the pancakes have cooled, add the sprinkles and maple syrup to the pancake crumbs and mix. If the sprinkles start to melt too much in the wet syrup, you can add more in while layering in the cake mold.
  5. Take the ice cream out of the freezer in order to soften it.
  6. I used two 4" circular cake pans to mold the cake into the shape I wanted. You'll need to line the bottom of it with two pieces of parchment paper at a 90 degree angle so that you can easily pull up the cake once it's all frozen. (I cut 4 pieces of parchment paper into 2 inch wide strips because the circle shape is awkward and it made the most sense that way.) They should be long enough so that there are 4 tabs sticking up and out of the baking pan for you to pull! Once they are in place, you can put the pancake crumbs right on top of them.
  7. Scoop 1 cup of the pancake bits into a measuring cup, it shouldn't be packed in there too tight but it should be decently full.
  8. Line the bottom of each baking pan with the 1 cup of pancake crumbs and press down with the bottom of a cup until it's even. If it's a liiiiittle loose, that's okay, the ice cream will seep in and do it's thing.
  9. Next, add a layer of the softened vanilla ice cream on top of each layer of smooshed pancake crumbs. The ice cream should be soft enough to spread around but not too soft where it's complete liquid. (A hot spoon helps to smooth it around better.)
  10. Quickly transfer each pan to a flat area in the freezer. Leave it in there until the ice cream freezes up enough to hold another layer of pancake crumbs and then ice cream. (Mine sat in the freezer for a little over an hour before it was ready.)
  11. Repeat steps 9 and 10 with the layers. On one of the cakes, top with pancake crumbs and more sprinkles. This will be the top portion of your cake - the one with just ice cream on top will be the base layer.
  12. Return to the freezer again for at least three hours.
  13. Remove each cake pan and let thaw for 5 minutes before pulling each piece of cake out of the pan. Start with the one without pancake crumbs on top and put it on your cake stand. Quickly remove the other cake from the pan and place it directly on top of the base layer. Pop it back into the freezer to firm back up for 30 minutes or longer.
  14. Let thaw for 6-8 minutes before slicing through and serving!
1 Comment

Drunken Buttered Noodle Sauce

7/2/2020

5 Comments

 
This might be the most versatile recipe that I make in my kitchen. It's honestly not even a recipe it's just a cooking method of combining equal parts white wine and butter and then adding whatever you're in the mood for. It's def a chameleon pasta, blends into whatever and there's so many things that it pairs perfectly with!! I love how well the butter and white wine end up coming together to make the most silky buttery sauce. Sometimes I brown the butter a bit too before I add in the wine if I'm wanting an even deeper butter flavor.

I usually eat it plain with just pasta, but if I'm adding veggies to it I'll go with garlicky broccoli or charred corn in the summer. When I brown the butter, I like to use mushrooms and onion. For protein, sooo good with little neck clams or scallops! The pasta also pairs really well with with lemon chicken and capers too.

This dish can also be turned spicy or cajun with a teaspoon of either red pepper flakes or cajun flavors like Old Bay Seasoning or Tony's Creole Seasoning! (So good this way if you're pairing the pasta with seafood and/or corn.)

ALSO, you could add a few splashes (around 1/2 cup) of heavy whipping cream to this sauce to turn it into a more rich and creamy sauce, kind of like alfredo but with a slightly heavier booze factor.
Picture
What you need:
  • 1/2 stick (1/4 cup) regular or vegan butter
  • 1/2 cup white wine (I use Kim Crawford pino or some sort of buttery chardonnay)
  • 1/2 tsp garlic powder
  • 2-3 tbsp lemon juice
  • Optional - 1 tbsp cajun seasoning for a cajun version that pairs great with seafood
  • Optional - 1/2 heavy cream for a heavier, creamy version 
What to do:
  1. Melt the butter into a medium-large skillet on medium heat.
  2. Once it starts to bubble, add the wine and or whatever extra seasonings or cream you might be adding in. The wine should create some steam and be bubbling. Lower the heat to its lowest setting and let the sauce simmer while whisking on and off for 10-15 minutes. It should go from bubbling to barely bubbling. (Be careful, if your heat is too high it could evaporate too much of the liquid and you might need to add another round of ingredients to keep it going.)
  3. Toss the pasta in the sauce before serving. I like to add 2-3 tbsp of pasta water for an even better, silky texture. Parmesan cheese is also really good on top!!
5 Comments

Elote Pasta Salad

7/1/2020

4 Comments

 
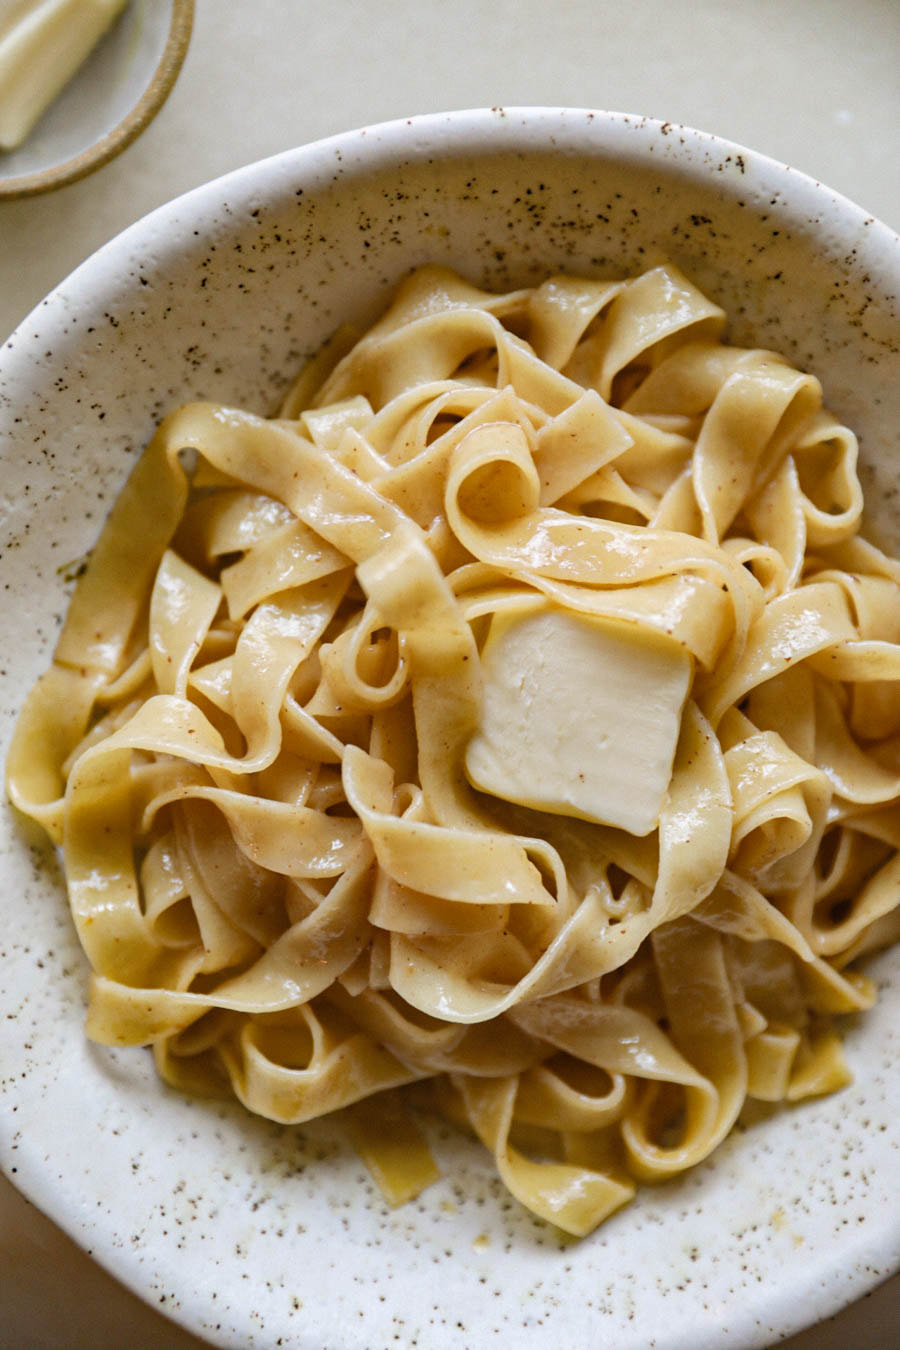
This is the summer of corn. I've been eating so much of it lately and putting it into everything! 

I couldn't decide if I wanted this to be a creamy pasta salad or not so I used burrata cheese so that some bites would be creamy and some wouldn't! You could totally add mayo though and make it a creamy pasta salad if you want! 

If you don't have access to a Trader Joes, you could make your own elote seasoning at home! I would use 1 tsp cayenne pepper, 2 tbsp cotija cheese and then 1/4 tsp cumin powder.​ The lime juice and cilantro that are added to the pasta salad will add a more "street corn" flavor to the overall dish as well.
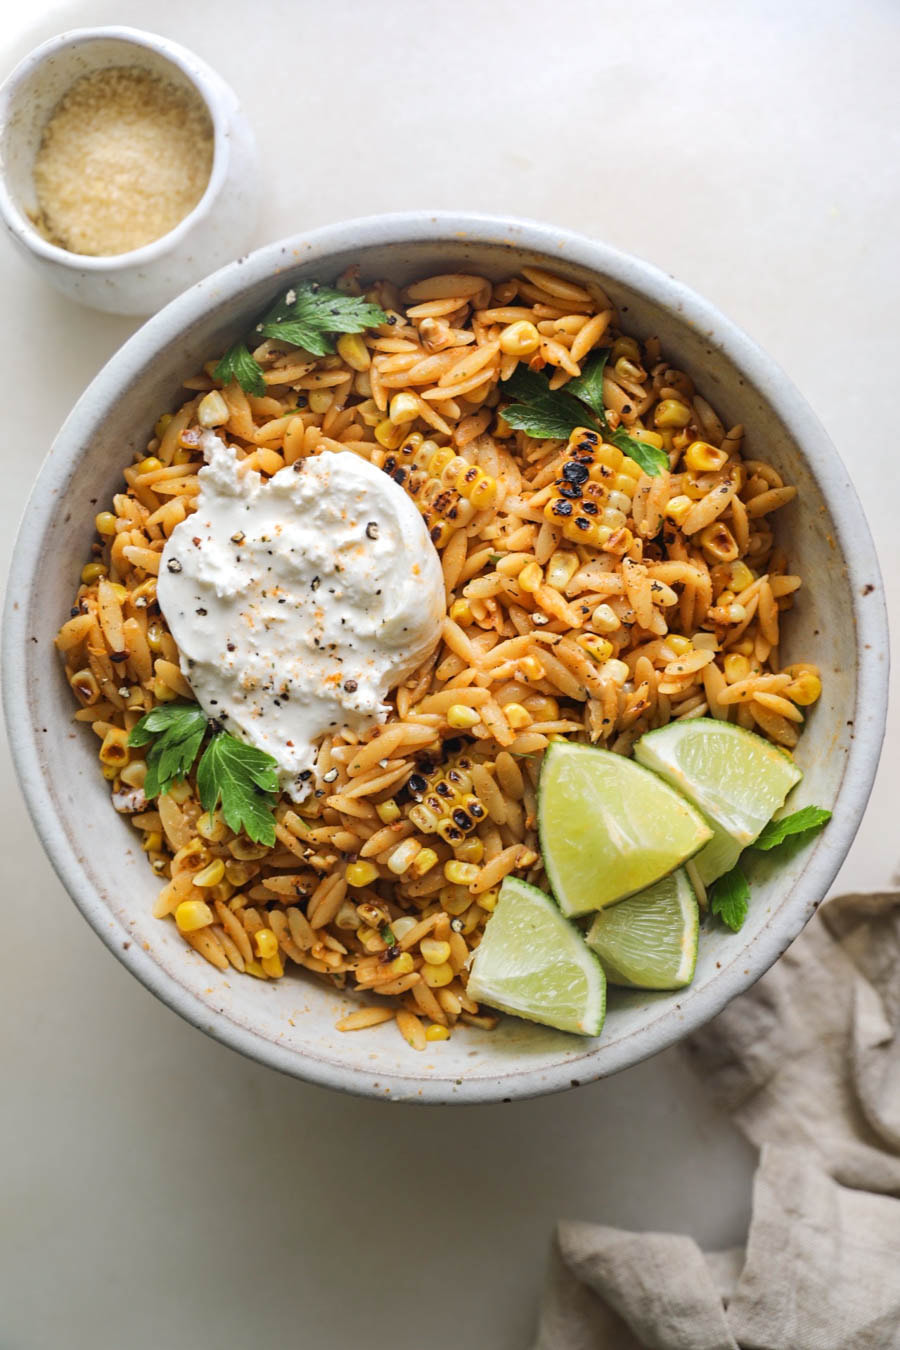
Picture
What you need:
  • 1 cup uncooked orzo pasta
  • 4 ears of corn
  • 2 tbsp Trader Joe's "Everything but Elote" seasoning (see note above if you don't live near a TJ's)
  • 3 tbsp chopped cilantro or parsley
  • 1 tbsp white wine vinegar or rice vinegar
  • 3 tbsp lime juice
  • Optional - 1/2 cup mayo or greek yogurt + garlic powder for a creamer pasta salad
  • Optional topping: burrata cheese
What to do:
  1. Bring a large pot of salted water to a boil and cook the pasta according to package instructions.
  2. While the pasta cooks, char the corn by cooking the ears in a large skillet with vegetable oil until charred and somewhat blackened. (You can do this on a grill too!)
  3. Cut the corn off the cob and mix it with the seasoning, cilantro or parsley, vinegar and lime juice.
  4. After draining the pasta, rinse it with cold water to bring down the temp before adding it to the other ingredients.
  5. Chill for an hour before serving. Or not, it's good hot too LOL.
4 Comments

    Connect

    CONTACT FORM
    If you’d like to use my photos & recipes, please ask or link back to this site. Thank You.

    Calendar

    August 2022
    July 2022
    June 2022
    May 2022
    April 2022
    March 2022
    February 2022
    January 2022
    October 2021
    September 2021
    July 2021
    June 2021
    March 2021
    February 2021
    January 2021
    December 2020
    November 2020
    October 2020
    September 2020
    August 2020
    July 2020
    June 2020
    May 2020
    April 2020
    March 2020
    February 2020
    January 2020
    December 2019
    September 2019
    August 2019
    July 2019
    June 2019
    May 2019
    April 2019
    March 2019
    September 2018
    August 2018
    July 2018
    June 2018
    May 2018
    April 2018
    March 2018
    February 2018
    January 2018
    December 2017
    October 2017
    August 2017
    May 2017
    April 2017
    February 2017
    December 2016
    November 2016
    June 2016
    April 2016
    January 2016
    June 2015
    April 2015
    March 2015
    February 2015
    January 2015

    RSS Feed

FOODS OF JANE

mostly noodles
foodsofjane, llc  |  © Copyright 2021 |  Contact@FoodsOfJane.com

  • Home
  • Recipes
  • CLE
  • Contact