foodsofjane
  • Home
  • Recipes
  • CLE
  • Contact
  • Home
  • Recipes
  • CLE
  • Contact
Search

Crockpot Short Rib Ragu

12/14/2017

0 Comments

 
Someone called me the other day while they were Christmas shopping to see if I had a crockpot. I said no, and then i said, wait, yes I do!! (That's how often I use it...yikes.) My mom gave me some short ribs that she wasn't going to use and I decided to whip out the crockpot. Crockpot cooking is so easy, you just sort of have to get things started and then forget about it for several hours.

Also, with tomato sauce...the longer it cooks, the better it tastes. This sauce is SO rich and flavorful I could cry. It's a bit different than most meaty sauces since it's short rib. I feel like the way it separates sets it apart from other kinds of bolognese sauces that use ground meat.

The recipe makes about 4 cups of sauce so there will be a lot. You can freeze part of it in a ziplock bag and save it for another time! It's a good one to start up earlier in the day since the short ribs have to cook for so long in the crockpot.
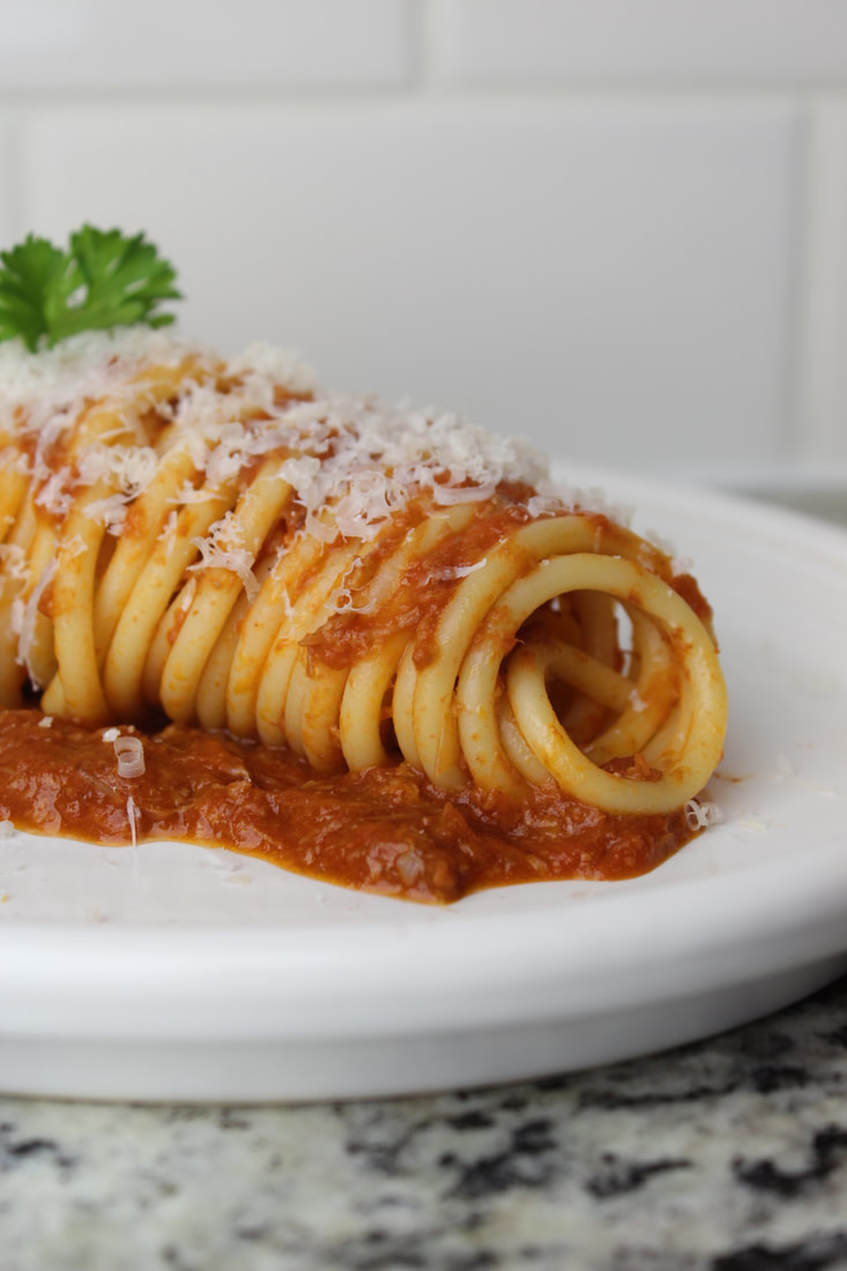
Picture
What you'll need:
  • A crockpot and food proccessor 
  • 4 bone-in beef short ribs
  • Plenty of olive oil
  • Plenty of salt and pepper
  • 2 cups cherry tomatoes
  • 1/2 large white onion, chopped
  • 3 garlic cloves, sliced in half
  • 2 15oz cans of plain tomato sauce
What to do:
  1. Turn the crockpot on to high and preheat the oven to 350 degrees.
  2. Line a baking sheet with tinfoil. Sprinkle a little olive oil, salt and pepper. Put the tomatoes, onion and garlic onto the tray and mix around to coat in the oil. Roast for 30 minutes.
  3. Pour a spoonful of olive oil into a skillet and turn the stove on to medium-high heat.
  4. Sprinkle the short ribs with salt and pepper and sear each side in the skillet. (Cook on each side for about 3-4 minutes until all of the edges are a little browned.)
  5. Put the short ribs, roasted tomato/onion/garlic into the crockpot. Add in the plain tomato sauce and little more salt and pepper. Cover and cook on high for 5 hours - or until the meat slides off the short rib bones.
  6. After you've removed the bones, you're going to want to blend the  short ribs in a food processor - just for a couple of seconds. They don't shred as easily as other meats like pulled pork, so a food processer will help break things up. Careful though, if you process too long it will turn into a gross meat paste. I used the "pulse" button and I pressed it probably 3 times for a couple seconds each time.
  7. If you want the remaining sauce in the crock-pot to be thin and not as chunky, blend that separately in a food processor until smooth and then reunite it with the shredded short rib.
  8. Serve it with pasta, or over polenta! I used bucatini pasta - you can buy it at Whole Foods.
0 Comments

Rice Noodle Rolls

12/10/2017

14 Comments

 
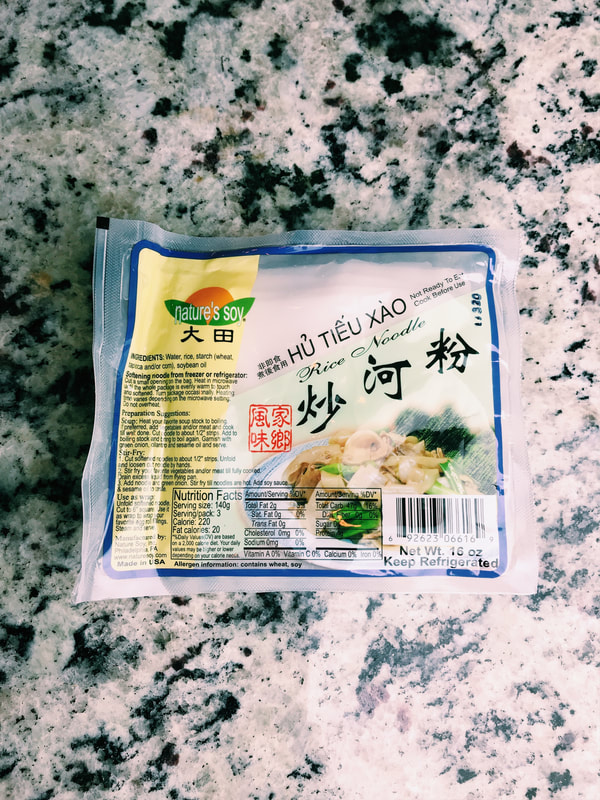
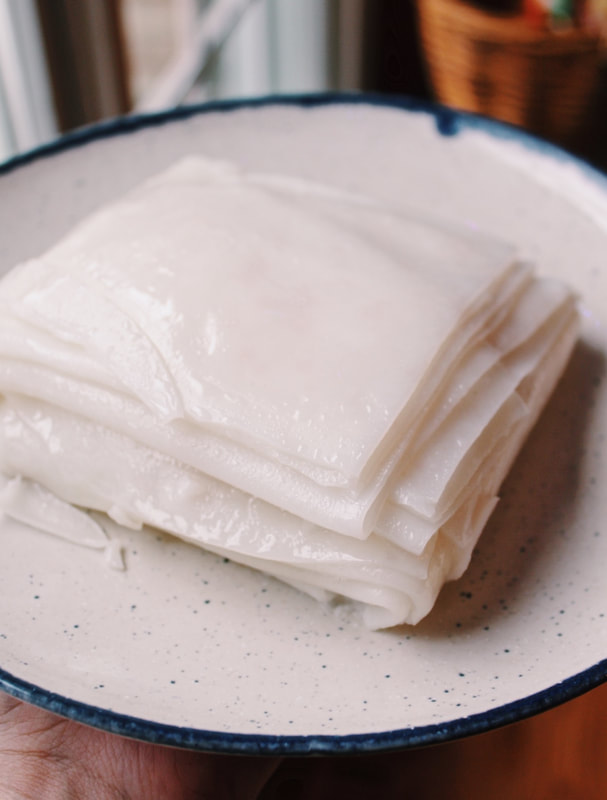
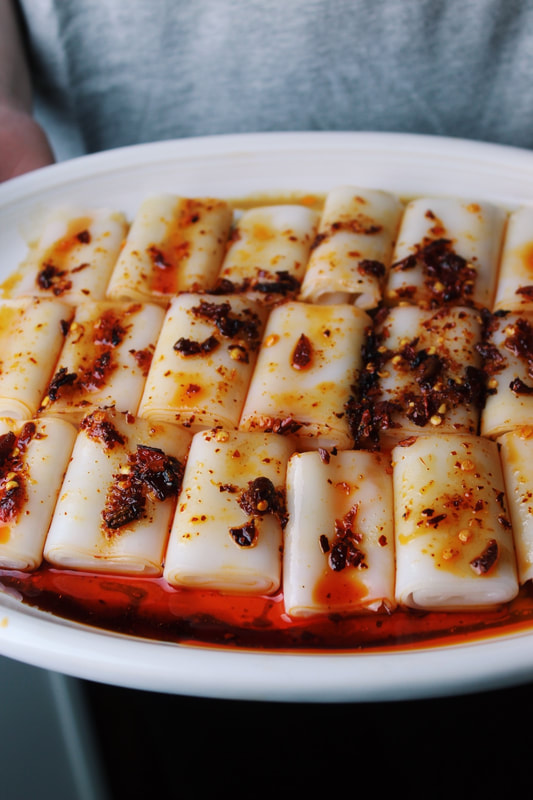
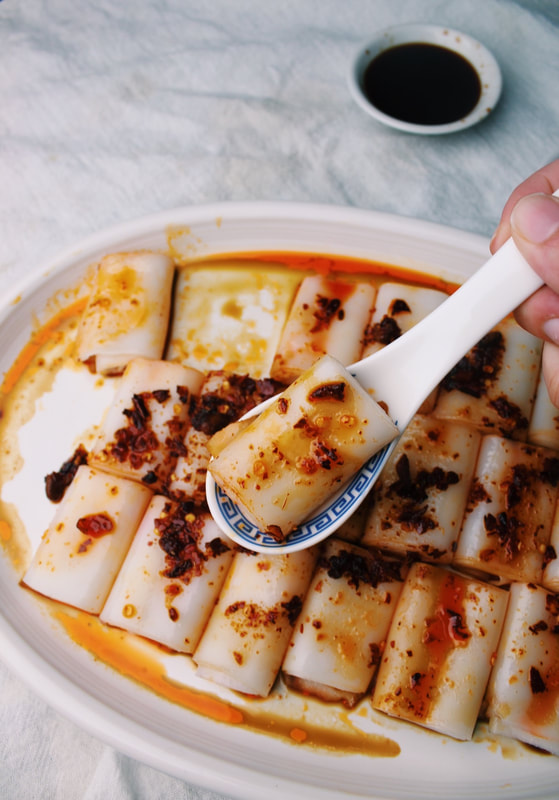
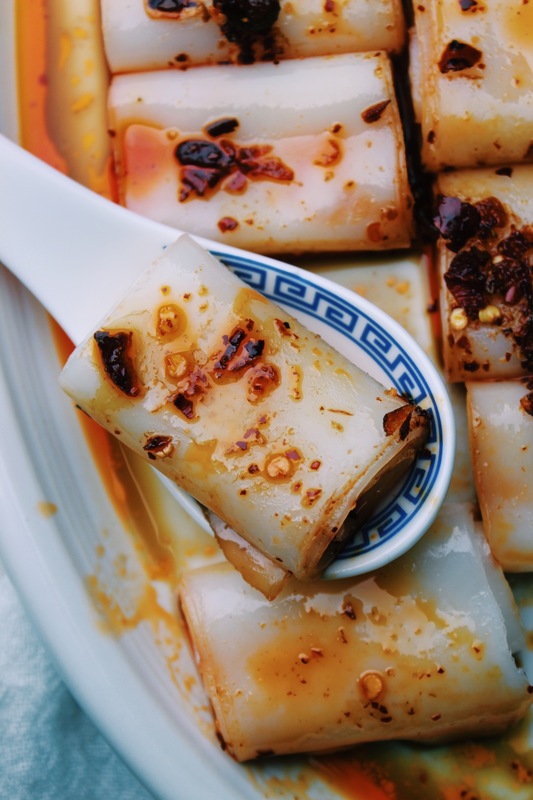
I've come across steamed rice rolls (or cheung fun) at a couple of different Chinese restaurants and I absolutely LOVE the texture of them. I've made them from scratch before using The Wok's of Life's recipe and Lisa Lin's recipe - they're a bit harder to make from scratch but a fun project for sure. What I have listed below is not really a recipe, more of a guide for how to assemble them. There are several different ways to serve cheung fun - with or without filling or even wrapped around fried dough! I like to serve them plain with chili oil since I can't have any peanut, shrimp or sesame due to my allergies. 
​If I were to explain them to someone that's never seen/heard of them before I would say that they are paper thin sheets of thick white rice noodles, rolled up and sliced into bite size portions. That said, think of pad see ew - the really thick rice noodles, rolled up just like a fruit roll up. Once the rice noodle is steamed, it becomes really soft, slippery and chewy.
Rice Noodle Roll
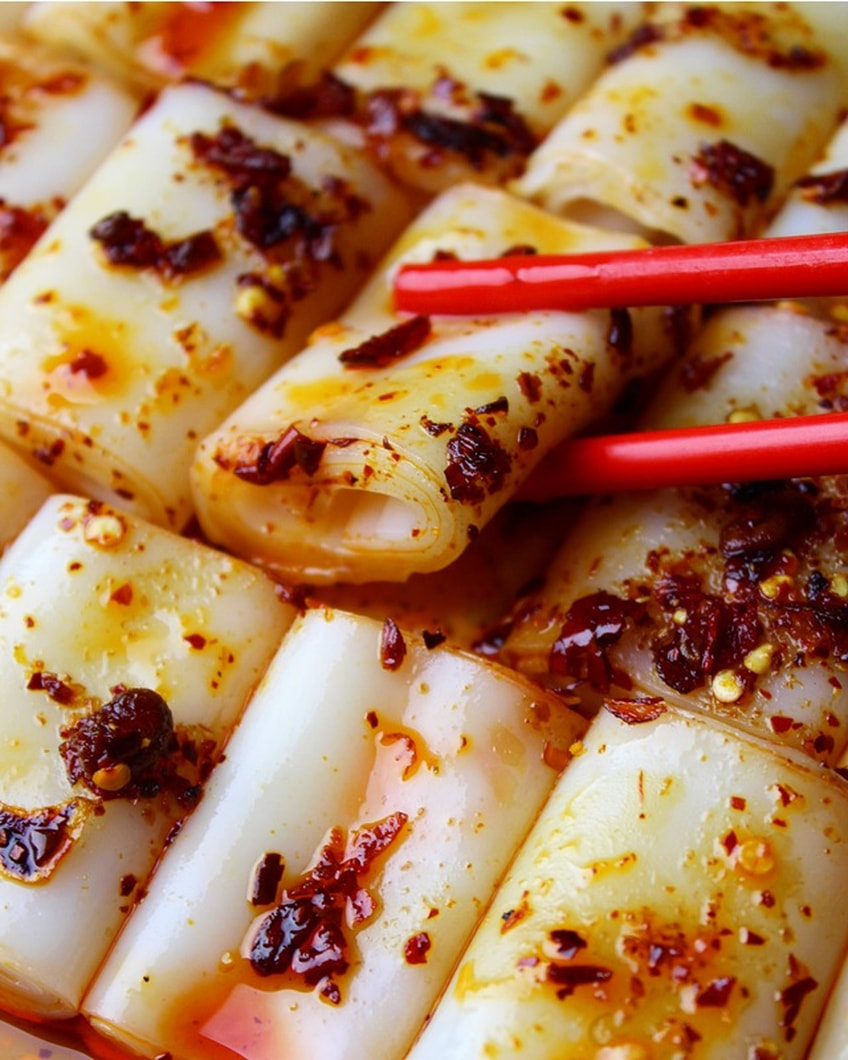
The steamed rice noodles that I bought came completely folded up in a package from the refrigerator in the back of Tink Holl Market, which is in CLE's Asia Town. The package says "Natures Soy Rice Noodle" and below is a photo of what it looks like. The noodles were sort of stiff, and folded up kind of like a blanket.
​I would say that one of the packets of rice noodles I used is enough for two people to share. I ended up with around 18 bite size pieces.

What You Need
  • 1 package of pre-made rice noodle sheets (see above for the brand I used, you'll most likely have to get from your local Asian grocery store, they aren't easy to find!)
  • 2 tablespoons of dark soy sauce + more for dipping 
  • 2 tablespoons of spicy chili crisp sauce or chili oil combined with red pepper flakes
  • 2 garlic cloves, minced
  • 2 stalks of scallions, chopped
What To Do
  1. Poke a hole  on the top of each side of the package, 4 slits the size of standard knife, then microwave for a minute. This will steam the noodle sheets.​
  2. ​Remove the top part of the package and check to see if the noodles are heated properly. They should feel like a jelly texture, and shouldn't be hard at all, or else they will break and rip when you try to unravel them, so be careful while checking. If they are still kind of hard in the middle of the folds, keep microwaving at 30 second increments until the noodles are really soft.
  3. ​Let the noodles cool for second before you start to  unfold them. Find a clean flat surface and spray with pam, or rub a little vegetable oil on it so that the noodles won't stick.
  4. ​Once unfolded, you should have sheets that are about 6" long. One by one, lay out each sheet and roll it up sort of like a fruit roll up. Leave about 1/2 inch on the first fold so that they are a bit wider once rolled up.
  5. ​Place each roll side by side on the oiled flat surface - it's important that they are touching so that when you slice them, the bite-sized pieces will be even in size.
  6. ​​If you're a freak like me, cut off the very ends of the rolls to have straight edges. Then slice up the rolls into little bite sized pieces. 
  7. ​Use a big spatula to transfer the rolls onto a plate. Warm the noodles in the microwave for 30-60 seconds and then douse them in the soy sauce and chili oil. Sprinkle the fresh minced garlic and scallions.
  8. ​The final and best step. EAT.
14 Comments

Three Ingredient Homemade Noodles

12/7/2017

19 Comments

 
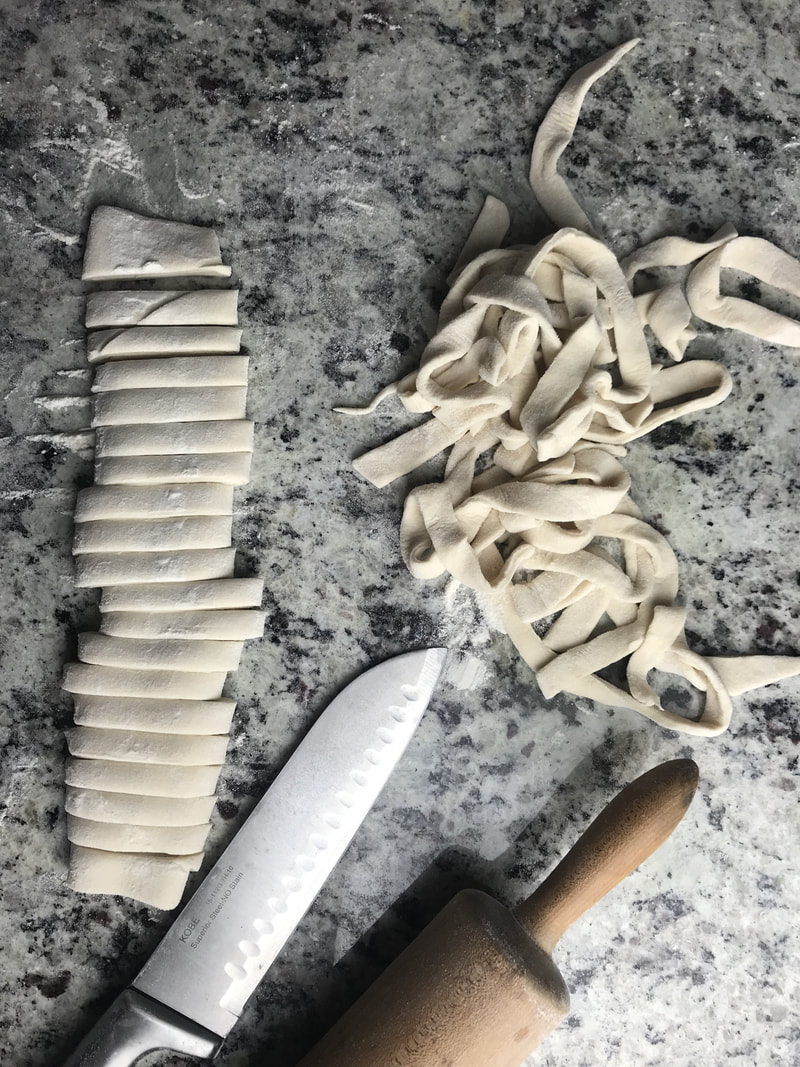
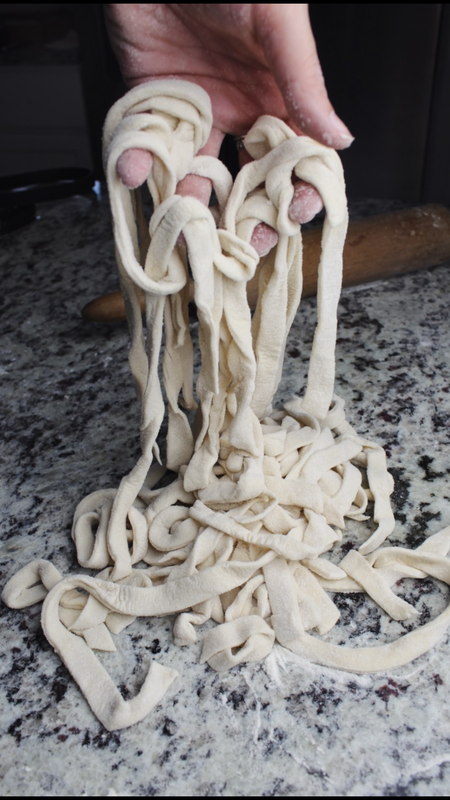
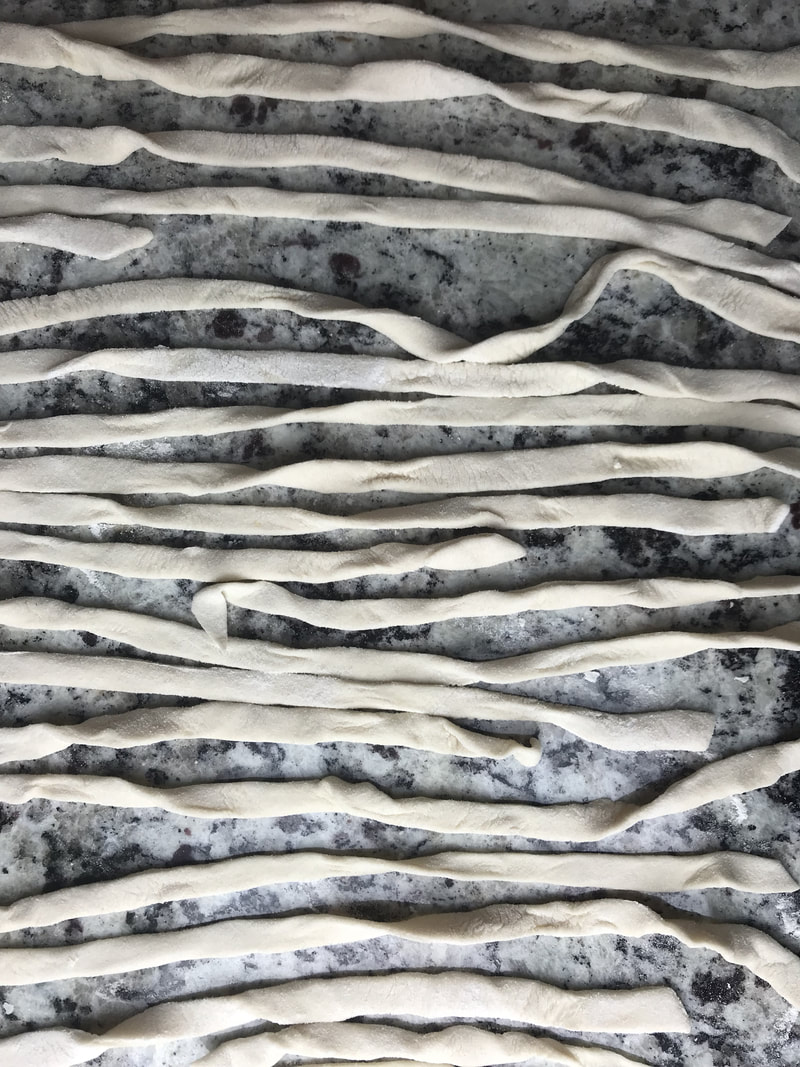
It's pretty crazy that from start to finish, you can make ready-to-eat noodles with only three ingredients in only 30 minutes. 
​
The longer, more intensely you knead, the smoother the noodle texture is. You can totally knead by hand, I would say for about 10 minutes - that's how I used to make this recipe before I was gifted a Kitchen Aid and now I use a dough hook to help knead my dough.

I've used this recipe with bread flour and all purpose flour and both will work! I think the AP flour is best though. Oh AND, it makes enough noodles for two people so you can share or just eat the whole thing by yourself which is what I normally do, lol.
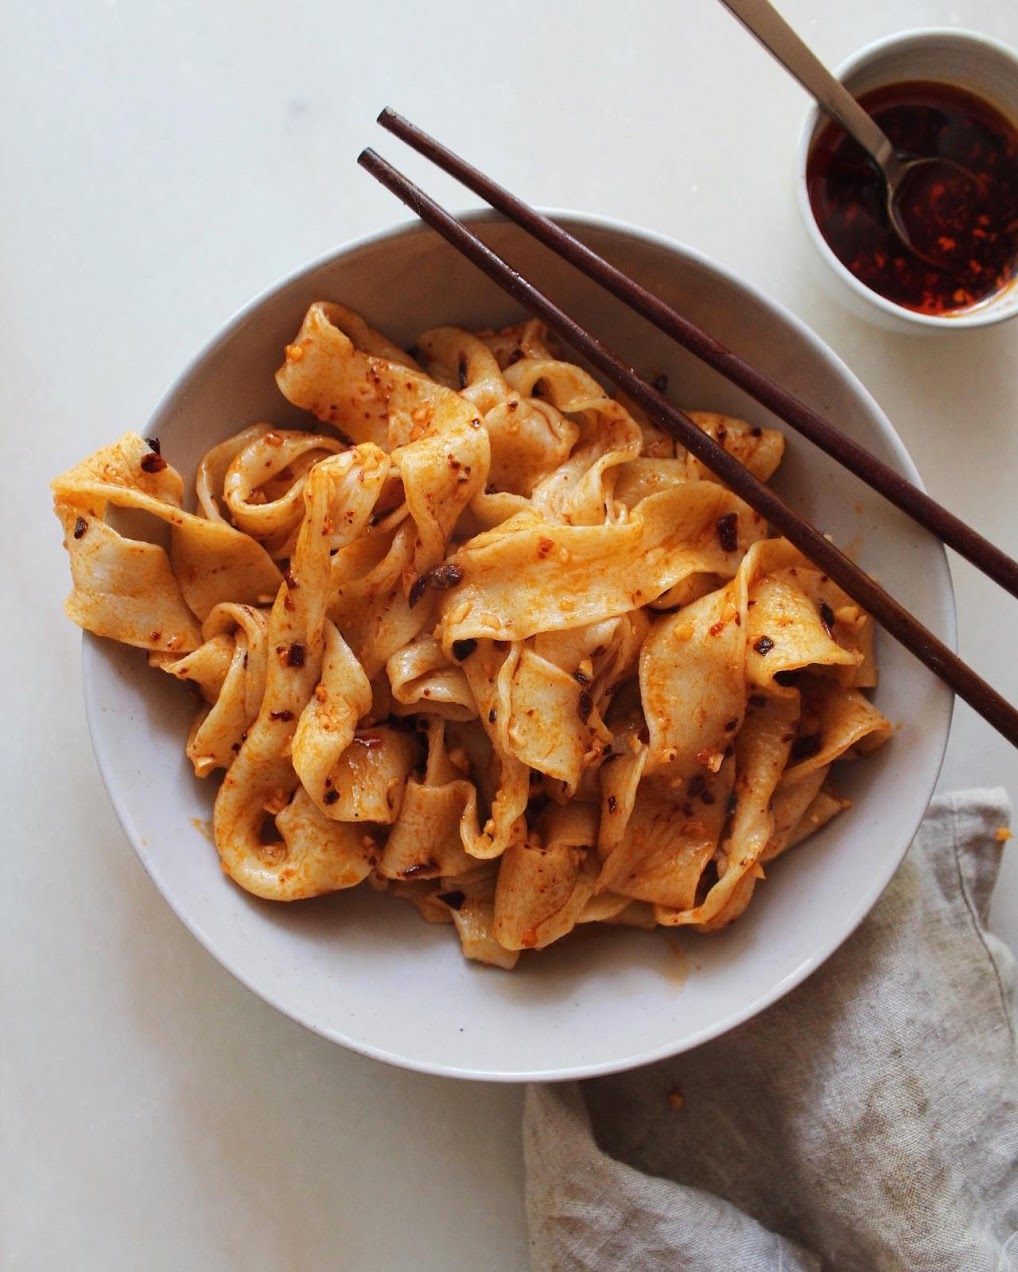
Picture
What you need:​
  • 2 cups AP flour​
  • 1/2 tsp salt
  • 1/2 cup water
  • 3 garlic cloves, minced
  • 3-4 tablespoons Spicy Chili Crisp (or chili oil)
  • 1 tablespoon soy sauce
What to do:
  1. Combine flour and salt in a large bowl and add in the water little by little and mix until the dough starts to get shaggy. From here, start to roll it into a ball. (You might need to use a little bit more water if the dough is turning out too dry.)
  2. Once a ball has been formed, it's time to make sure that the consistency is on point. It shouldn't be completely dry, and it shouldn't be too sticky. Somewhere right in between dry/sticky will do.
  3. If you're not using a stand mixer, knead the dough for 10 minutes by hand. Your arms/hands/fingers will get really tired, but it's worth it. (Sometimes, I would kneel on a chair and use the weight of my body to help the process, it makes doing it by hand kind of easier.)
  4. Split the kneaded dough in half and roll them both out, separately. Once rolled out, the noodles should be a little thinner than what you want because once you boil them, they will fluff up a tiny bit. (The noodles in the picture above were about 1/8" thick once rolled out.)
  5. Sprinkle a little flour on both sides of the rolled out dough. Then, fold/roll up the dough to slice. (See photo below.) Kind of like rolling cinnamon rolls, but keep things more loose. Slice the roll of dough into pieces as thick as you want your noodles to be. Mine were somewhere between 1/4-1/2".
  6. Cook the noodles in salted boiling water for 8-10 minutes. Test one out before you drain all the water to make sure it's not too doughy or stiff, and that they've cooked all the way through.
  7. Drain the noodles and toss them in the minced garlic, chili oil and soy sauce. Sometimes I like to add a splash of Chinese black vinegar too! 
  8. EAT up.
19 Comments

    Connect

    CONTACT FORM
    If you’d like to use my photos & recipes, please ask or link back to this site. Thank You.

    Calendar

    August 2022
    July 2022
    June 2022
    May 2022
    April 2022
    March 2022
    February 2022
    January 2022
    October 2021
    September 2021
    July 2021
    June 2021
    March 2021
    February 2021
    January 2021
    December 2020
    November 2020
    October 2020
    September 2020
    August 2020
    July 2020
    June 2020
    May 2020
    April 2020
    March 2020
    February 2020
    January 2020
    December 2019
    September 2019
    August 2019
    July 2019
    June 2019
    May 2019
    April 2019
    March 2019
    September 2018
    August 2018
    July 2018
    June 2018
    May 2018
    April 2018
    March 2018
    February 2018
    January 2018
    December 2017
    October 2017
    August 2017
    May 2017
    April 2017
    February 2017
    December 2016
    November 2016
    June 2016
    April 2016
    January 2016
    June 2015
    April 2015
    March 2015
    February 2015
    January 2015

    RSS Feed

FOODS OF JANE

mostly noodles
foodsofjane, llc  |  © Copyright 2021 |  Contact@FoodsOfJane.com

  • Home
  • Recipes
  • CLE
  • Contact