foodsofjane
  • Home
  • Recipes
  • CLE
  • Contact
  • Home
  • Recipes
  • CLE
  • Contact
Search

Linguine & Clams

9/28/2020

0 Comments

 
Technically, you don't have to eat this pasta dish with linguine but the name 'linguine and clams' is so iconic to me that we're just gonna call it that. I personally loveeee clams with mafaldine too which is like a more wider long noodle with curly edges. 

I love adding chopped clams to this dish in addition to the fresh clams in the shell. One of my favorite restaurants serves it that way and the texture + extra amount of clams is so gooood. Also, sometimes I add cherry tomatoes at the same time as the garlic cloves and it's so good that way too!

This dish is enough for two entrees, or three small plates and it takes about 30 minutes to whip up.
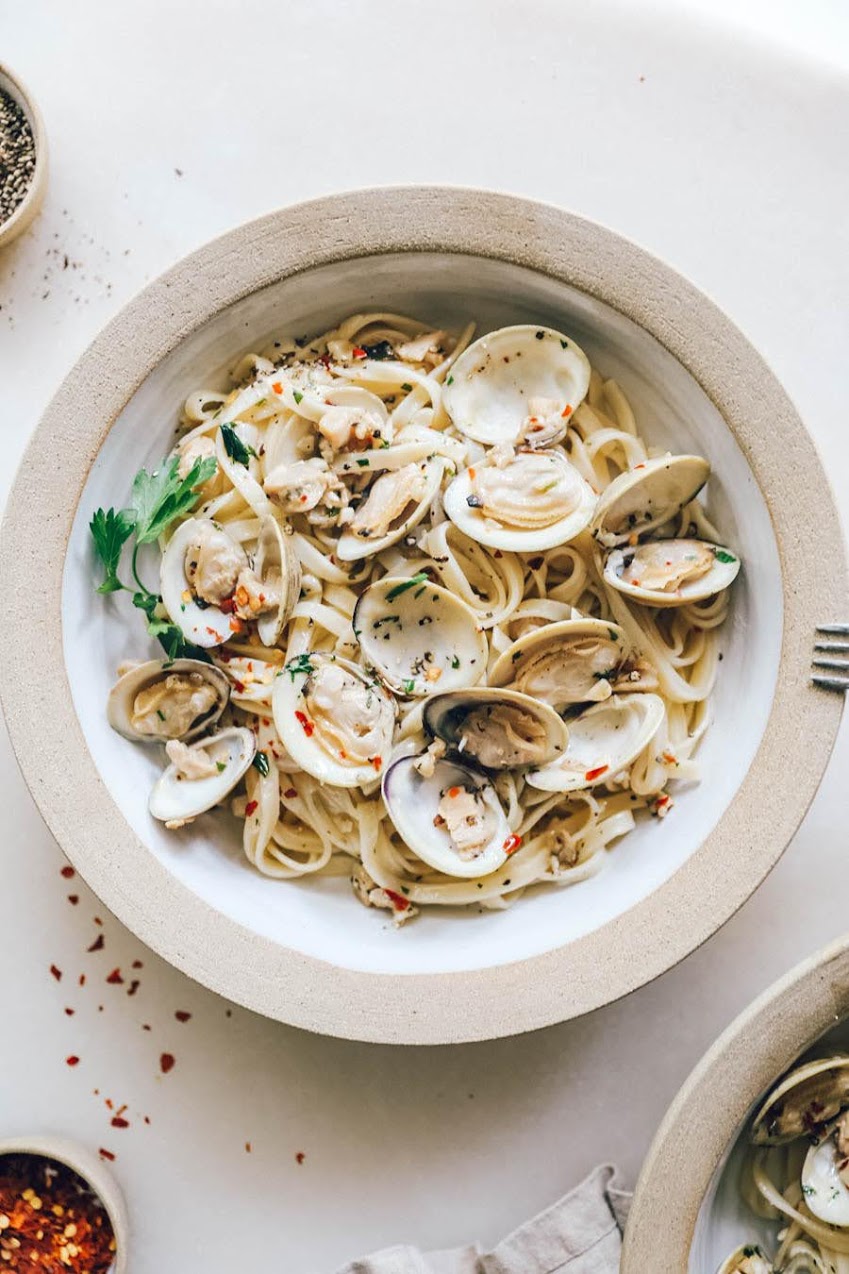
Picture
What you need:
  • 1/2 lb of pasta (enough for 2 entrees or 3 small plates)
  • 3 tbsp of butter (can be vegan)
  • 4-6 minced garlic cloves (the more the better IMO)
  • 1-2 teaspoons of red pepper flakes depending on how much heat you can tolerate
  • Around 30 fresh little neck clams (in a pinch you can use two small cans of chopped clams)
  • 1 6oz size can of roughly chopped clams (you can de-shell some of he clams and chop them yourself but I kinda like the canned clams, is that gross? Lol.)
  • 3/4 cup white wine (I use cheap chardonnay)
  • 1/2 teaspoon black pepper
  • 1 tbsp fresh chopped flat leaf parsley (dried parsley works too)
What to do:
  1. Bring a large pot of salted water to a boil and cook the pasta according to package instructions.
  2. ​Turn your fave stove burner (we all have one, lol) to a low heat setting and melt the butter in a large/deep skillet and add the minced garlic and red pepper flakes. (Make sure the skillet you decide to use has an option to use a lid!)
  3. While the garlic is simmering in the butter for a few, wash the clams with a scrub brush and cold water to remove any sand or possible bacteria.
  4. Once the garlic is fragrant and translucent, add the clams into the skillet. Pour the wine over the clams, change the heat from low to medium and cover with a lid.
  5. Check back after about 10 minutes to see if the clams have opened up. Once they are all opened - they're done. Discard any that stayed shut.
  6. Remove the clams from the skillet and place them on a nearby plate while you add the chopped clams, pasta, pepper and parsley to the skillet. Mix over medium heat for a few minutes. (It's easier to mix around without the clams and their shells!)
  7. Taste the pasta before adding the clams back in and serving. If you didn't salt the pasta water, you may need to season with salt.
  8. Once you're satisfied with the taste of pasta sauce you can add the clams back in and it's ready to be served! I always top with more parsley and red pepper flakes.
0 Comments

Pumpkin Sheet Cake (Gluten Free/Vegan)

9/27/2020

0 Comments

 
I stumbled upon this recipe from Jessica in the Kitchen last week and changed it around a bit to fit the way I like to eat. I did use her vegan cream cheese recipe and it was FIREEEE, the best vegan cream cheese frosting I've tried hands down so I didn't change a thing about that part. (Tap here for her vegan cream cheese frosting recipe.)

When it comes to desserts, I'm obsessed with trying to find healthier ways to bake them! So instead of using 1 1/2 cups can sugar, I used 3/4 cup maple syrup. I also love subbing out wheat (flour) in baking recipes for a 1:1 oat flour and all purpose gluten free flour combo so I did that here too.
Picture
What you need:
  • 1 cup gluten free all purpose flour (I used Pamela's)
  • 1 cup gluten free oat flour (you can grind up whole or quick oats in a food processor to make your own!)
  • 1 tsp baking soda
  • 1 tablespoon baking powder
  • 1 teaspoon cinnamon
  • 1/2 teaspoon nutmeg 
  • 2 cups pumpkin puree
  • 3/4 cup pure maple syrup
  • 1/4 cup grape seed or vegetable oil
  • 1/2 cup oat milk
  • 1 1/2 tbsp vanilla extract
  • 1 teaspoon apple cider vinegar (this helps the more dense gf flour rise)
  • 1 batch of Jessica in the Kitchen's Vegan Cream Cheese Frosting
What to do:
  • Preheat the oven to 350 degrees F and spray a 9x13 inch brownie pan with non-stick or line with parchment paper. (I used this pan.) The brownie pan works best because it's not too large and the edges go up higher than a regular baking sheet so it holds the shape better.
  • Combine the dry ingredients (sifting is best to prevent clumps) in a large bowl.
  • I used my Kitchen Aid to mix/combine the pumpkin puree, maple syrup, oil, milk vanilla and apple cider vinegar.
  • Pour in the dry ingredients in two equal parts until you have a cake batter.
  • Transfer the cake batter to the brownie pan and spread it out evenly with a frosting spatula or just a regular spatula.
  • Bake for 25 minutes and check the center with a toothpick. If it comes out dry, you're good if it comes out wet with batter, cook for another 5-10 minutes and check the cake again. (You can cover the top with tinfoil to prevent too much browning or any burning on top.)
  • Let the cake cool completely before frosting. (I made the frosting while the cake was cooling but you could make it at any of the waiting times while you bake the cake!)
  • Sprinkle the applied frosting with a little cinnamon, slice into squares and serve. Store in the fridge if you're not eating it right away and bring back to room temp before serving.
0 Comments

Homemade Crunch Wrap Supremes

9/23/2020

4 Comments

 
Taco Bell! But won't make your stomach hurt afterwards. :)

Believe it or not but I actually found low carb Mission soft tortillas at the grocery store that taste EXACTLY the same as a regular tortilla? Like what? Why haven't they always made them that way? 

I have recipes for both regular sized crunch wrap supremes and then mini ones below. The mini are handheld and SO FUN!!
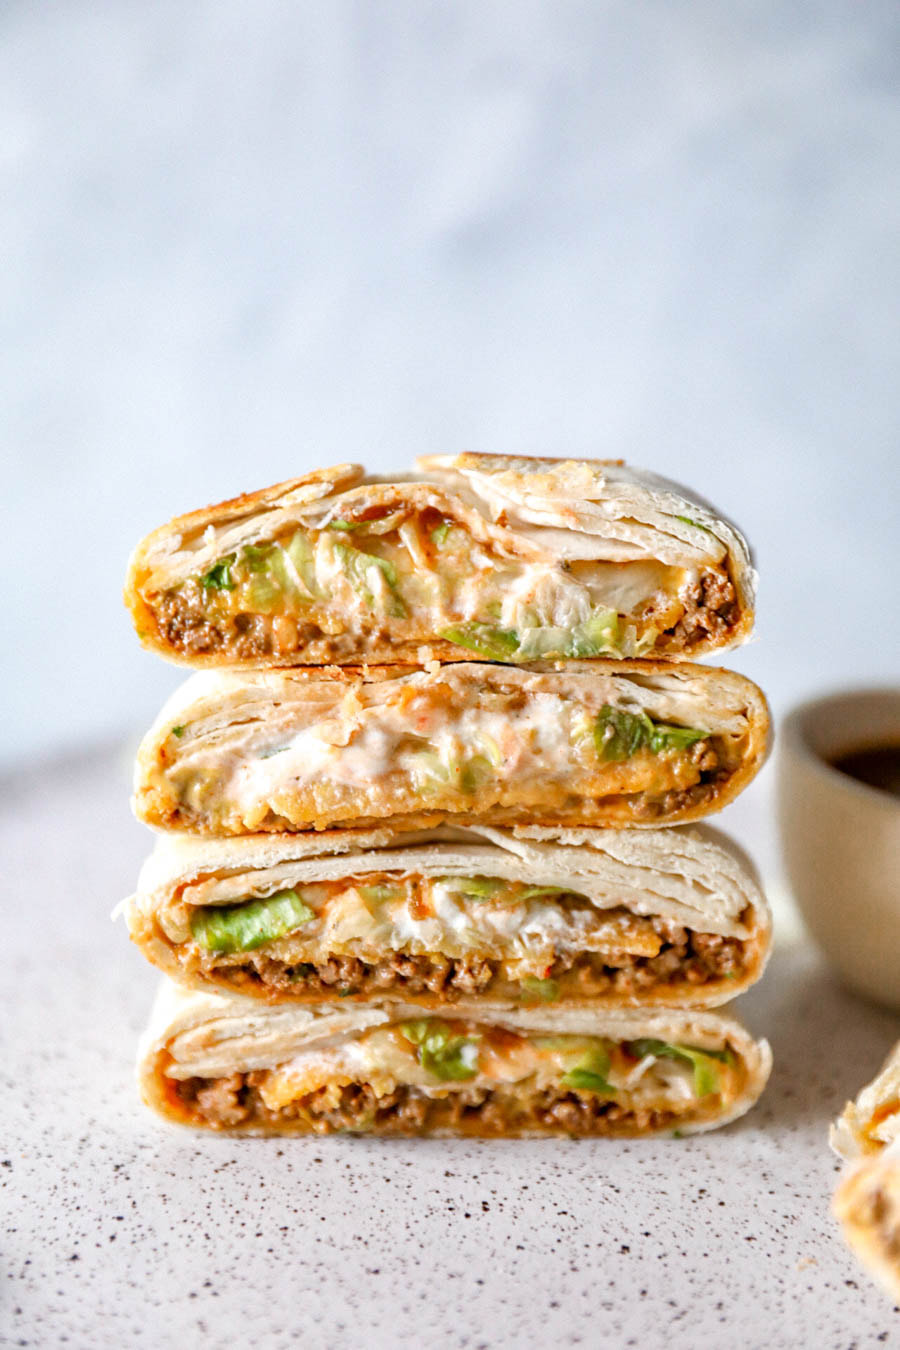
Picture
What you need:
Regular Sized CWS
  • 1/2 cup white onion, diced
  • 1 lb ground turkey (beef or chicken works too)
  • Taco seasoning, I used Siete Foods
  • 6 large soft tortillas
  • 6 small medium sized tortillas
  • Queso
  • 6 tostadas
  • Greek yogurt
  • Lettuce, diced
  • Salsa or fresh diced tomatoes
What you need:
Mini Sized CWS
  • 1/2 white onion, diced
  • 1/2 lb ground turkey (beef or chicken works too)
  • Taco seasoning, I used Siete Foods
  • 6 medium sized soft tortillas
  • 6 street tacos, or use a cup as a "cookie cutter" to cut bigger ones to make street-sized tacos.
  • Queso
  • 6 round yellow tortilla chips (in place of the larger tostadas)
  • Greek yogurt
  • Lettuce, diced
  • Salsa or fresh diced tomatoes
What to do:
  1. ​If you're doing chicken breasts, drop them into some boiling water until the insides aren't pink anymore. (If you cut them in half they cook faster.) Once they're done place them on a cutting board until they are completely cook and shred them.
  2. In a skillet, combine 2 tbsp neutral oil, onion, your meat of choice + taco seasoning. Let all of that cook for about 10-15 minutes or until the meat is cooked all the way through. Drain excess liquid and set aside.
  3. OKAY. Crunch wrap time. Here's the deal - you can customize the layers how you want but this is how I did it.
    1. Large tortilla lays out first.
    2. Create a small pile of your meat of choice about the same size as a tostada or small taco tortilla.
    3. Next - queso.
    4. Next, the tostada or small tortilla chip. Be gentle from here on out because you don't want to crack the delicate tostada/chip.
    5. Top the tostada/chip with a spoonful of greek yogurt. (Spoonful = tablespoon for all of those who need me to hold your hand through this LOL.)
    6. Next, top that with a handful of freshly shaved iceberg lettuce.
    7. Salsa or diced tomatoes come next.
    8. Almost done - place the smaller soft tortilla over the lettuce.
    9. MOST CRUCIAL PART, fold the edges of the large soft tortilla on the bottom up and over the top tortilla and fold/pleat the edges in order to close everything up.
    10. Once closed up, spray or brush the top with a little neutral oil and carefully flip it into a skillet and place on the stove on low-medium heat. Cook for 5ish minutes until golden brown - brush the top with a little more oil and then flip and cook for another 5ish mins and then you're done!
  4. Garnish however you would like, I usually dip in ranch or add hot sauce.
4 Comments

Butternut Squash Carbonara

9/23/2020

0 Comments

 
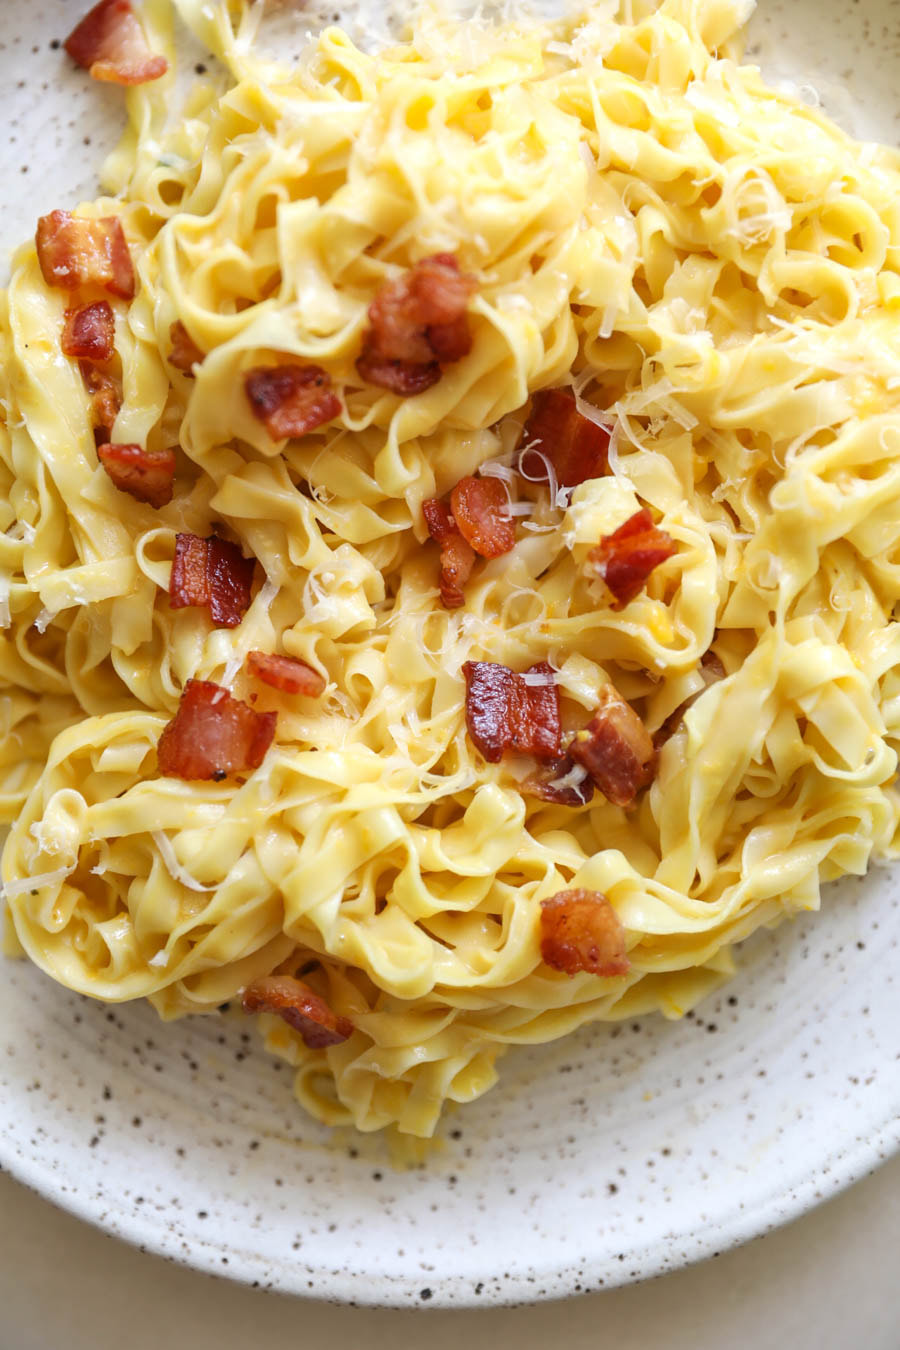
Loooove me some carbonara. I love making this dish because it can be easily customized. Want it creamier? Add heavy whipping cream. Want to add in some fall flavors? Add some butternut squash or pumpkin puree. Want it to taste like cacio e pepe? Toast some peppercorns and toss em' in. Looking to add some greens? Arugula or spinach both work great mixed in. Want to give it an Asian flare? Miso paste is so amazing in it too! The options are endlessssss. 

A few carbonara tips I've learned over the years:
​
  • Grating cheese with a microplane (super thin) straight from a block works best. It melts easier and really just tastes way better than like that powdery kraft parmesan you can buy at the store.
  • DO NOT combine the sauce mixture and the pasta over heat, like in a pot on the stove. Too much heat will make the eggs in the sauce scramble and what you'll get is basically pasta with scrambled eggs in it, lol. The worst.
  • If you don't have pancetta, bacon will work. Try and get thicker sliced bacon if you can! If I'm working with bacon, I like to cut it into perfect little squares because it looks nicer that way!
Picture
What you need:
  • 1/2 box long pasta - I prefer tagliatelle
  • 1/2 cup diced pancetta or bacon or more if you want
  • 2 egg yolks, one whole egg
  • 1/2 cup freshly grated parmesan or pecorino romano cheese
  • 1 tsp black pepper
  • 1/2 cup pureed butternut squash (or pumpkin if you want!)
What to do:
  1. Bring a large pot of salted water to a boil and cook the pasta according to package instructions.
  2. Start cooking the pancetta (or dice the bacon and start cooking that.) Once it's done transfer to a plate and let it chill until the pasta is done. Up to you whether or not you want to set it on a paper towel in order to transfer less or more of the flavorful grease from it - as long as there's not a ton of it you're good.
  3. Meanwhile, combine the egg yolks, whole egg,  cheese, BNS puree and pepper in a large bowl. If you did not salt your pasta water you may need to add a pinch of salt here. There will be salt from the pancetta or bacon so you don't need a lot.
  4. Drain the pasta and while it's still very hot - put it straight into the bowl with the sauce. This is *important* - use tongs to gently but also quickly toss the noodles over and over again in the sauce. The heat and movement spreads out the sauce and helps the raw eggs cook. (If you don't create that movement the eggs could scramble.)
  5. Plate immediately and serve hot. Top each serving with more cheese and pepper.
0 Comments

Healthy Cinnamon Apple Bread

9/19/2020

4 Comments

 
I baked with applesauce for the first time!! The texture it brings to this cinnamon apple bread is insaneeeee. Don't expect some giant apple flavor to take over your tastebuds, it's pretty subtle but still so sosossoso good. I really love this one because even though one of the main components is apple, there aren't any apple chunks involved in the recipe. I hate apple chunks in any baked good, the texture of this bread is the same as like banana bread/pound cake! Aka, amazingly moist.

If you don't know by now, I have a weird obsession with baking healthy treats. It's usually at the start of a new season when I bake the most. Sooooo, this  recipe is actually *vegan* because the applesauce replaces the eggs and I use oat milk instead of cow's milk. It's also gluten free because I used oat flour/gf all purpose flour and then it's nut free too, obviously, no almond flour used in any of my recipes due to my nut allergy! Oh and I used maple syrup instead of sugar so it's naturally sweetened. AHH, SO FUN TO BAKE HEALTHY THINGS THAT STILL TASTE THIS GOOD!
Picture
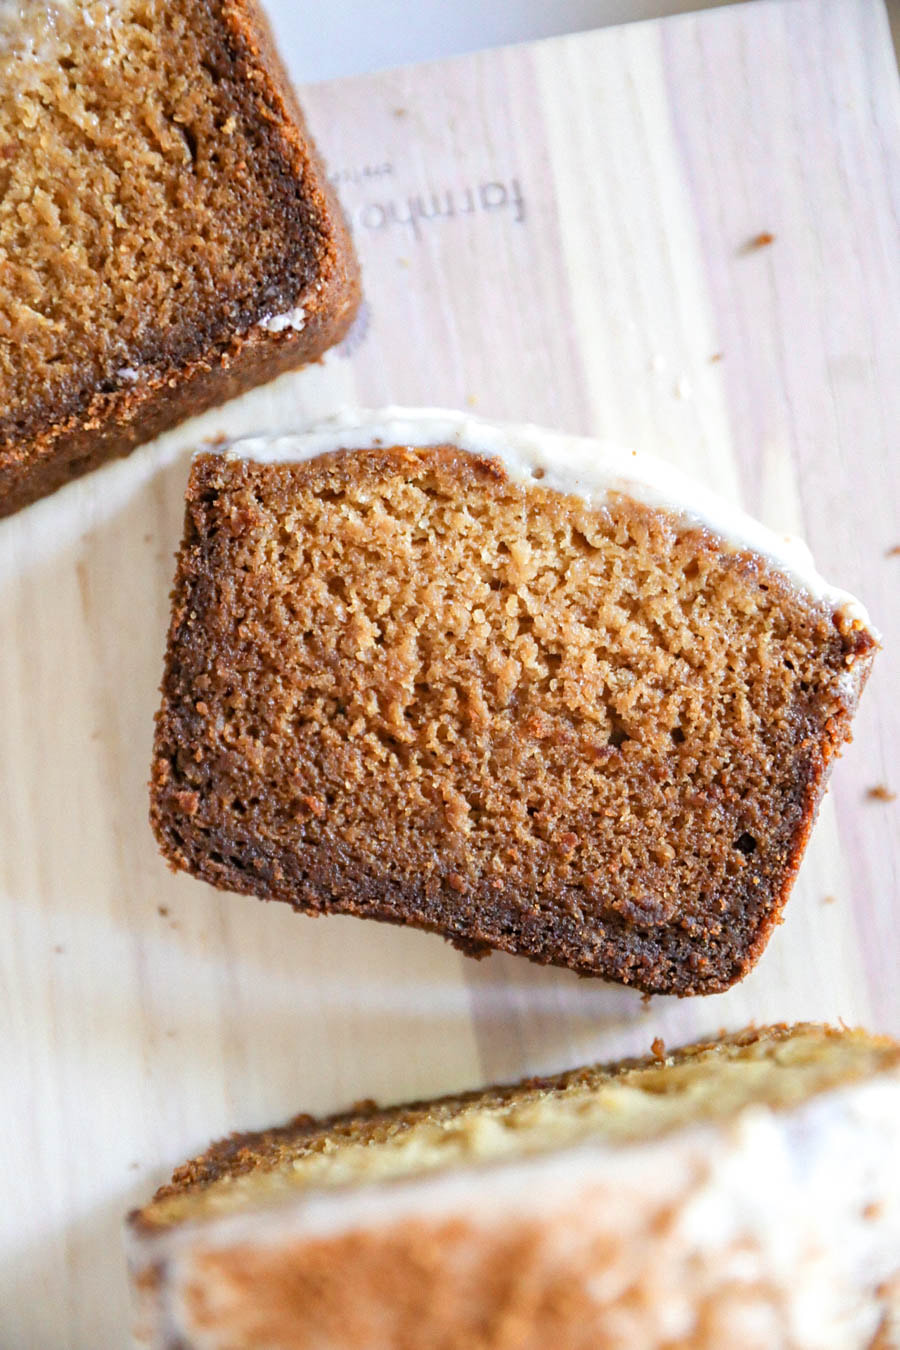
**Everyone's oven works differently and reaches different temperatures at different times so be patient with it and keep checking it throughout the suggested cooking time! It's a little harder for gluten free flour to rise, so if you have options, use a more narrow than wide bread pan.

Also, one more thing. It looks sort of ombre colored and I believe that is because I overdid it with the olive oil I used to brush the sides of the loaf pan. I am always scared that the loaf is gonna stick to the pan so I tend to over do it and that can sometimes lead to the edges of the loaf browning due to the heat and amount of oil seeping into the bread. Just an FYI.
Picture
What you need:
  • 1 cup unsweetened apple sauce
  • 1/2 cup melted vegan butter - I used soy free Earth Balance
  • 3/4 cup pure maple syrup
  • 1/2 cup oat milk
  • 1 tsp vanilla extract
  • 1 tsp apple cider vinegar
  • 1 tsp cinnamon
  • 1 cup gf all purpose flour (I used Pamela's)
  • 3/4 cup oat flour
  • 2 tsp baking soda
  • 2 tsp baking powder
Optional Frosting:
  • 2 tbsp vegan butter (room temp)
  • 3 oz vegan cream cheese
  • 1/4 cup powdered sugar
  • 1/2 tsp cinnamon 
What to do:
  1. Preheat the oven to 400 degrees F and prepare a loaf pan by either lining it with parchment paper or greasing the sides with grape seed oil or extra virgin olive oil spray.
  2. Add all of the wet ingredients to a large bowl and mix.
  3. Add all of the dry ingredients into a medium sized bowl and mix.
  4. Add the dry ingredients into the wet and then mix until combined and a batter is formed.
  5. Pour the batter into the loaf pan and bake for 35 minutes. The batter should be pretty thick!
  6. After 30 minutes, check on your loaf, cover it with tinfoil to prevent too much browning at the top and turn the heat down to 350 degrees. Cook an additional 15 minutes and then check the center with a toothpick to see if it's done or not. If it's not done, continue to cook for 5-10 minute increments. 
  7. If you're going the frosting route which I highly recommend, make it at any point and keep covered at room temp until the loaf is done baking and cooled.
  8. Let the loaf cool completely before removing it form the loaf pan and adding the frosting or else the frosting will totally melt and slide off of the loaf!
4 Comments

Roasted Garlic Butternut Squash Tortellini

9/15/2020

1 Comment

 
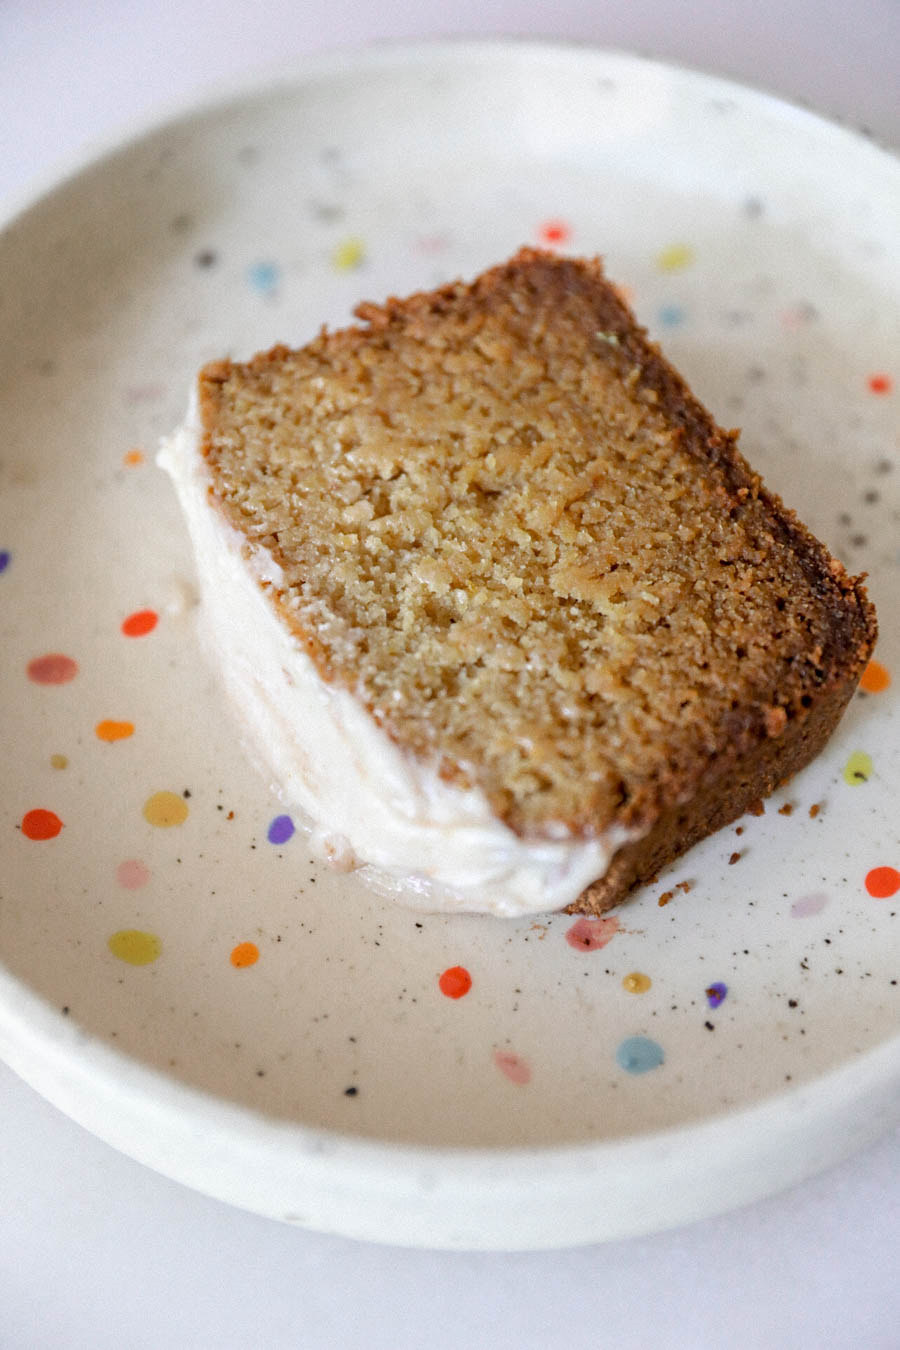
Some people get excited about the cooler weather aspect of fall but for me it's all about the food. I'm a huge fan of all things butternut squash and I especially love pairing it with pasta.

All of the ingredients I used were purchased from my local ALDI grocery store! I was super impressed with not only the value but also the variety and selection of groceries that they offer! I also love that in addition to visiting the store or doing curbside pick up, you can shop with ALDI on Instacart too - perfect for those super busy days. One of my favorite products I found and used in this recipe would be the Priano Three Cheese Tortellini because of how quick and easy it was to make - it only takes a minute or two after being tossed into boiling water and then it's ready to go.
This blog post is sponsored by ALDI.
Picture
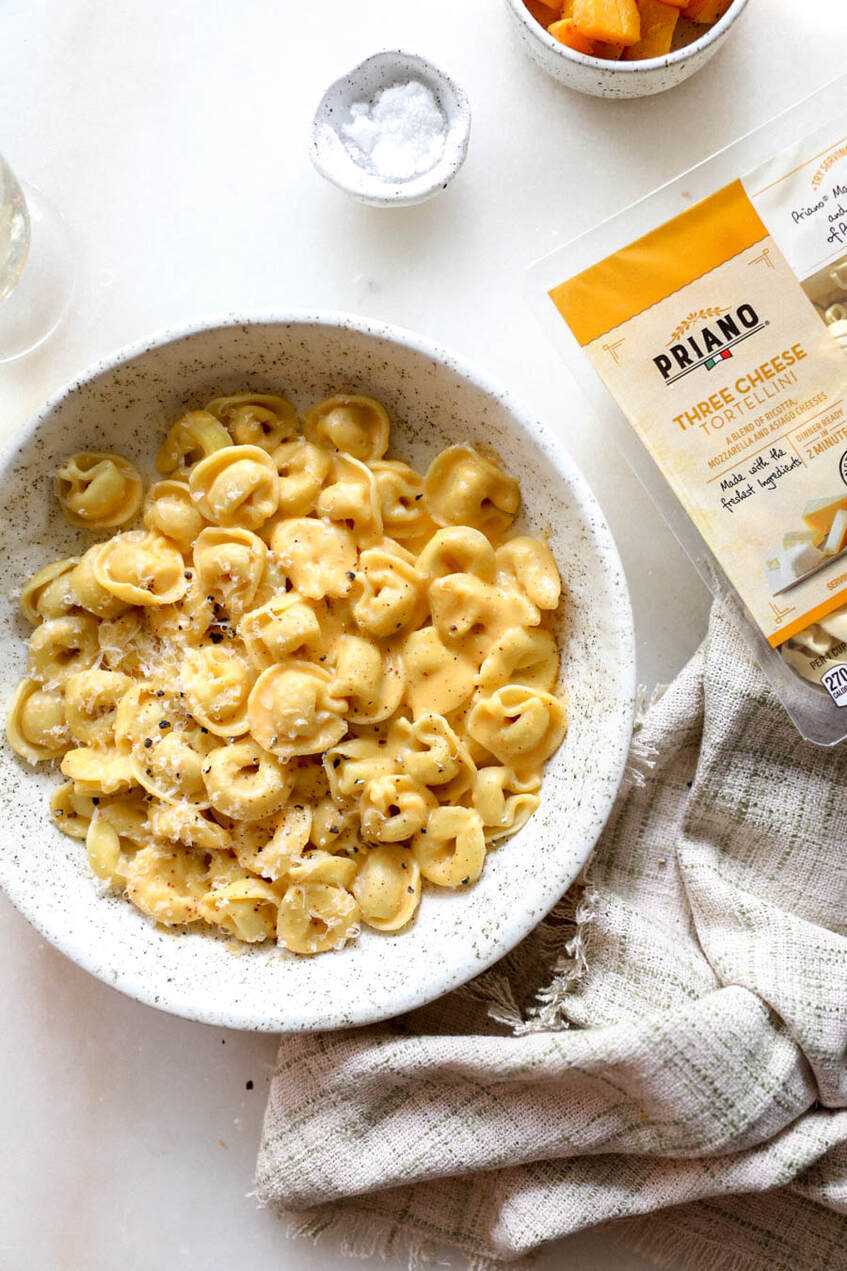
There are a few factors that take this particular butternut squash pasta sauce to a whole new level of cozy. It's obvious that the butternut squash is roasted and pureed but I also roasted a handful of garlic cloves with the squash and coated the entire roasting party in extra virgin olive oil and Stonemill Ground Nutmeg. 
Picture
Picture

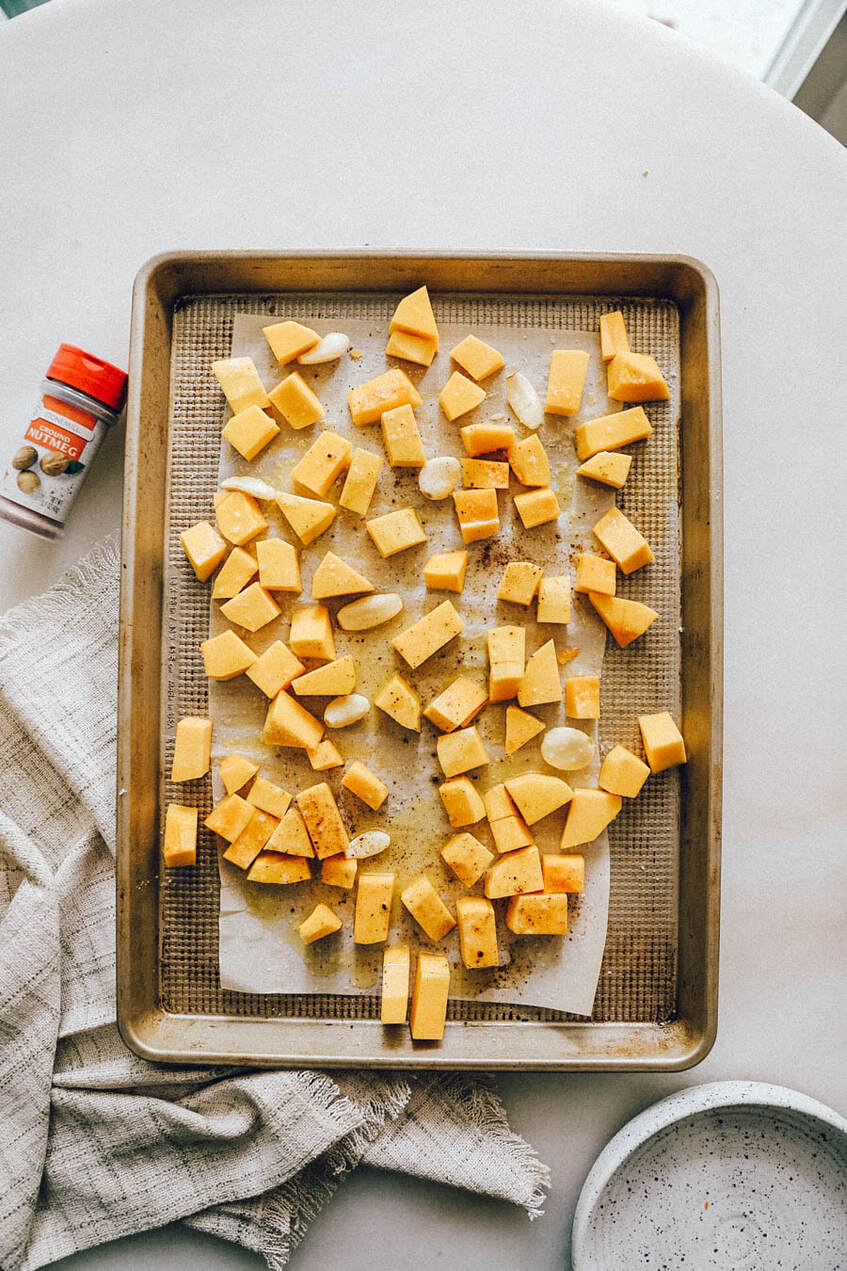
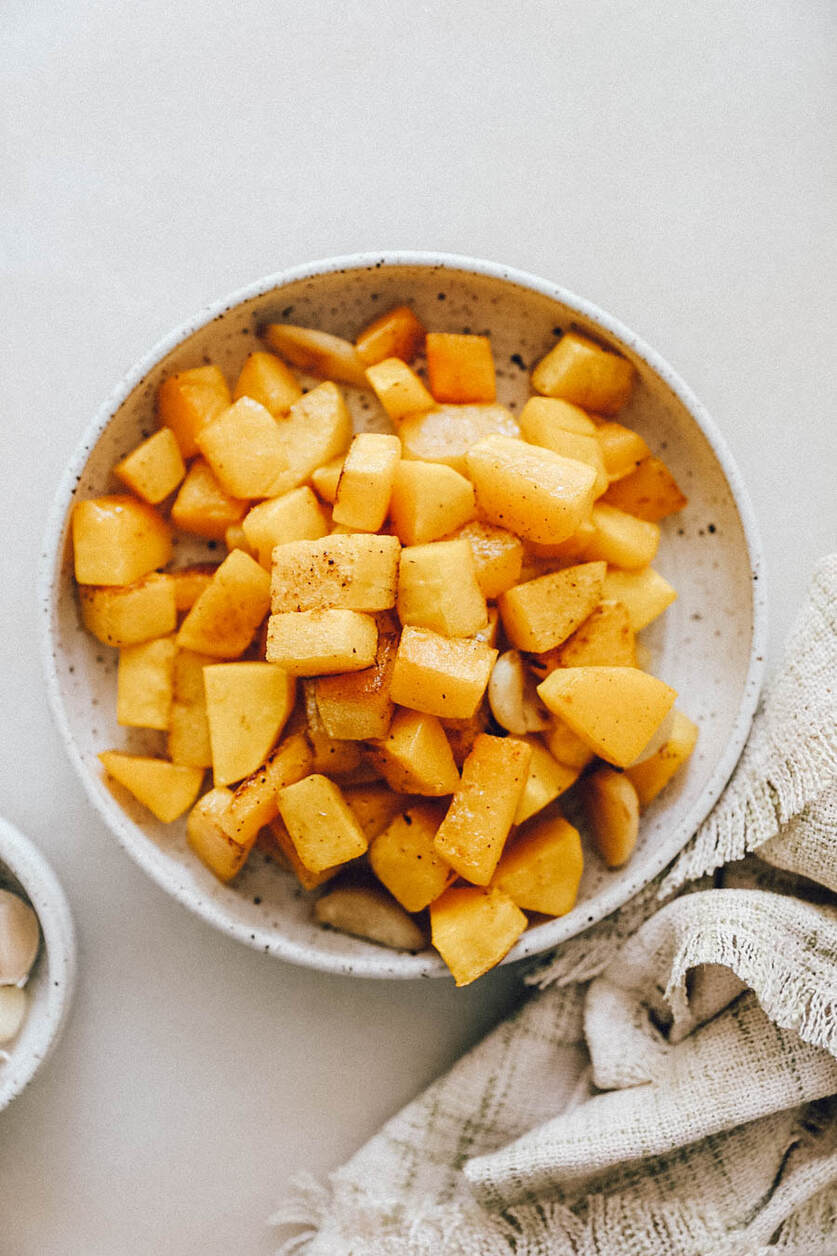
This recipe makes enough for two large entrees or 3-4 small sides. Prep time is 10 minutes and cooking time is 45 minutes, so it takes about an hour total to complete!
What you need:
  • 1 medium-sized butternut squash (should result in 2 very full cups of cubed butternut squash)
  • 6-8 peeled garlic cloves
  • 1 tsp salt
  • 1 tsp pepper
  • 1/2 teaspoon Stonemill Ground Nutmeg (optional: more for garnishing)
  • 2 tbsp extra virgin olive oil
  • 1 tsp tomato paste
  • 1/2 cup heavy whipping cream
  • 1/2 cup white wine - I used Winking Owl Pinot Grigio from ALDI (can sub in broth of choice if you can't consume wine)
  • 1 package of Priano Three Cheese Tortellini 
  • Optional garnishes: parmesan cheese, salt, pepper and nutmeg.
What to do:
  1. Preheat the oven to 400 degrees F. Line a large cookie sheet with parchment paper so that it's ready to go by the time you're ready to roast.
  2. Peel, de-seed and dice up a medium sized butternut squash. The cubes should be around 1" in size.
  3. Put the cubes and garlic cloves into a large mixing bowl and sprinkle in the Stonemill Ground Nutmeg, salt and pepper. Next pour the olive oil over top and mix until everything is coated and distributed.
  4. Transfer the veggies to the baking sheet and roast in the oven for 30 minutes. (I like to flip them half way through so that the bottom doesn't brown too much.)
  5. You should be able to easily cut through the butternut squash cubes when the timer goes off. If not, roast for an additional 10 minutes and check them again.
  6. Next, transfer the roasted butternut squash and garlic to a food processor or blender. Add the tomato paste, heavy whipping cream and white wine or broth.
  7. Puree until smooth and transfer to a skillet or pan to simmer while you cook the tortellini.
  8. Transfer the tortellini straight out of the boiling water into the sauce allowing some of the pasta water to come with it. This will help loosen the pasta sauce and give it an extra silky texture.
  9. Once the tortellini have been coated in the sauce, divide up into bowls or plates and serve while it's hot!
1 Comment

    Connect

    CONTACT FORM
    If you’d like to use my photos & recipes, please ask or link back to this site. Thank You.

    Calendar

    August 2022
    July 2022
    June 2022
    May 2022
    April 2022
    March 2022
    February 2022
    January 2022
    October 2021
    September 2021
    July 2021
    June 2021
    March 2021
    February 2021
    January 2021
    December 2020
    November 2020
    October 2020
    September 2020
    August 2020
    July 2020
    June 2020
    May 2020
    April 2020
    March 2020
    February 2020
    January 2020
    December 2019
    September 2019
    August 2019
    July 2019
    June 2019
    May 2019
    April 2019
    March 2019
    September 2018
    August 2018
    July 2018
    June 2018
    May 2018
    April 2018
    March 2018
    February 2018
    January 2018
    December 2017
    October 2017
    August 2017
    May 2017
    April 2017
    February 2017
    December 2016
    November 2016
    June 2016
    April 2016
    January 2016
    June 2015
    April 2015
    March 2015
    February 2015
    January 2015

    RSS Feed

FOODS OF JANE

mostly noodles
foodsofjane, llc  |  © Copyright 2021 |  Contact@FoodsOfJane.com

  • Home
  • Recipes
  • CLE
  • Contact