foodsofjane
  • Home
  • Recipes
  • CLE
  • Contact
  • Home
  • Recipes
  • CLE
  • Contact
Search

Mini Stuffed Shells

11/29/2020

1 Comment

 
My kind of cereal. A few weeks ago, I made two different pasta recipes. One was regular-sized stuffed shells and the other was a creamy lemon pasta dish with medium-sized shell noodles. After making and eating both the lightbulb went off in my head and I was like OMG, what if I stuffed THE SMALLER SHELLS?!?!

Usually, mini food recipes are somewhat impractical but besides being fun as hell to eat - this is actually one of the more successful mini recipes I've made, which is why it's deserving of an entire blog post! Here's why -- the ratio of shell to cheese is actually really nice with the mini version because in the regular version, there's A LOT of cheese. Which isn't necessarily a bad thing, but sometimes classic stuffed shells can be super heavy on the cheese since there's so much to fill, and for someone like my husband who thinks it's too much cheese and not enough pasta - the mini version is perfect.

As far as process goes, using something to assist with filling the shells helps a lot. You could use a pastry or ziplock bag and cut a hole in the bottom corner to squeeze the ricotta cheese, but I just used an old fashioned ketchup bottle with a pointy tip. Whatever works, but I def wouldn't recommend trying to free hand it!
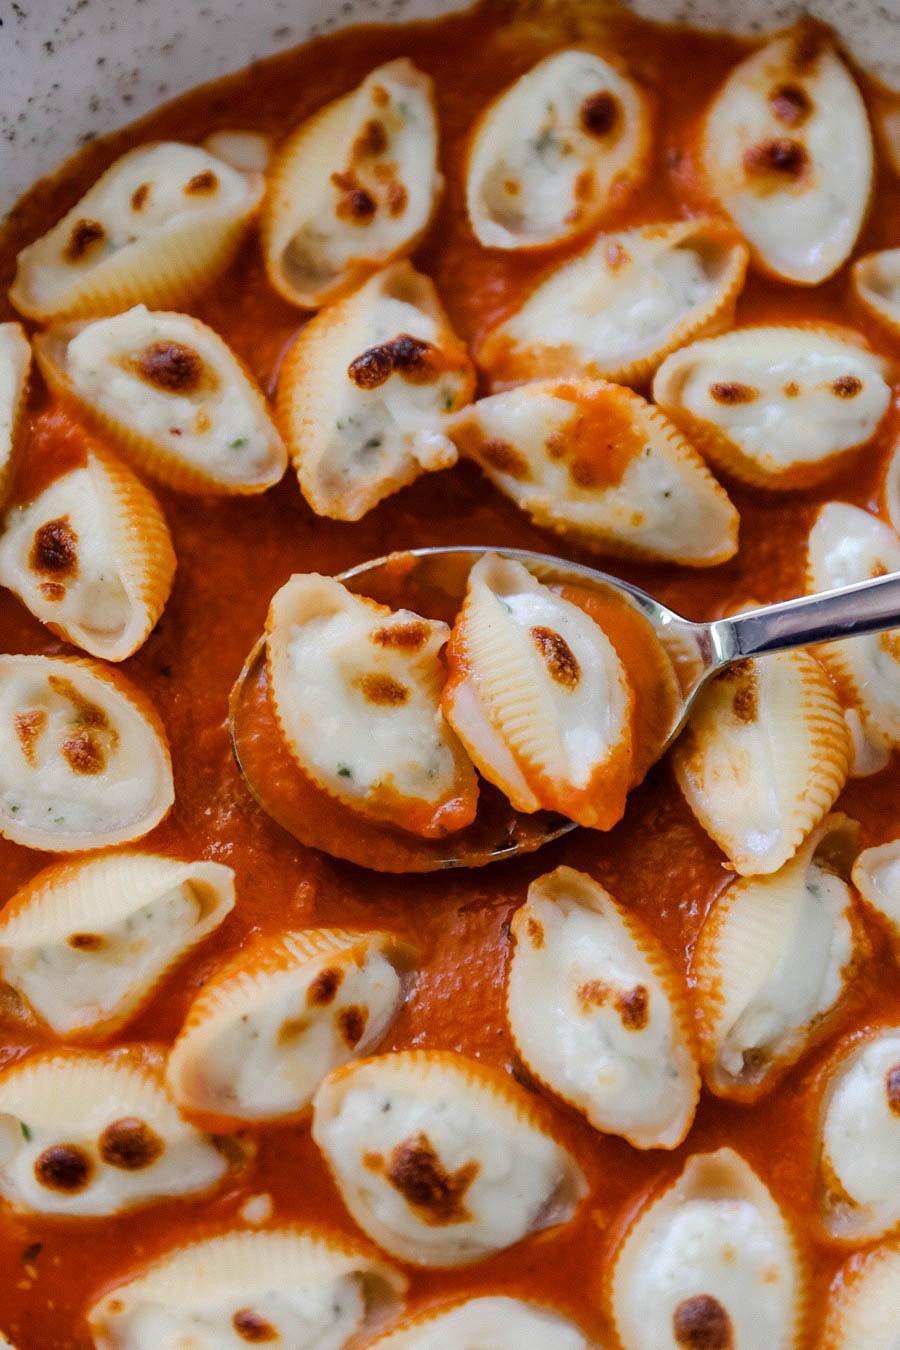
StuffedShells
What you need:
  • 1 cup medium sized shell pasta (makes enough for 2 bowls)
  • 15 oz ricotta cheese
  • 1/2 tsp garlic powder or 2 minced garlic cloves
  • 1 tsp fresh chopped parsley
  • 1 tsp fresh chopped basil
  • 1 tsp fresh lemon juice
  • 1/4 cup freshly grated parmesan cheese
  • 1/2 tsp salt
  • 1/2 tsp pepper
  • 1 cup of your favorite marinara sauce
  • 1/4 cup of thick shredded mozzarella cheese for topping (I used Sargento it's my fave mozz for melting.)
What to do:
  • Preheat oven to 350 degrees F.
  • Bring a large pot of salted water to a boil and cook about a cup of stuffed shells for as long as the packaging says.
  • Prepare the filling by mixing the ricotta, garlic, parsley, basil, lemon juice, parm, salt and pep in a bowl and filling up either a pastry/ziplock bag/sauce bottle to have ready for when the shells are done.
  • Fill an oven safe dish or bowl with the pasta sauce. (I used a bowl bc it would be hard to transfer and keep looking pretty into a bowl from a dish.)
  • Once the pasta is done, carefully place the empty shells into the sauce one by one and then fill them one at a time.
  • Next, carefully place a few thick shreds of mozzarella cheese onto each of the stuffed shells.
  • Bake for 10 minutes at 350 F and then turn the broiler oven setting on for 3-5 minutes in order to melt and partially brown the mozz that's laid out on top. (Watch the entire time the broiler is on because it could burn very easily!) Serve hot.
1 Comment

BLT Salad with Fried Green Tomatoes

11/28/2020

0 Comments

 
If you've ever been in the Southern U.S. States, you know that fried green tomatoes are huge. Every time I'm in Georgia or South Carolina I see them on every single menu. During a road trip to Florida, we stayed in a random hotel overnight to break up the drive and ordered takeout from a nearby place that had this awesome BLT Salad that I fell in love with and had to recreate to share with you guys! It was served with ranch dressing but I opted to add goat cheese instead. You could go either way!
Picture
What you need:
  • 1 large green tomato (ends up being enough for two salads)
  • 1 cup panko bread crumbs
  • 1/2 cup flour
  • 1 egg
  • Kale - as much as you want to eat
  • 2-3 tbsp extra virgin olive oil
  • 1 tsp salt
  • 1 tsp pepper
  • 4 slices of bacon
  • Either Goat cheese crumbles or ranch dressing 
What to do:
  1. ​Cut the green tomato up into pieces, think of them as the croutons to your salad so around that size.
  2. Heat up about an inch of vegetable oil in a small but deep skillet or pan.
  3. Assemble the frying station next to the oil. So, three bowls, one with the egg wash (scramble it), one with the flour and one with the panko.
  4. Dip each piece of tomato into the flour, then egg, then panko. Don't be afraid to really coat it in the egg so that the panko can stick properly and the whole thing is coated and covered. After the panko, shake off any excess crumbs and then drop into the oil and cook until golden brown. (Every stove is different but I use a medium heat setting for this.) Set aside on a paper towel once they are done.
  5. Wash and dry off the kale. Rip off the large stem in the center and discard. Add the leaves to a bowl and rip them into bite sized pieces. Pour the olive oil salt and pepper on the leaves and then "massage" the kale by squeezing it in your hands over and over until it's not rough anymore. More enjoyable to eat that way! You could add a simple salad dressing here if you want too but I like just the EVOO and s + p.
  6. Cook the bacon, I like to chop it into squares before cooking it, but you can cook/separate it however you want.
  7. Now that you have all the pieces and parts, assemble the salad. Mix the goat cheese and bacon pieces in with the kale and then top with the fried green tomatoes. If you don't like goat cheese, top with ranch dressing and then eat!
0 Comments

Seafood Pasta

11/28/2020

1 Comment

 
If you missed it, I found out this year that despite my life-long seafood allergy, I can eat mollusks. Which means I can eat clams, mussels, scallops, oysters, calamari and octopus!!! I always felt like I was missing out on the seafood pasta dishes my family would order at Italian restaurants on vacation and now that I can eat some seafood, I've been ordering it like crazy and of course, I had to try and make it at home too. Most of the times I see this kind of dish on the menu at a restaurant, there's almost always shrimp in it - so that's pretty much the only thing missing from this dish as far as what's "typical." (Sadly, I can't have shrimp, crab or lobster.)

Cooking time is a little more than my usual recipes since you have to pay close attention to preparing the scallops separately - but it's so worth it to get that tasty sear. If you're going to roast your own tomatoes and garlic like I suggest, that takes time too. You could use jarred marinara sauce but I truly think fresh is best for this one. I'd say the whole thing start to finish can be done in around 45 minutes. Like the rest of my recipes, this will serve 2 people.
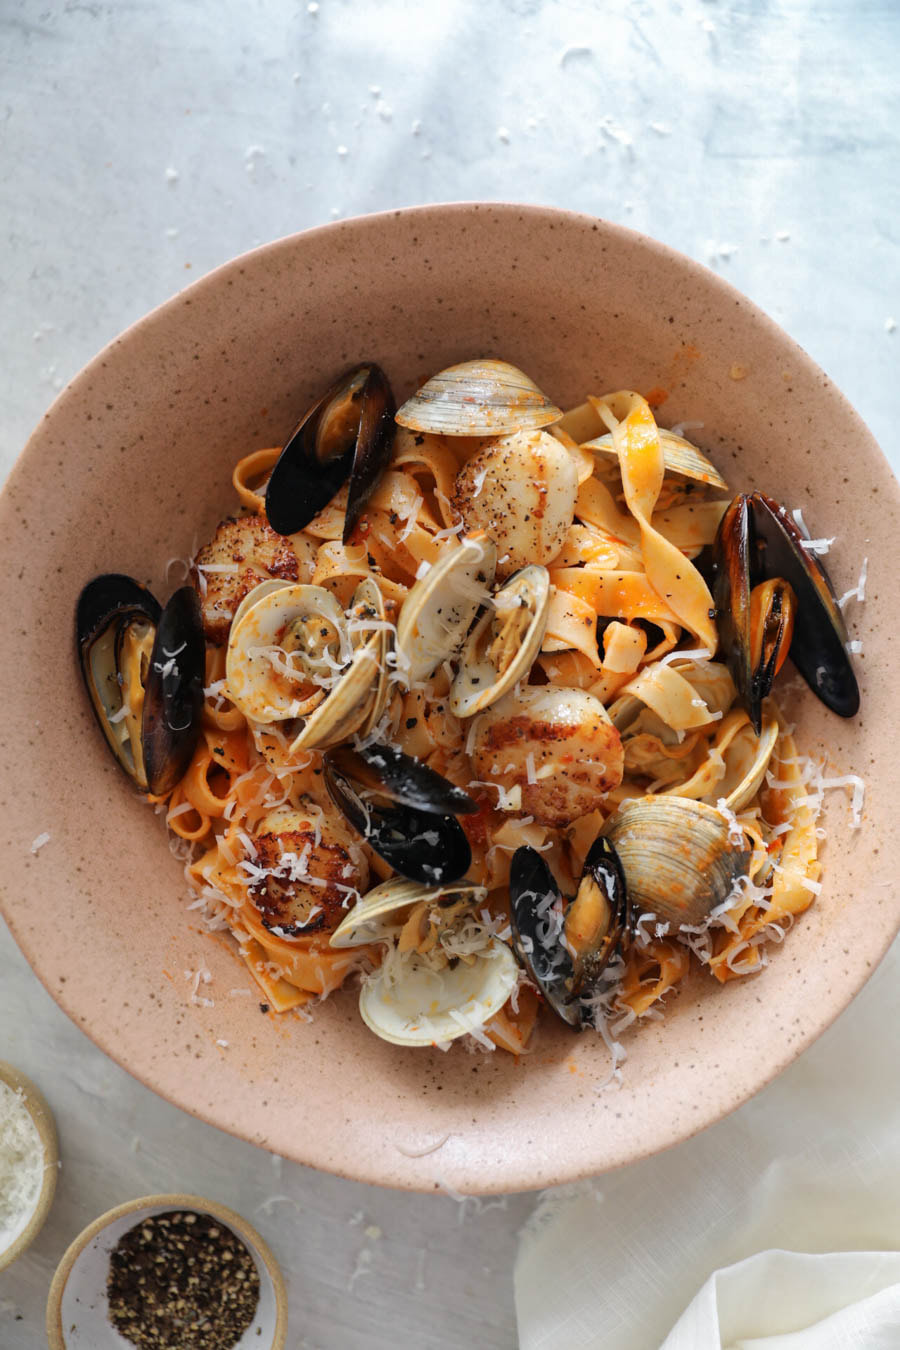
Picture
What you need:
  • 4-6 fresh or frozen + thawed scallops
  • 10-12 little neck clams, washed
  • 10-12 mussels, washed
  • 1/2 lb pasta, angel hair, linguine or tagliatelle (or fettuccini)
For the tomato sauce:
  • 2 cups grape tomatoes for 6 roma tomatoes sliced in half
  • 3 gloves garlic roughly chopped
  • 3 tbsp extra virgin olive oil
  • 1 tsp salt
  • 1 tsp pepper
For cooking the clams and mussels:
  • 3 tbsp butter (I use EarthBound plant-based butter)
  • 4 minced garlic cloves
  • 1 tbsp Calabrian chili paste
  • 1/2 cup dry white wine
What to do:
  • Combine the tomatoes, garlic, olive oil and salt/pep on a baking sheet and roast for 30 minutes at 350 F. You can add herbs if you would like more flavor but this will be your tomato sauce for the pasta dish - it tastes sooo much more fresh than using pre-jarred sauce this way and compliments the freshness of the seafood!
  • Bring a large pot of salted water to a boil to cook the pasta in. (If you're using pasta that cooks in a few minutes, wait to cook it until the very end.)
  • Put two skillets on the stove, one of them must have a lid that goes with it.
  • The skillet with a lid is for the clams and mussels. Melt the 3 tbsp butter into it and add the minced garlic and Calabrian chili paste. Let that cook for a few minutes and then add the wine, clams and mussels. Cover until all the shells open up and the clams and mussels have been steamed - this usually takes about 10 minutes on med-high heat.)
  • Next, cook the scallops. I pour grape seed oil into a skillet that's been resting on med-high heat. The skillet needs to be decently hot to sear the scallops better. Pat the scallops completely dry and hit them with a little salt and pepper. Place the scallops into the skillet and cook for 4 minutes without touching. Flip the scallops to the other side for about 2 minutes and then they are done! Once they are finished I like to move them to a plate to stop the cooking process and squeeze a little lemon juice on them.
  • Once the clams and mussels are done, add them to the plate with the scallops.
  • Add the blended tomato sauce to the leftover sauce that the calms and scallops cooked in and whisk together over medium heat.
  • Add the cooked pasta into the sauce and combine. Taste test and adjust, sometimes I add a little more wine or butter here. You can add the seafood right to the pasta and serve or plate the pasta and then add the seafood on top! Serve hot.
1 Comment

    Connect

    CONTACT FORM
    If you’d like to use my photos & recipes, please ask or link back to this site. Thank You.

    Calendar

    August 2022
    July 2022
    June 2022
    May 2022
    April 2022
    March 2022
    February 2022
    January 2022
    October 2021
    September 2021
    July 2021
    June 2021
    March 2021
    February 2021
    January 2021
    December 2020
    November 2020
    October 2020
    September 2020
    August 2020
    July 2020
    June 2020
    May 2020
    April 2020
    March 2020
    February 2020
    January 2020
    December 2019
    September 2019
    August 2019
    July 2019
    June 2019
    May 2019
    April 2019
    March 2019
    September 2018
    August 2018
    July 2018
    June 2018
    May 2018
    April 2018
    March 2018
    February 2018
    January 2018
    December 2017
    October 2017
    August 2017
    May 2017
    April 2017
    February 2017
    December 2016
    November 2016
    June 2016
    April 2016
    January 2016
    June 2015
    April 2015
    March 2015
    February 2015
    January 2015

    RSS Feed

FOODS OF JANE

mostly noodles
foodsofjane, llc  |  © Copyright 2021 |  Contact@FoodsOfJane.com

  • Home
  • Recipes
  • CLE
  • Contact