foodsofjane
  • Home
  • Recipes
  • CLE
  • Contact
  • Home
  • Recipes
  • CLE
  • Contact
Search

Chicken Po Boys + Homemade Cajun Aioli

4/30/2020

1 Comment

 
I've never actually been to NOLA but I do love most Cajun-inspired dishes and I always order a po boy sandwich when I see it on a menu. I usually see shrimp or chicken options, but this would honestly be really good with my crispy cauliflower recipe as well if you're a vegetarian!

Seeing that we are going on over a month of Covid-19 quarantine, I had to get creative with what I had on hand at home so don't judge if this isn't exactly the po boy you once ate in Nola. I used some chicken I had in the freezer from Butcher Box and then some fresh steak rolls from my local grocery store's bakery. Traditionally, po boys are served on New Orleans French bread - which is a similar shape but softer than an actual French baguette and very light and airy. I feel like that would probably make a big difference in the overall sandwich quality but the steak roll wasn't too bad.

If you don't want to make the aioli completely from scratch you could just add some Cajun seasoning to some mayo. (Also if you don't have Cajun seasoning it is really easy to make from scratch...just google it.) For aioli shortcuts, I've also done half mayo and half greek yogurt with cajun seasoning to make a healthier option and it's just as good!!
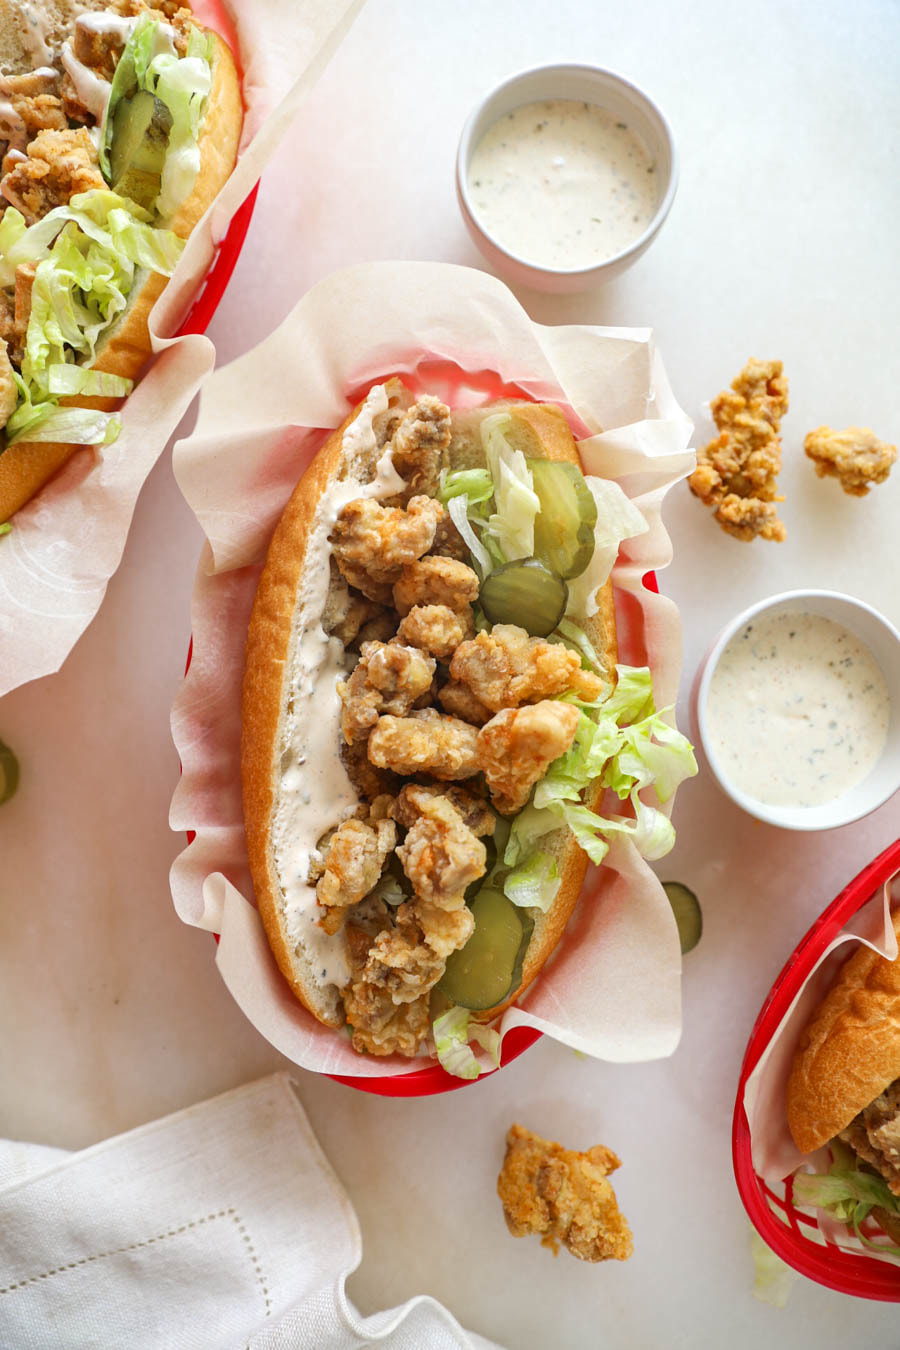
Picture
What you need:
For the homemade aioli
  • 1 egg
  • 1 cup neutral oil - I used vegetable oil
  • 1 tsp lemon juice
  • 1 tbsp minced garlic
  • 1 tsp dijon mustard
  • 1/2 tsp cayenne pepper
  • 1/2 tsp paprika
  • 1/2 tsp Italian seasoning
  • 1/4 tsp dried thyme
  • 1/4 tsp onion powder
  • 1/4 tsp black pepper
  • 1/4 tbsp salt
For the rest
  • ​Boneless skinless chicken thighs or breast meat
  • Flour, garlic powder and seasoned salt (or cajun seasoning in it's place) for the breading 
  • A few cups of canola oil for frying the chicken
  • New Orleans fresh baked French bread rolls (steak rolls will work too as long as they are soft and sort of flakey)
  • About 1/2  head of shaved or thinly chopped iceberg lettuce
  • Pickles (I used Tony Packos Sweet & Spicy)
  • Optional: sliced tomatoes 
What to do:
  1. Make the aioli. Add all the ingredients + only 2 tbsp of the cup of oil into a food processor. While blending, slowly pour in the cup of oil - the pour should be a tiny stream and it should take you about a minute to do so. You should notice the aioli forming and things thickening in there. Once the oil is all poured in you can stop blending and turn off the processor. Set the aioli aside until it's time to use later.
  2. ​Fry the chicken. Use my boneless wing recipe to prep and fry the chicken, but instead of chicken nugget size pieces, cut them up a bit smaller so they can fit better onto the sandwich. I like to add a tsp of cajun seasoning to the flour batter too in place of the seasoned salt since we're going for Cajun vibes here.
  3. Prep your bread by slicing it open - Bryant LOVES his toasted so you could do that here if you want. I usually stick his loaf in the oven under the broiler until the edges of the bread get crispy - just a minute or two.
  4. Line the bottom of the bread with a handful of the shaved iceberg lettuce and some pickles. If you are adding tomato slices too those will go on here now as well.
  5. Layer the hot fried chicken on top of the veggies and slather the chicken/top half of the sandwich with the cajun aioli before closing it up to eat!
1 Comment

Roasted Red Pepper Pasta Sauce

4/21/2020

1 Comment

 
I LOVE the color of this sauce just as much as I love the taste! The best part is is that it's relatively healthy since it's made out of pureed roasted red peppers with just a touch of either heavy cream or coconut milk depending on your dairy preference.

Since the sauce is mostly roasted red peppers, you'll want to use a good brand for higher quality. My favorite is DeLallo Foods! You can purchase either their Whole Roasted Red Peppers or Roasted Red Pepper Strips. I paired the red peppers with DeLallo's shellbow pasta shape which is the most perfect vehicle for transporting more of this delicious sauce into your mouth.
Picture
What you need:
  • 1/2 lb DeLallo Shellbows
  • 1 15 oz jar DeLallo Roasted Red Pepper Strips
  • 3 tbsp white wine (can be omitted but I love the extra flavor)
  • 1 tbsp extra virgin olive oil
  • 1 tsp garlic powder
  • 3 tbsp heavy cream (can be swapped out for coconut milk or cream for a dairy-free version)
  • Pasta water - be sure to save some!!
  • Optional: burrata cheese for topping
What to do:
  1. Bring a large pot of salted water to a boil and cook the shellbow pasta according to package instructions.
  2. Sauté the roasted red pepper strips (or cut the whole roasted red pepper into strips) in a skillet on medium heat with the olive oil and white wine for 6-8 minutes.
  3. Puree the roasted red pepper and any leftover drippings of white wine/oil in a food processor until very smooth.
  4. Add the roasted red pepper puree back to the large skillet and then add the garlic powder and splash of either the heavy cream or coconut milk or cream and stir. 
  5. Transfer the cooked shellbows to the sauce directly from the boiling water - this will transfer over some of the starchy/salty pasta water.
  6. Add an additional tablespoon or two of pasta water and mix before serving to loosen up the sauce so that it gets nice and silky.
1 Comment

Dirty Martini Pasta

4/21/2020

1 Comment

 
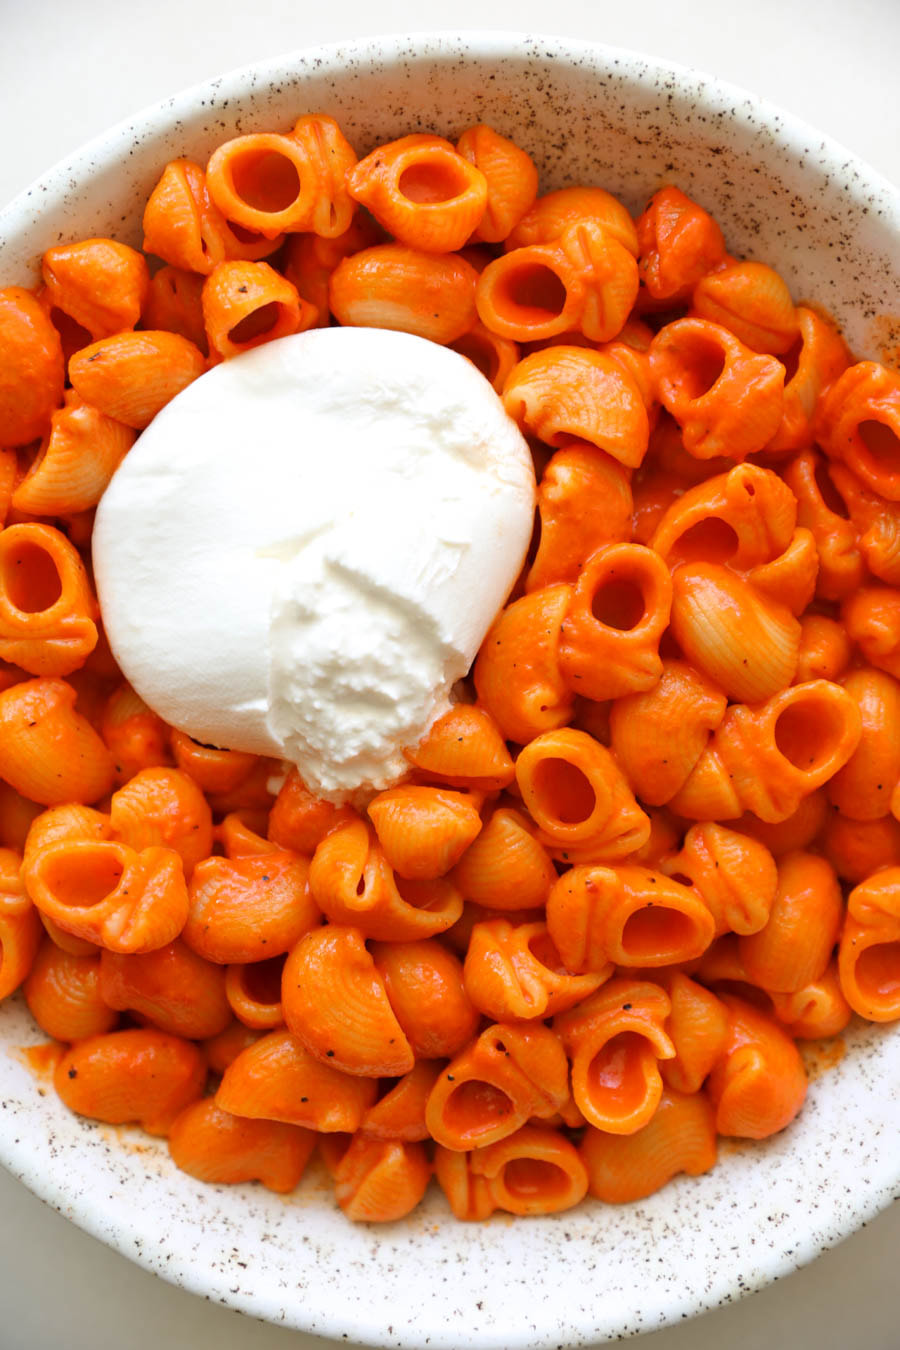
If you know me, you know that my all time favorite cocktail is a dirty martini. You should also know that my favorite food of all time is pasta. That said, I present you with my latest recipe creation: dirty martini pasta.

I recently partnered with DeLallo Foods in order to showcase some of their amazing specialty items and I've been snacking on these Italian Pitted Castelvetrano Olives non-stop. They're super plump and have the best briney-buttery taste to them. The flavor of DeLallo's Italian olives and their brine really shines through and is the perfect compliment to the subtle boozy hint of white wine.
Picture
What you need:
  • 1 5.3 oz jar of DeLallo Castelvetrano Pitted Olives
  • 3 garlic cloves
  • 1/2 lb DeLallo pappardelle or fettuccine
  • 3 tbsp butter
  • 3 tbsp olive brine from the jar
  • 1/2 cup white wine (I use chardonnay)
  • 1 tsp black pepper
What to do:
  1. Cut the olives in half sideways and then mince the garlic cloves, set aside.
  2. Bring a large pot of lightly salted water to a boil and cook the pasta according to package instructions.
  3. Melt the butter in a large sauce pan on high heat and add the garlic and olives.
  4. Once the butter starts to bubble a little (about 3 minutes - def before it turns brown) add in the olive brine and white wine. Whisk together and turn the heat setting to low/simmer. 
  5. Continue to whisk the sauce on and off until the pasta is done cooking - about 10 minutes. It should reduce and turn a little thicker and should look silky.
  6. Transfer the pasta straight from the boiling water (in order to carry over a little pasta water) into the sauce pan and toss it with the olives, garlic and sauce. Mix the pepper in while tossing.
  7. Serve hot with a pat of butter and more pepper on top.
1 Comment

Detroit Style Pizza

4/18/2020

3 Comments

 
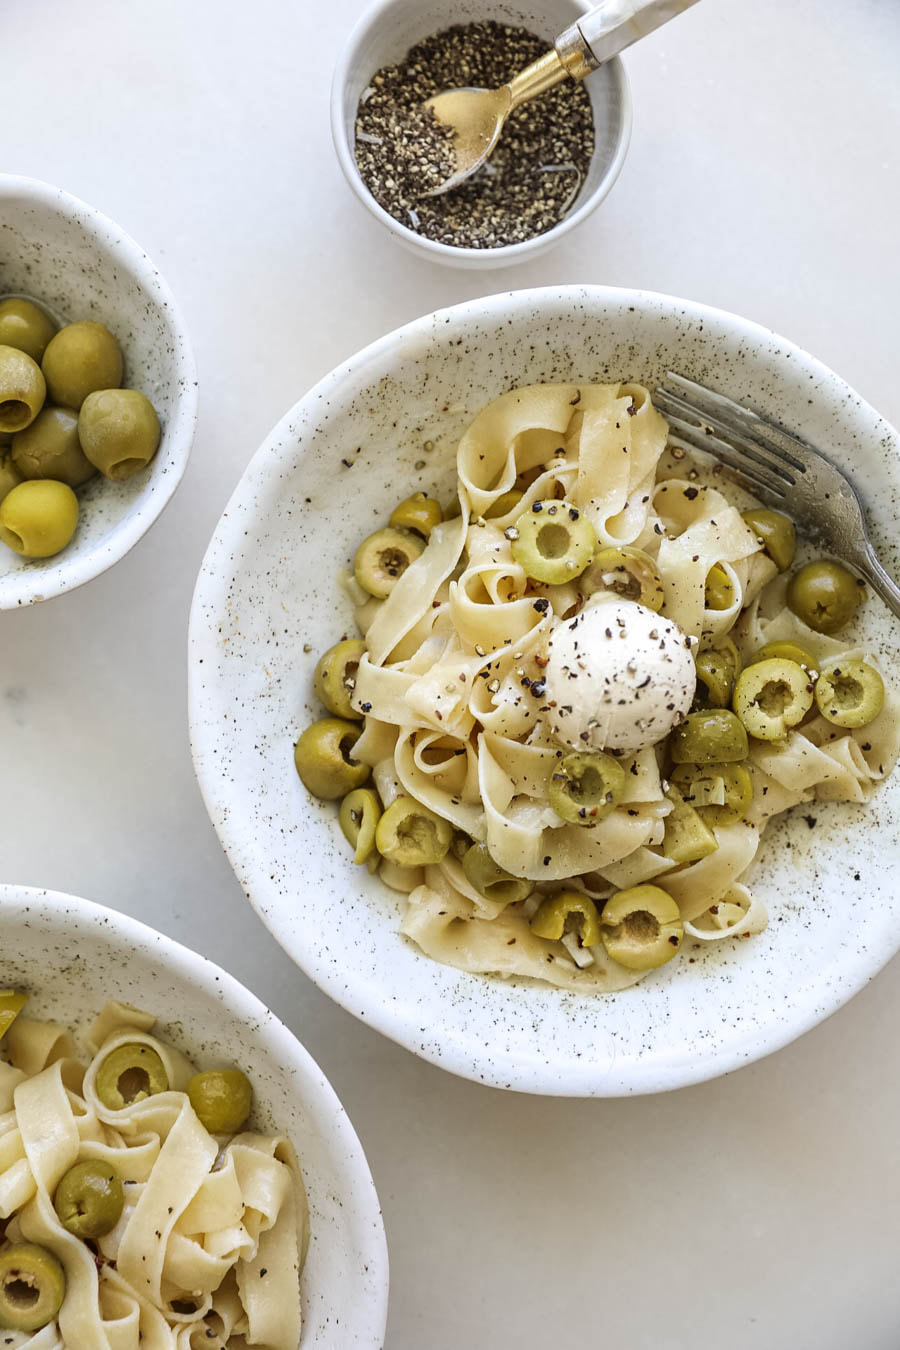
My husband Bryant and I are absolutely obsessed with Jet's Pizza - we love the fluffiness and how crispy and buttery the crust is. This is the closest I've ever come to making something that tastes similar at home!!

Full disclosure I used this recipe from Serious Eats to learn how to do this. I made a few adjustments based off what worked for me!
Picture
What you need:
  • 2 cups bread flour
  • 1 tsp dry active yeast
  • 1 1/2 tsp salt
  • 1 cup room temp water
  • 1 tbsp butter for greasing the pan
  • 1 cup plain tomato or your fave pizza sauce
  • 8 oz of shredded brick cheese (on my Amazon shop) or high fat mozzarella 
  • Pepperoni (optional)
What to do:
  1. Add the flour, yeast and salt to a stand mixer and combine with a few turns of the dough hook. Add the water and mix on the lowest setting with the dough hook until a ball forms. Let that rest for 10 minutes.
  2. On the lowest speed setting, knead the dough with the dough hook for 10 additional minutes - the dough shouldn’t be sticking to the sides, only the bottom of the bowl.
  3. It should be kinda sticky unlike pasta dough, and silky. Remove the hook from the kneaded dough and set the dough in the bottom of the stand mixer bowl. Cover tightly and let rest for 2 hours in a warm place.
  4. Spread a tablespoon-ish of room temp butter all over a 9x13 baking sheet.  Then spread out the dough. (It shouldn’t stretch all the way to the edges just yet so cover the dough in the baking sheet with saran wrap and let it rest for 30 more minutes.
  5. Preheat your oven to 550° F or as high as it can go. (Mine only goes to 525° F)
  6. After the dough relaxes for the 30 extra mins, spread it all the way to the edges and make sure it’s evenly distributed.
  7. Coat the pizza dough with a thin layer of your fave pizza or marinara sauce. Cover with cheese, all the way to the edges. (All the way to the edges is important for crisping the crust because the cheese melts and seeps down to crisp it all the way to the bottom of the pan.)
  8. Add additional dollops of the sauce to the pizza on-top of the cheese. I love the bites of pizza that have the sauce cooked on top of the cheese!!
  9. Cook the pizza on the very bottom of the oven (not the rack, the actual oven) for 6 minutes. This achieves a crispy bottom crust! After the 6 minutes, move it up to the next level and lowest rack of your oven. This will finish off the melty cheese and prevent the bottom of the pizza crust from blackening.
  10. Slice up and serve hot!
3 Comments

Oatmeal and Chocolate Chip Banana Bread Cookies

4/1/2020

26 Comments

 
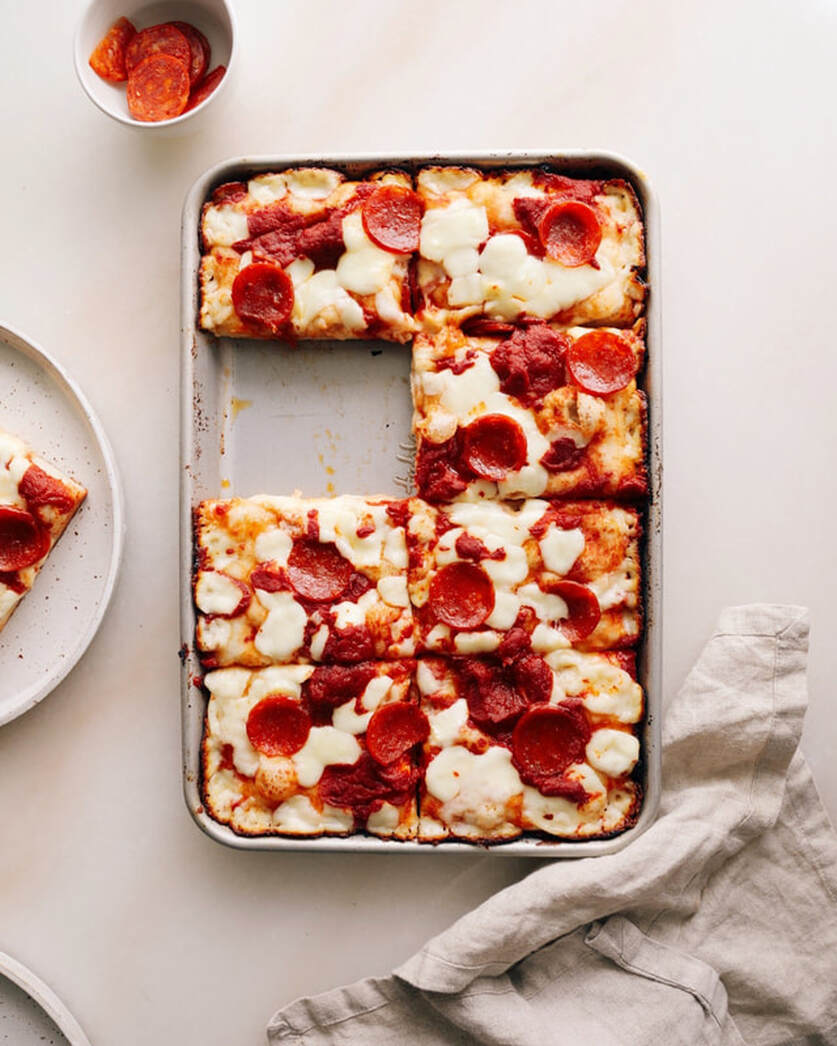
I'm truly at a loss for words. Banana bread meets oatmeal cookie meets chocolate chips?? These are the best cookies I have ever made and believe it or not, I actually guessed the amounts of each ingredient as opposed to using another cookie recipe as a base and it freaking worked. That almost never happens when I try and bake!! Ah! My very own and first ever original FOJ cookie recipe!

FYI, this recipe made 16 cookies. You'll want to pay close attention to the consistency of your finished dough since it's super hard to measure flour properly for baking without weighing it. Since baking measurements are way more sensitive than cooking measurements, I bet even the size of the banana you use compared to the one I used could make a difference in the texture! The finished cookie dough should be firm enough to hold a somewhat of scoop shape and def shouldn't start spreading out onto the cookie sheet before baking. If your dough is too wet and looks like pancake batter, I would add in flour, 1 teaspoon at a time and then mix it in until it seems thick enough to scoop. Also, throwing the dough into the fridge for twenty minutes helps to make things more solid for scooping as well.

If you're one of those people (guilty!) that skip through the beginning text of a recipe here's what you need to know before making these: have 1/4 cup of extra flour handy to add to the dough if you need to. Sometimes, the size of the banana you use can throw things off and the dough will need more flour to prevent flat and completely melted cookies from coming out of the oven.
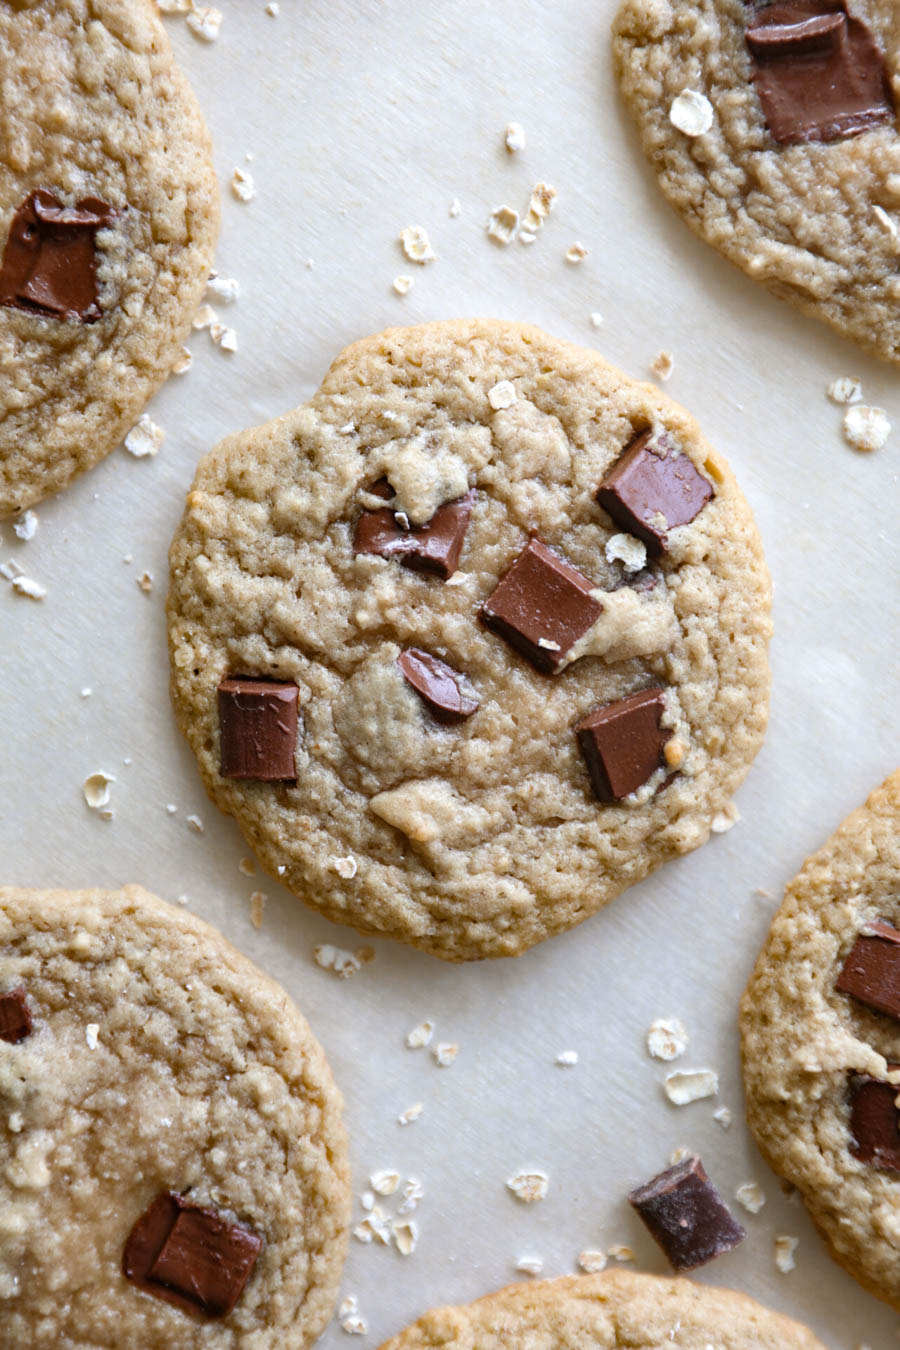
Picture
What you need:
  • 1 cup oat flour
  • 1/4 cup oats
  • 1 cup AP or GF flour (an additional 1/4 cup flour might be needed - see the bold note above.)
  • 1/2 tsp cinnamon 
  • 1 tsp baking soda
  • 1 tbsp cornstarch 
  • 1/2 tsp salt
  • 1 mashed banana (must be ripe)
  • 1 egg
  • 1 stick melted butter
  • 1 tbsp olive oil
  • 1 tbsp vanilla extract
  • 3/4 cup brown sugar
  • 1/2 cup cane or regular sugar
  • 3/4 cup semi-sweet or dark chocolate chips or chunks
What to do:
  1. Preheat the oven to 325 degrees F and set out a cookie sheet and a piece of parchment paper.
  2. Combine the oat flour, oats, all purpose or gluten free flour, cinnamon, baking soda, cornstarch and salt in a large bowl.
  3. In a separate bowl, mash the banana and mix in the egg, butter, olive oil, vanilla extract, and both sugars.
  4. Slowly add in the dry ingredients to the wet ingredients and then mix in the chocolate chips. If the dough looks more like cake batter than cookie dough here, add in that additional 1/4 cup of flour.
  5. Refrigerate the dough for at least 2 hours before baking. (You can skip this step but your cookies will be more flat than fluffy.)
  6. I used an ice cream scooper to place each cookie dough ball onto a cookie sheet lined with parchment paper. (Pro tip - spray the ice cream scooper with pam and add a few chocolate chips into it before scooping the dough to ensure they get to be on top of the cookie, prettier that way!!
  7. Bake for 11-13 minutes. (I did 11 mins bc I prefer more undercooked cookies.) They won't look done in the center but that's where the gooey part comes in once they take their final form while cooling off. The edges of the cookie should be more firm than the center.
  8. Smack the cookie sheet against the counter top gently in order to create that wrinkled-cookie texture on top of your cookies and let them set and cool for 15 minutes before eating.
26 Comments

    Connect

    CONTACT FORM
    If you’d like to use my photos & recipes, please ask or link back to this site. Thank You.

    Calendar

    August 2022
    July 2022
    June 2022
    May 2022
    April 2022
    March 2022
    February 2022
    January 2022
    October 2021
    September 2021
    July 2021
    June 2021
    March 2021
    February 2021
    January 2021
    December 2020
    November 2020
    October 2020
    September 2020
    August 2020
    July 2020
    June 2020
    May 2020
    April 2020
    March 2020
    February 2020
    January 2020
    December 2019
    September 2019
    August 2019
    July 2019
    June 2019
    May 2019
    April 2019
    March 2019
    September 2018
    August 2018
    July 2018
    June 2018
    May 2018
    April 2018
    March 2018
    February 2018
    January 2018
    December 2017
    October 2017
    August 2017
    May 2017
    April 2017
    February 2017
    December 2016
    November 2016
    June 2016
    April 2016
    January 2016
    June 2015
    April 2015
    March 2015
    February 2015
    January 2015

    RSS Feed

FOODS OF JANE

mostly noodles
foodsofjane, llc  |  © Copyright 2021 |  Contact@FoodsOfJane.com

  • Home
  • Recipes
  • CLE
  • Contact