|
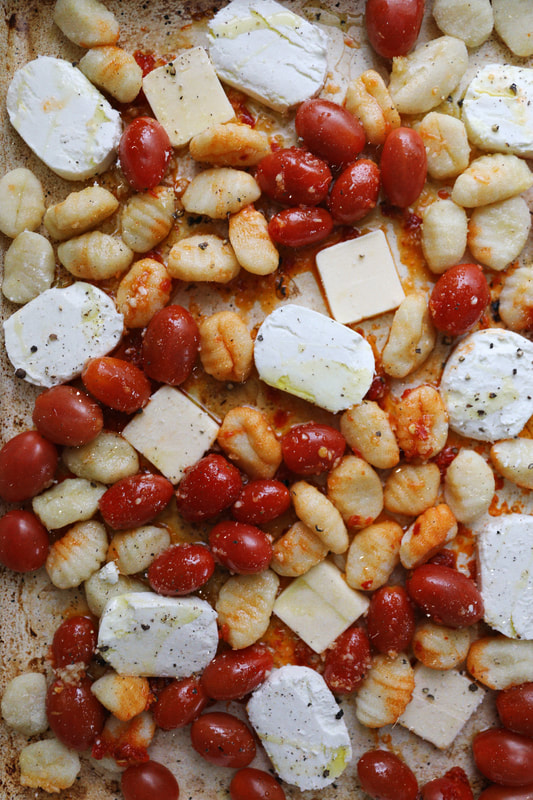
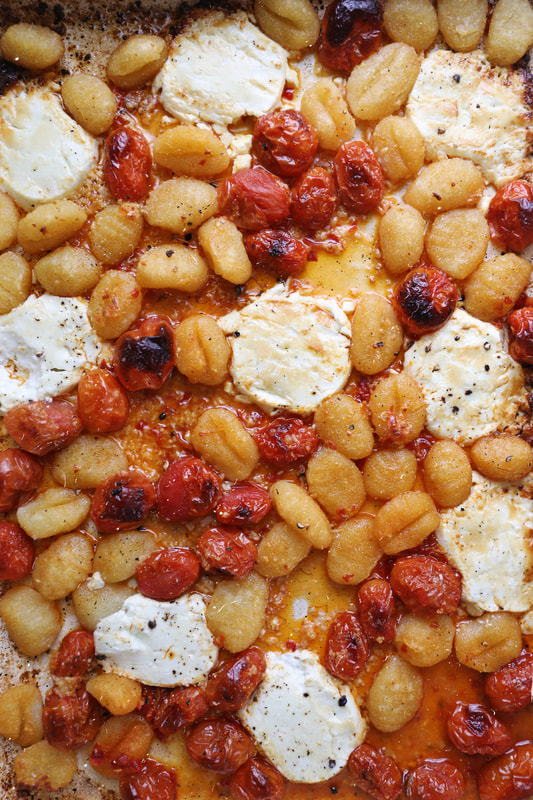
A couple of things about this dish that I LOVE: it's easy, it's quick, and it's versatile! The gnocchi pieces crisp up to perfection from the oil and also, roasted tomatoes are good on their own but tomatoes roasted in butter, garlic and spicy chilis...along side of goat cheese...and then drizzled with honey...way better. If you want to leave out the gnocchi, this would make the most perfect appetizer/dipping spread for a good crusty bread. Also, sometimes I'm not feeling gnocchi (it's a very filling pasta!) and I'm thinking you could very easily boil your own pasta while the cheese/tomatoes bake and add it to the sheet pan once you pull it out of the oven. Like I said earlier, very customizable dish!!
What you need:
What to do:
6 Comments
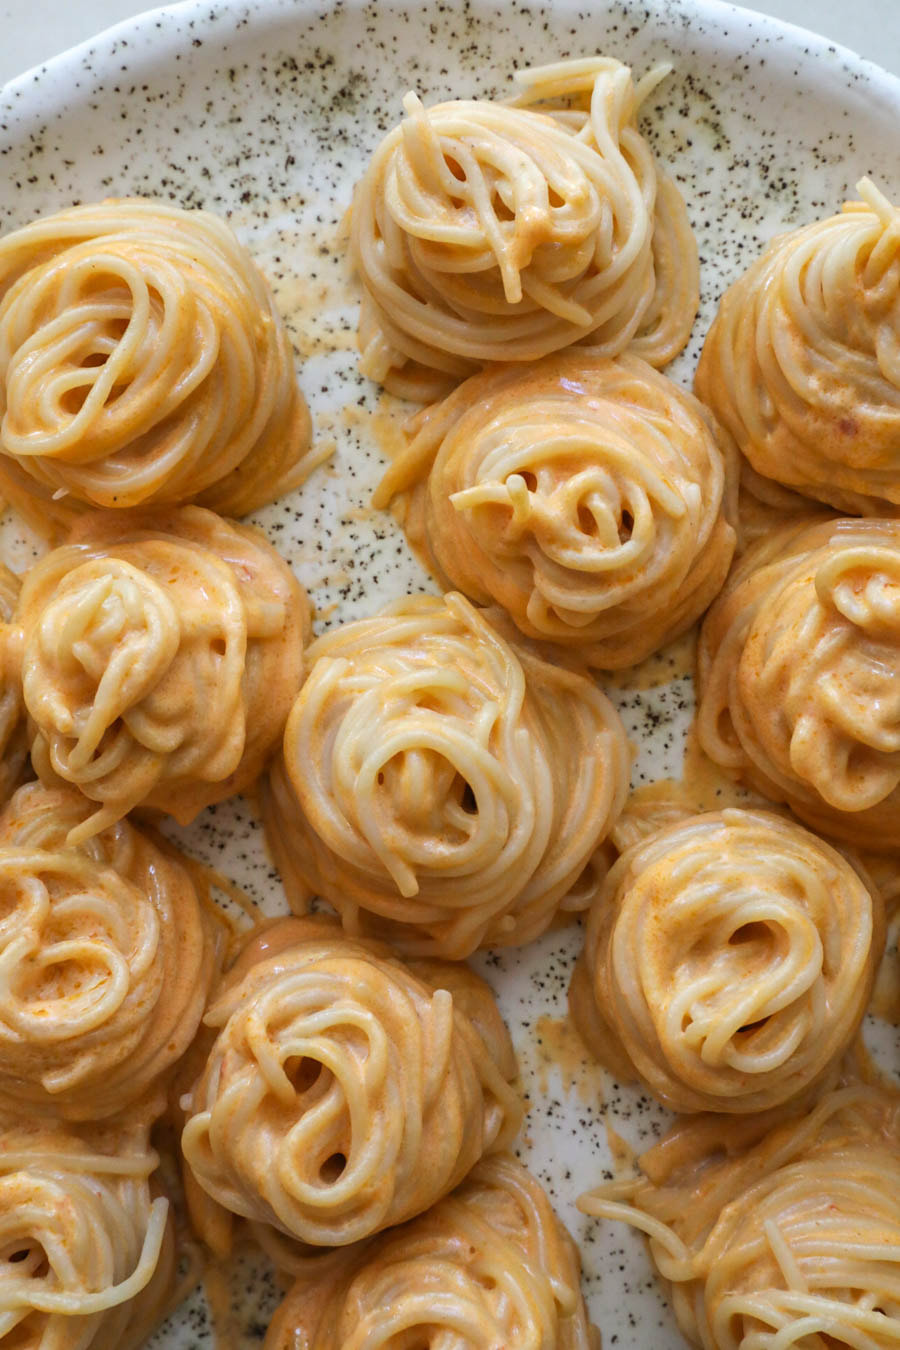
Towards the end of my pregnancy, I kept getting messages about this pasta dish from a restaurant called Frank Papa's in St. Louis that apparently has put a lot of very pregnant women into labor! The restaurant's "Eviction Notice" special is a penne amatriciana which is a spicy tomato sauce with meat (typically guanciale.) I've been served a ton of different versions of amatriciana so I'm sharing how I prefer to eat it -- not the traditional Italian version. ;) 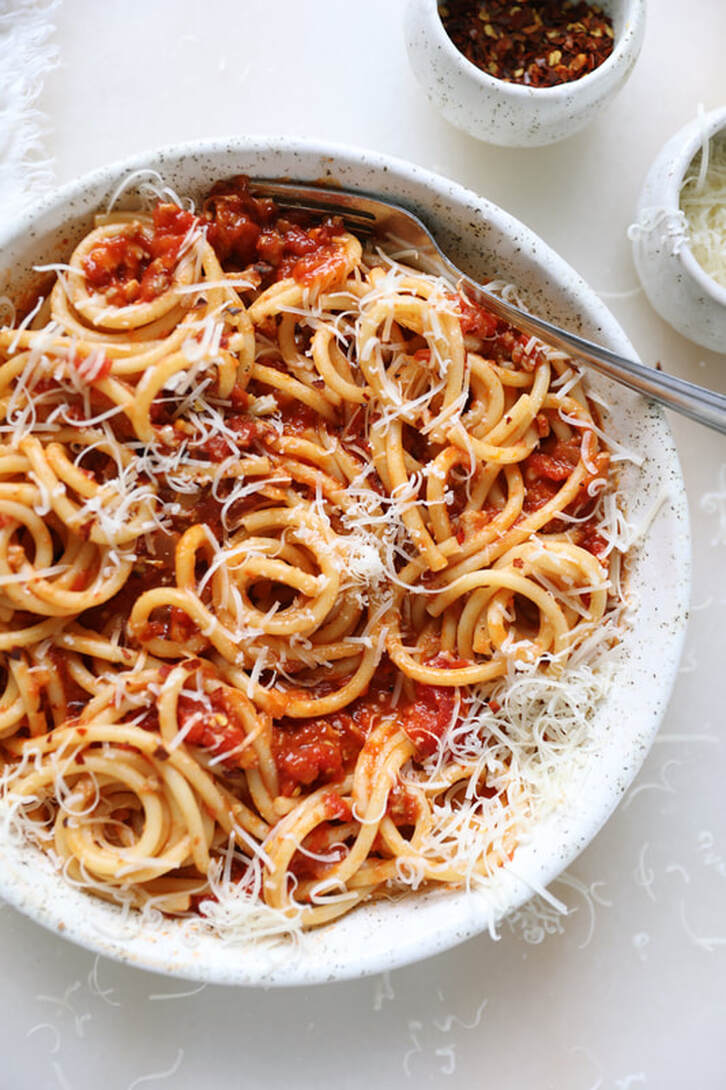
I’ve been making different versions of this since college!! (Started off with ramen in the dorm room microwave and a Kraft single lol…it’s come a long way.) Sometimes I make a cleaned up version, sometimes I use all the indulgent stuff. My go-to way is plant-based butter, coconut milk, regular cheddar and my fave brown rice ramen! ALL THE DETAILS and how to customize: Any noodle will work..udon, rice noodles, even pasta! I love using Lotus Foods brown rice & millet ramen or knife cut noodles from any Asian grocery store. My fave sriracha is Fix Hot Sauce. Reg version: salted butter, regular milk for heavy cream for extra thick sauce + @tillamook cheddar Plant-based version: Plant-based butter, vegan cheddar (I like Violife Foods), unsweetened coconut milk or Nutpods oat milk creamer. 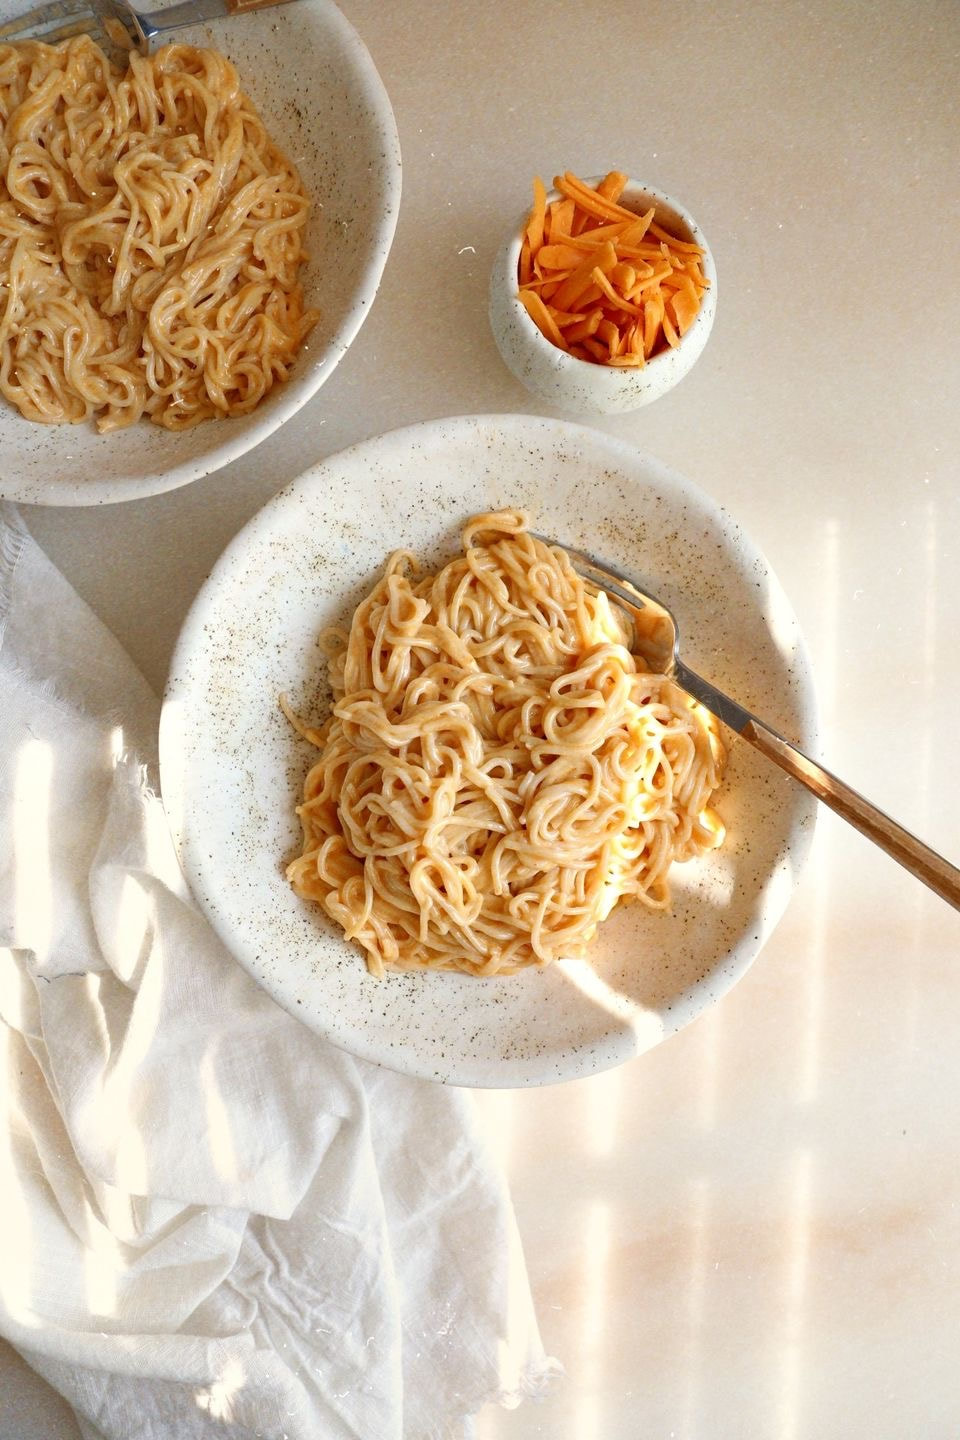
FINALLY, the recipe I made a couple years back has a home online. Until now, it's been floating around in an Instagram caption! Think french onion soup vibes, but creamier with pasta and more varieties of the best kind of cheeses - gruyere, goat cheese and burrata on top. Oh, and also, crispy prosciutto!! All of the best flavors. 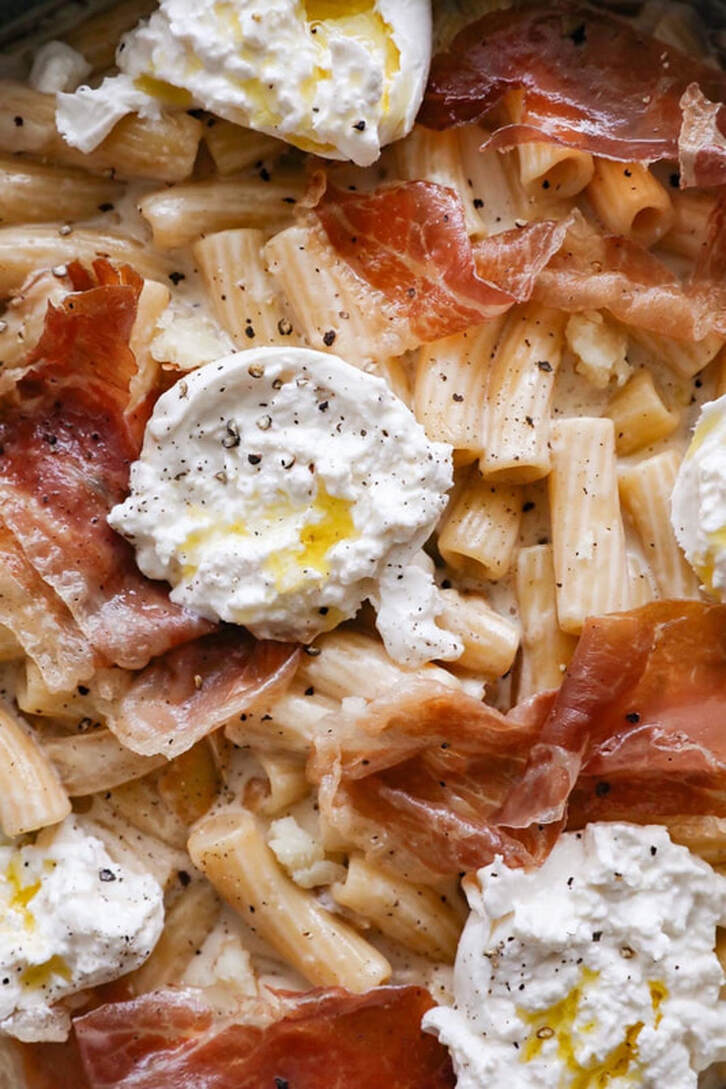
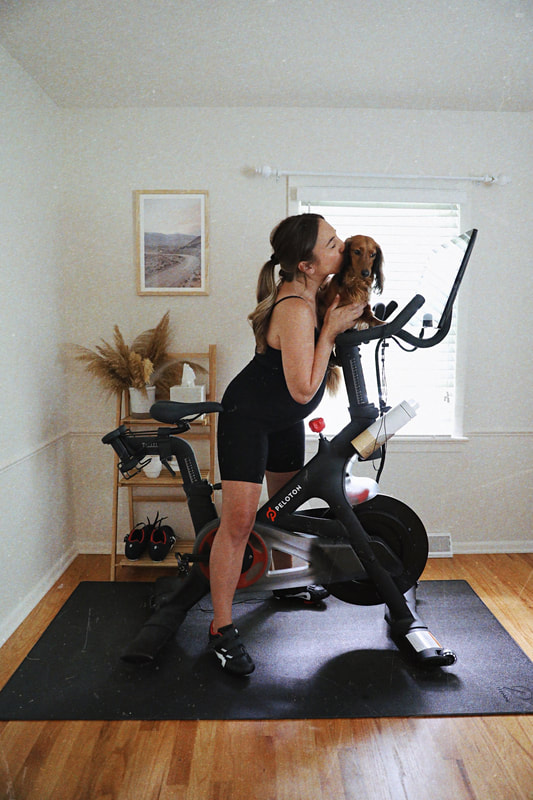
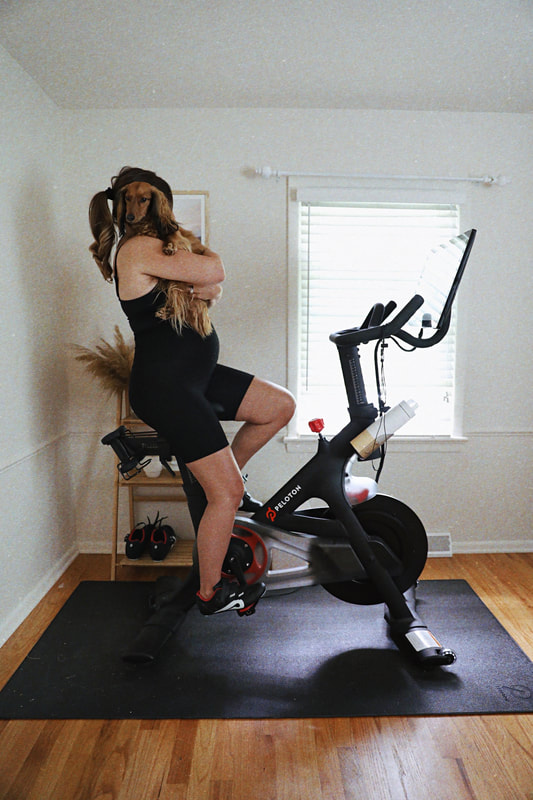
Working out consistently plays a big role in maintaining a healthy lifestyle, especially for someone like me who likes to eat a TON of carbs. I love using my Peloton for workouts because there is such a wide range and so many styles of workouts! There's something for every kind of person and helps make things feel more approachable when it comes to finding a consistent workout schedule. In March 2019, my husband bought a Peloton. (We did the monthly payment plan, and pay close to $100 a month for the plan + Peloton membership so we basically look at is as if it's like we're paying for a gym membership!) It sat in our office for a couple of weeks and I dreaded the idea of climbing onto it and sweating. At this point in my life I was NOT working out at all, I was eating pretty unhealthy and wasn't happy with my appearance. I was also having trouble sleeping and experiencing a lot of anxiety. I finally hit a breaking point with the rut I was in and climbed onto the Peloton a few different times. Once I found the right style workouts, instructors who I resonated with and that played music I enjoyed...I started to really look forward to working out and I went from going years without exercise to working out every single week...consistently for more than an entire year! Still going strong on that same streak and it's been life changing. Intervals and Arms Rides
I LOVE intervals and arms rides because these classes have a few short arm sections between all of the cycling. It's a great way to catch your breath while still working hard on another part of your body. I'll link a few of my favorite classes that I've taken several times since the start:
Groove Rides All my fave groove rides are taught by Emma Lovewell who is one of the instructors that I vibe with a lot. I love all of the music she plays, especially in her groove rides! Groove rides are so fun, and lightly choreographed which means there are a few different moves like tapping your booty back to the edge of the bike seat, or hinges where you bend your head down and up from the handlebars. Everything goes hand in hand with the beat of the music and once you hit those moves along with the beat it's that much more motivating and exciting. Here are my favorite groove rides:
Low Impact Rides Low impact rides have been my favorite type of ride to do while pregnant. They are also great for days when you want to get a good sweat in, but not push yourself too hard. I do the 10 minute low impact rides on days where I'm really not feeling a workout, and the 15, 20 or 30 minute low impact rides on days where I'm looking for more of a challenge and a workout that will feel more fulfilling. Here are my favorite low impact rides: Prenatal Workouts All of the prenatal Peloton workouts classes are taught by Robin Arzon! During my pregnancy, I paired these prenatal strength workouts with low impact cycling rides. Robin is full of energy and highly motivating. Working out during pregnancy has helped me to feel strong mentally and physically and I know it's helping me to prepare for labor, delivery and recovery!! Here are my favorite classes:
Miscellaneous Rides These ones are mostly just because I loveeee the playlists!! Music can truly make or break any ride and I always have to be feeling the tunes to be feeling the workout.
Strength: Stretches It's so important to stretch, every Peloton instructor will mention that in every kind of class they teach. If I'm really not feeling a workout day, they're a great way to move the body and no where near as hard as an actual workout. Here are some of my favorite stretches: Strength: Arms and Light Weights I love the arms and light weight workout classes and almost always tack one onto every cycling class that I take!! I notice most instructors use the two pound weights but the ones I have are three pounds!! Here are some of my favorite arms and light weights workouts: Strength: Core Love that there's the option to do different length core workouts! From 5 minutes to 20 minutes, so many good options. I keep finding myself going back to Olivia Amato's core classes, I really like them and I love the music she plays. Amazing with or without noodles - that's something I feel like I rarely say since I am such a carb lover!! Lol. In the photo, I served the clams and broth over wide rice noodles. When I make the curry clams without noodles, I serve this dish as an app with some crispy toasted bread in order to soak up all that luscious sauce! Like most of my recipes, this one is portioned out for two entree servings or a few small side dishes!! The whole thing takes about 15-20 minutes to make so it's a super quick and simple recipe. 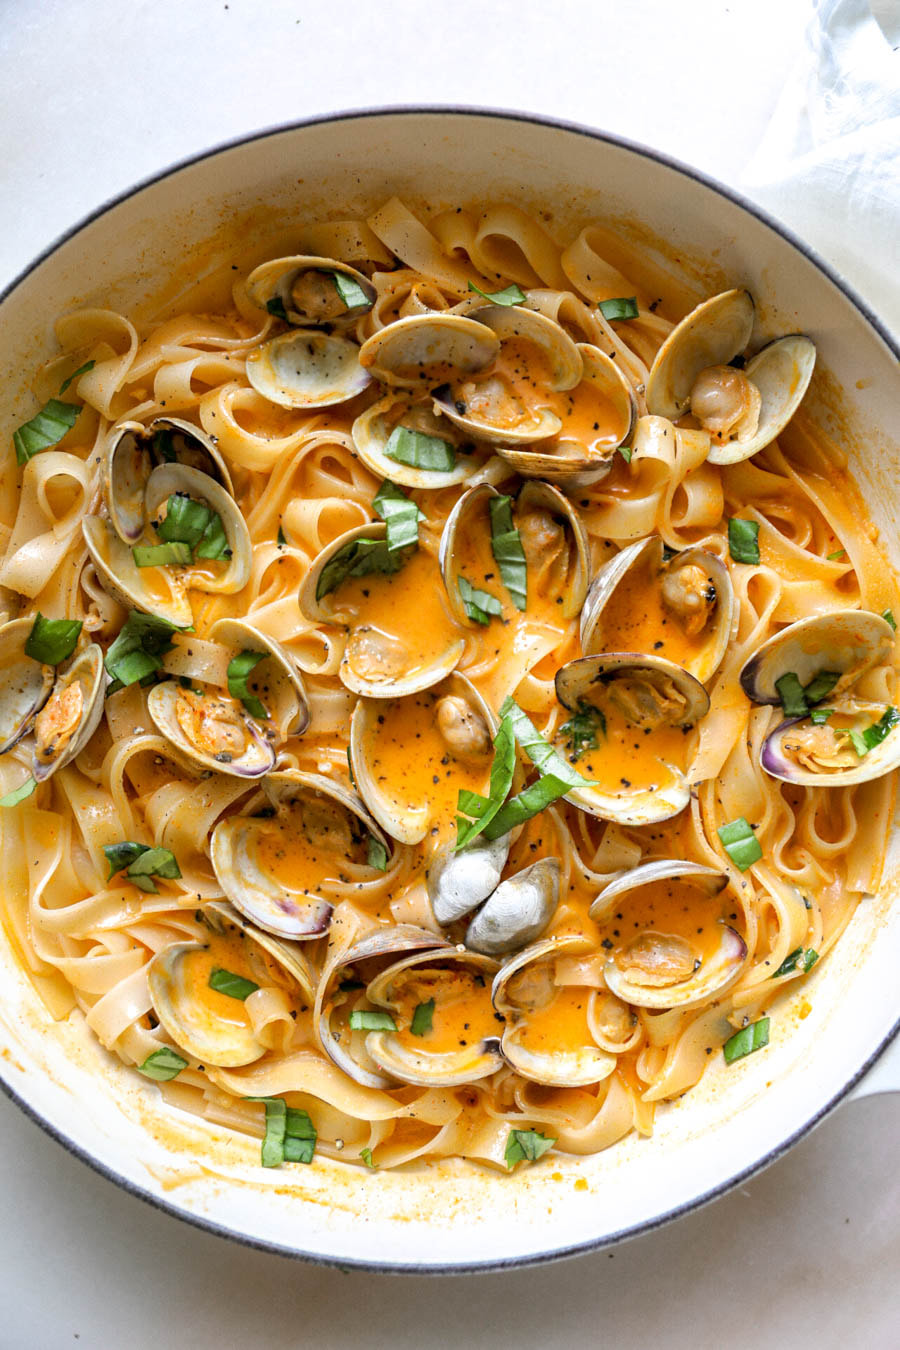
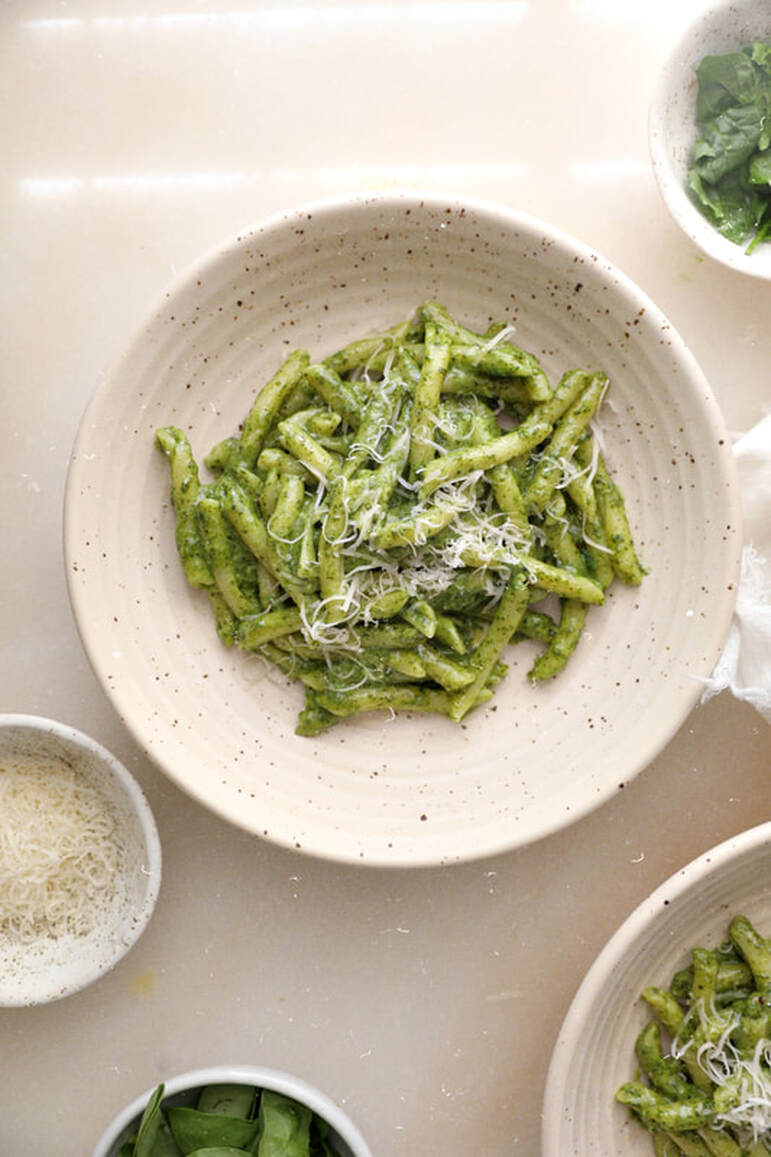
Growing up I always LOVED my aunt's pesto recipe. I used to be able to tolerate the accidental nut or two when I was younger so it wasn't until I was a bit older that I realized I'm allergic to pine nuts and I can't have traditional style pesto!! Lucky for me, pine nuts aren't the real flavor hero of the recipe unlike the crucial and potent garlic and basil components...so it's very easy to omit the pine nuts and still end up with something that tastes very similar to pesto! A few house keeping notes:
Creamy, spicy and tangy!! This sauce is so so so good!! The best part about it is that it can be paired with literally any type of protein. I've made it with grilled chicken, scallops, mushrooms and also just by itself! For a more texture filled sauce, use crushed tomatoes and add diced onion in addition to the tomato paste! And since there's always a handful of people that ask - I haven't tried to make it dairy-free yet but if I did, I would try using unsweetened coconut cream in place of the heavy cream! 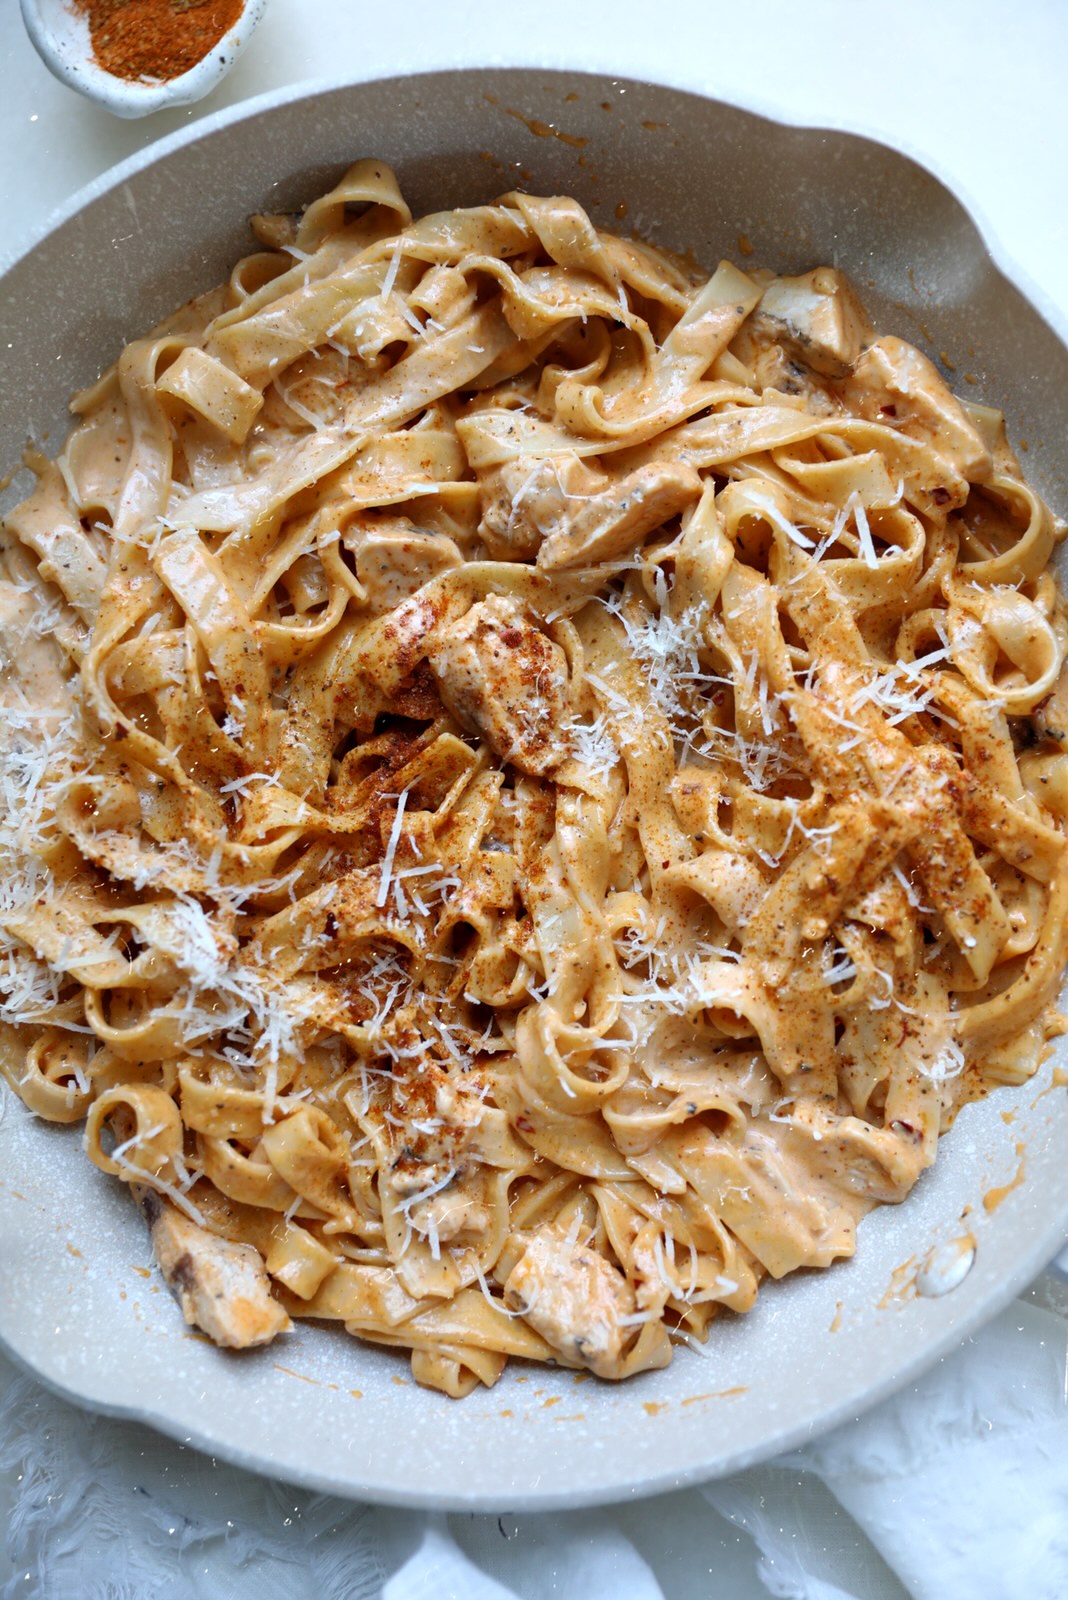 What you need:
What to do:
This recipe is Roman and very simple, but classic!! It's like a sister recipe to cacio e pepe and carbonara, sans the egg component and it's traditionally made with spaghetti or rigatoni. Since pecorino romano cheese and guanciale are both very salty, there's an exception here and you do not need to salt the pasta water. If you don't live near an Italian market or can't find guanciale, you could try using cubed pancetta or even thick cut bacon as a substitute.  What you need:
What to do:
Every year around Christmas time, my grade school would host a weekend holiday shopping boutique in the gymnasium. Card tables set up row by row with folks from my hometown selling theee most random stuff. I went with my mom every year - started off helping her sell pumpkin pies at the bake sale table and then at a certain point we just attended as guests. However, I never went to shop - I went for the chicken casserole that was served out of the lunchroom every year. This stuff is pure magic. Not the prettiest, I'll admit. But it's damn good. Comfort scooped into a bowl and topped with love that is crunchy cornflake cereal and melted margarin. 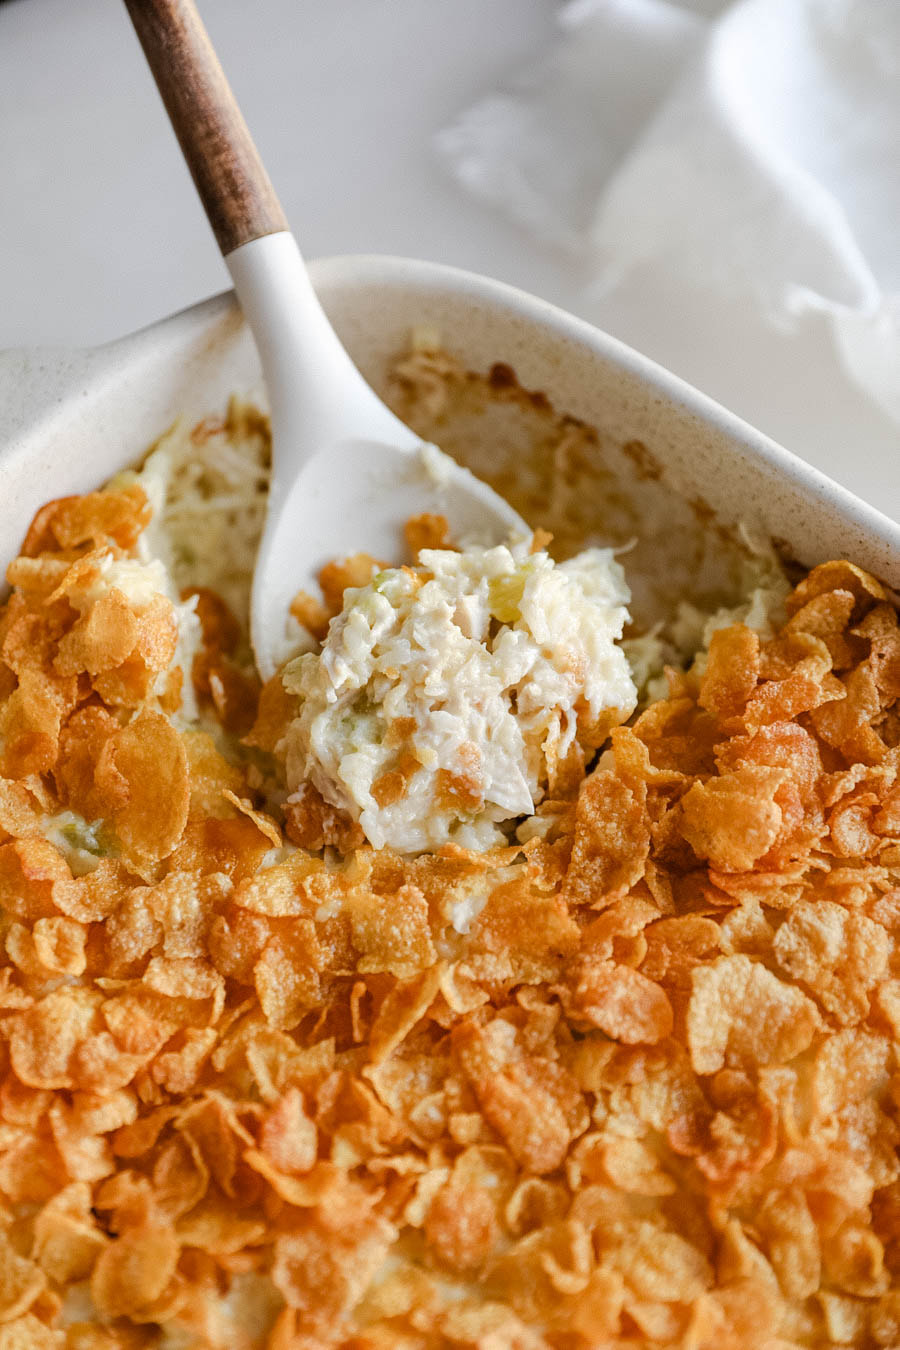
I grew up eating this rice dish and completely forgot about it until my mom randomly decided to make it as a side dish for Christmas last year!! I started posting about recipe testing it a few weeks back and got a huge number of responses from people saying their moms used to make this dish too and that it goes by several diff names. "Stick of butter rice" was my personal fave, lol. The fact that there's an entire stick of butter in it means you know it's going to be amazing and super comforting. That said, there are ways to make it a bit healthier. You can use plant-based butter, I've made it with both dairy and plant-based butter and both turned out to taste very similar. When my mom made it on Christmas, she made her own french onion soup base with caramelized onions and beef broth!! So that would be another way to maybe eliminate some sodium and give it a more natural feel if you don't want to use the canned soup. I also love how EASY this recipe is - 5 ingredients total and only three steps. It's probably the easiest side dish you will ever make and it's always a huge hit at dinner. Makes enough for 4-6 sides, can be doubled in the same size pan. 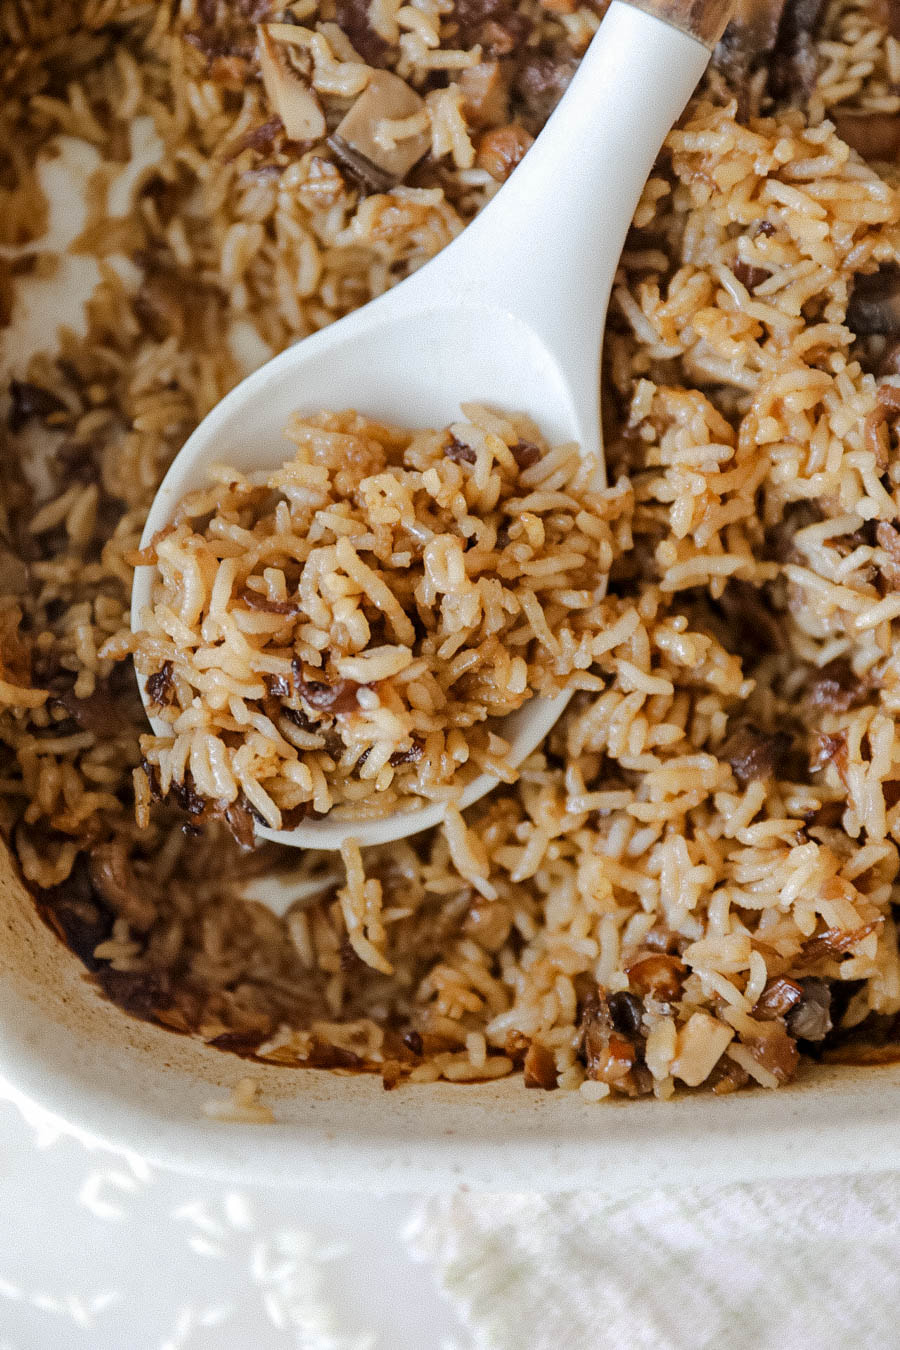
I love a good basket of fried calamari with peppers and marinara dipping sauce but I also love stewed or sautéed calamari too! It pairs so well with crushed tomatoes and garlic and basil!! It is VERY easy to overcook the calamari. If overcooked, the texture will be very rubbery and ruin the dish. I know cooking seafood is scary and you want to make sure it's completely done but calamari cooks very fast. If you're a newb, test out cooking a single ring in the sauce for one minute and see what you think before cooking all the others. 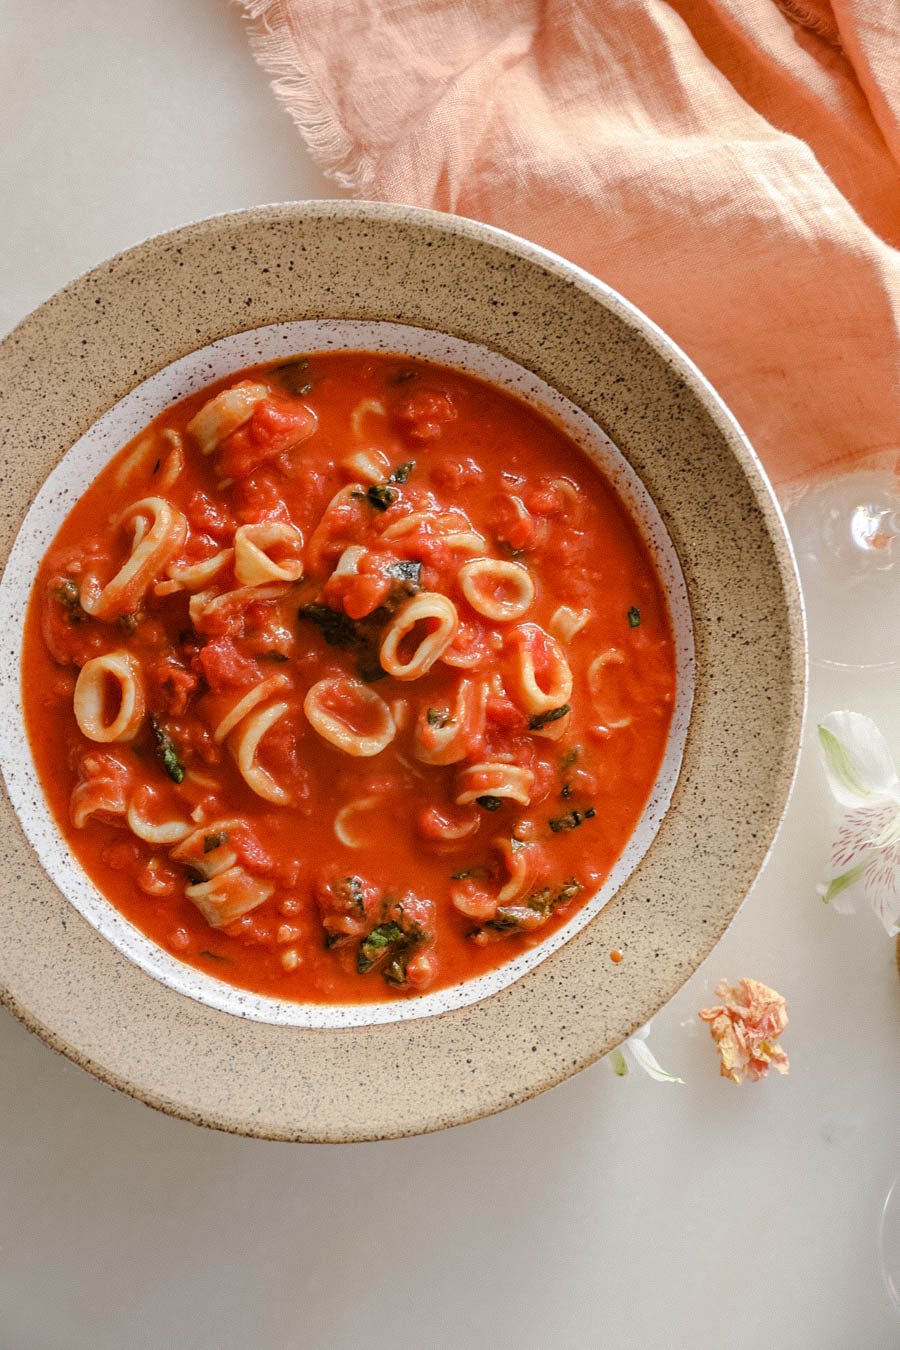
OKAY, SO EXCITED ABOUT THIS. One of my favorite Italian restaurants in Cleveland, Luca, has this insane pasta dish on their menu that has absolutely changed my life since the first time I tried it several years ago. The sacchetti is a bucket purse shaped pasta that is usually filled with cheese. At Luca, they use ricotta and truffle and serve it in a truffle cream sauce with an aged fig balsamic glaze and microgreens. 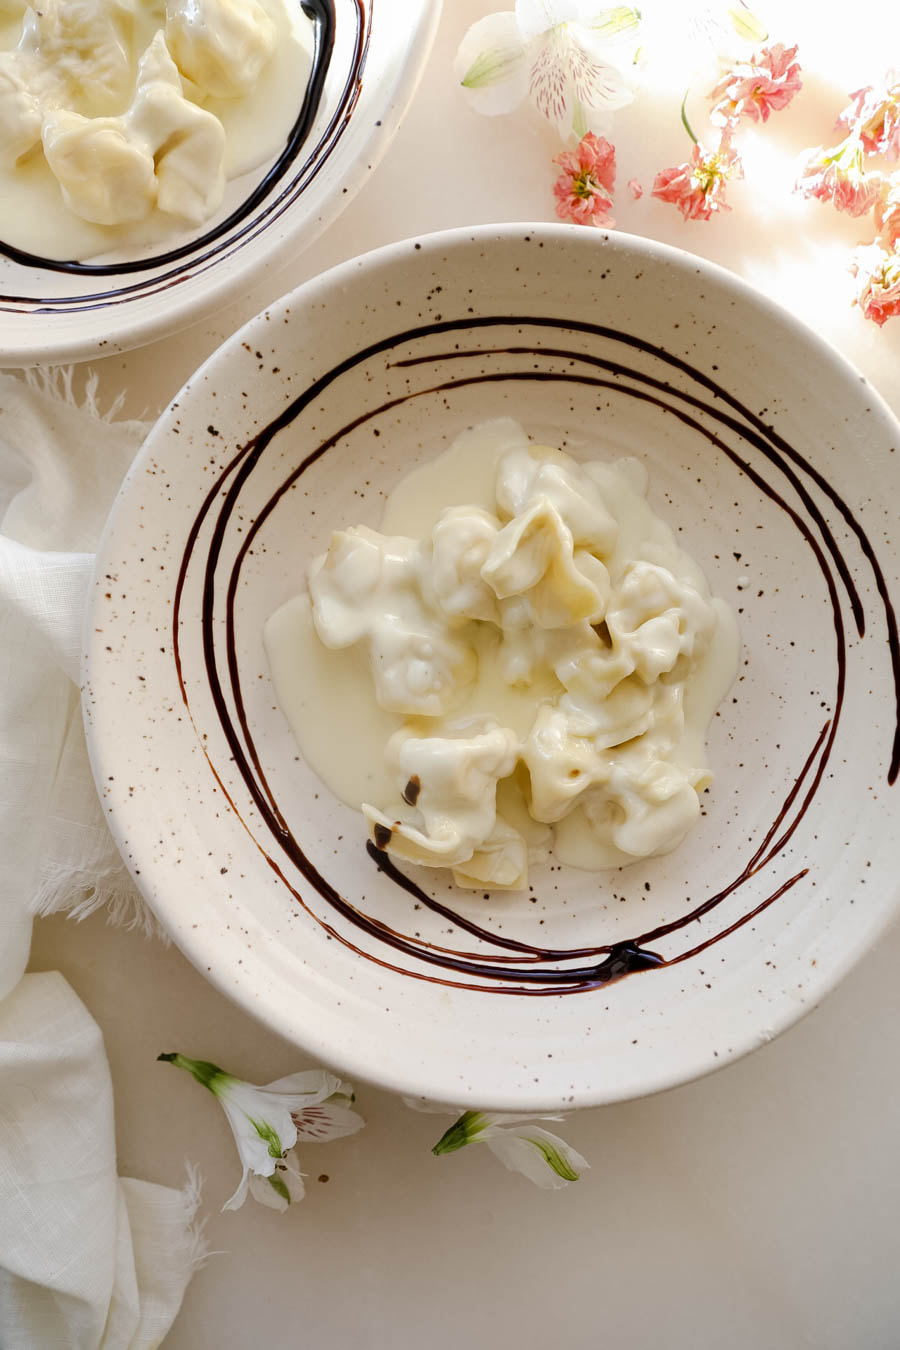 What you need For the sacchetti:
What to do:
For the sacchetti:
I make alfredo sauce with a heavy whipping cream base and I am not sorry!! So many people are scared of heavy cream because of the amount of dairy and fat but this is one of those recipes where you really just treat yourself and don't try to make short cuts. You'll be glad you didn't once you start eating it, I promise!! 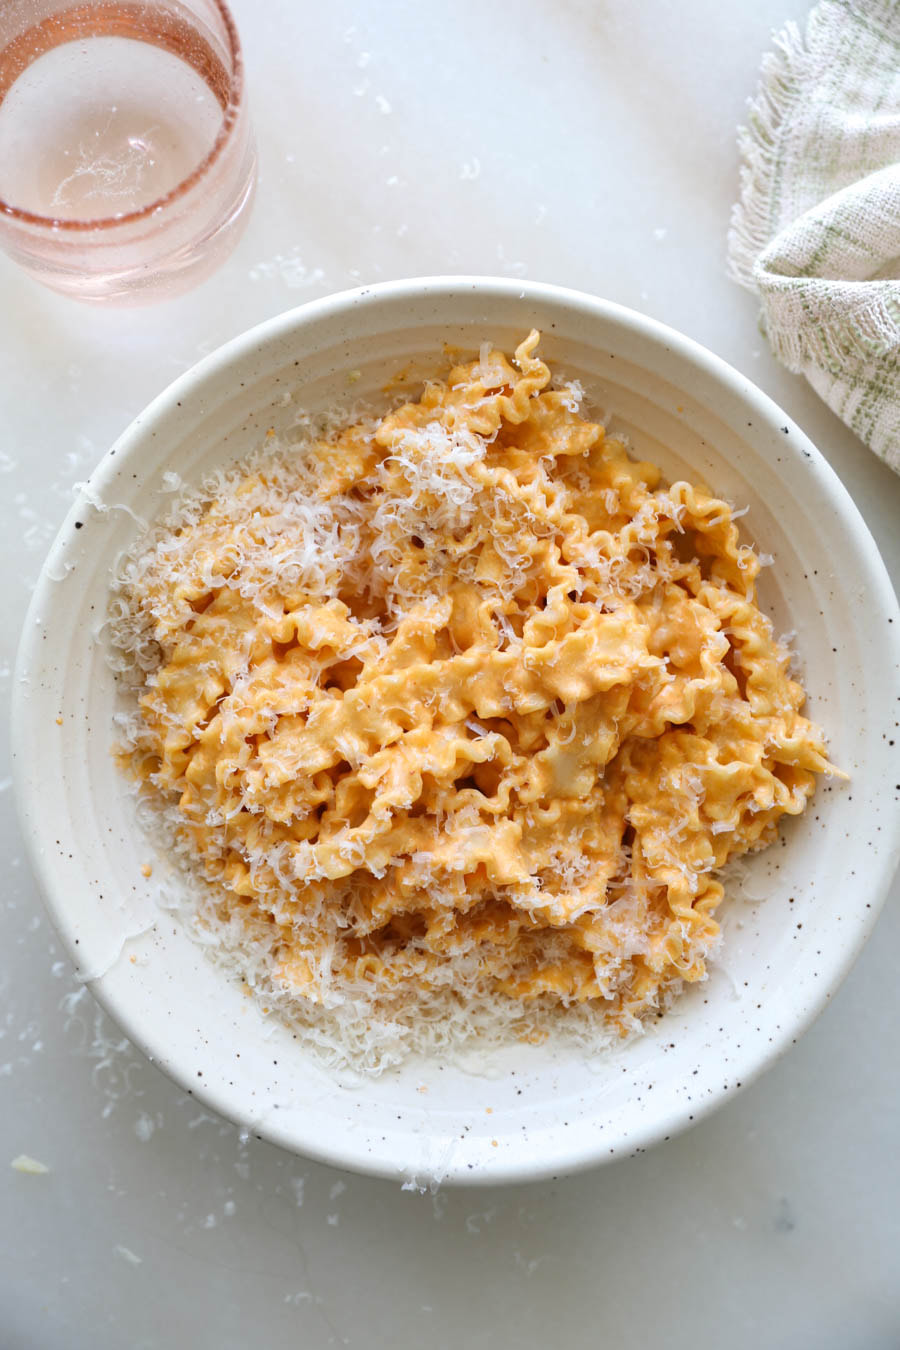
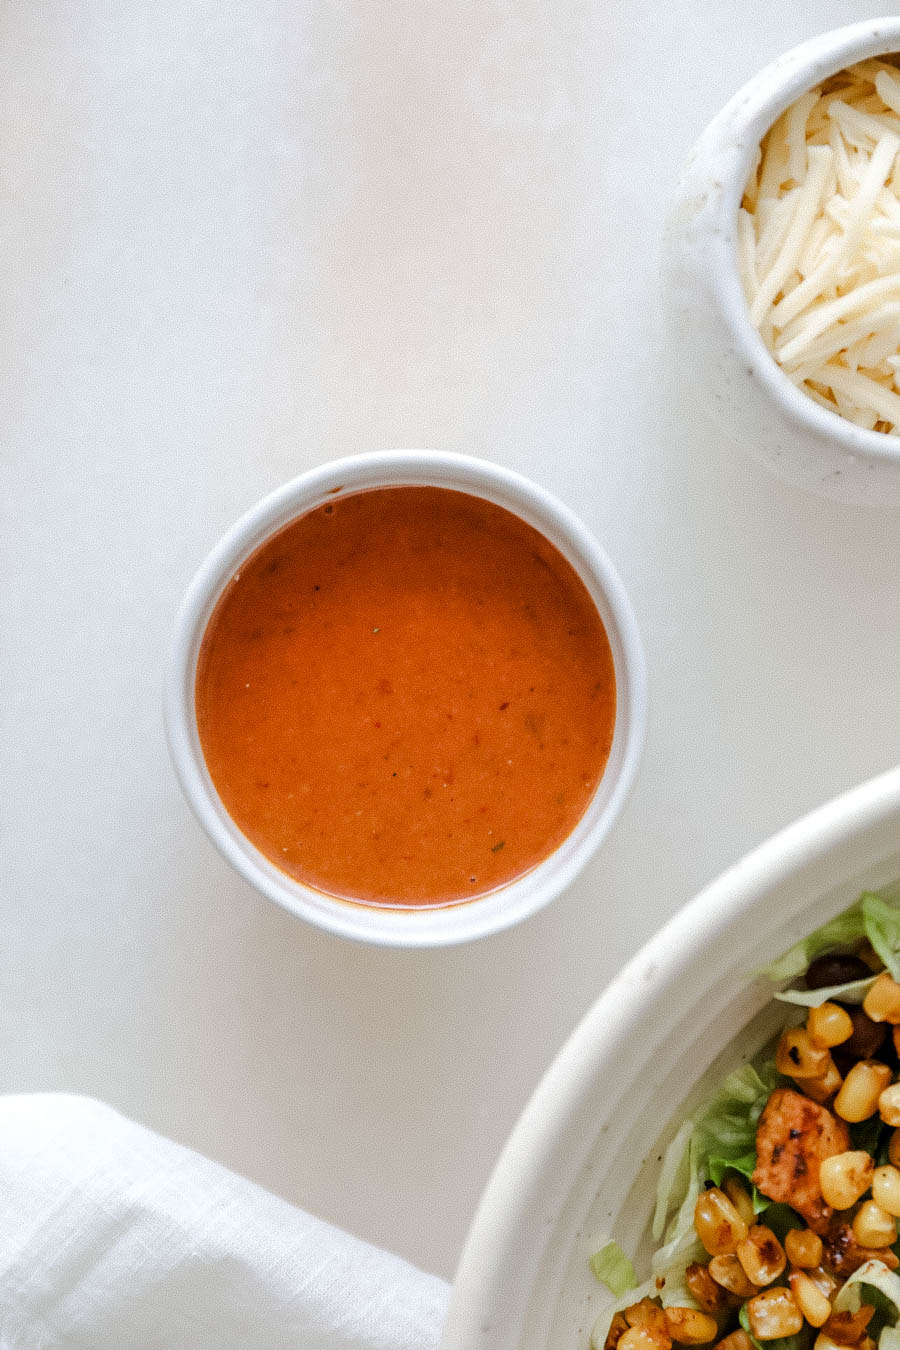
I shared a salad I was eating on my story one time and got soooo many requests for the honey chipotle dressing that I was using! It's inspired by the chipotle vinaigrette salad dressing at Chipotle! The main components of it are chipotle peppers, red wine vinegar and honey! It's so good, and also really good when mixed with greek yogurt to make a chip dip!! Feel free to customize this salad with whatever you like. I like doing a mix of romaine lettuce with iceberg and then adding charred corn, black beans, diced red onion, cheese, a few crushed tortilla chips and then a small dollop of greek yogurt. (Also, you don't have to use chicken, you could do ground beef or a vegetarian option!) The dressing recipe makes a little more than a cup of dressing and it can last in the fridge for 7-10 days. Since the salad portion mainly depends on how much lettuce you use, I'll leave it up to you to eyeball that part. I recommend cooking one piece of chicken per person having a salad!  What you need For the dressing:
 What to do
For the dressing:
I used to love caeser salad growing up but I hit a certain age where my seafood allergy started to get more severe to the point where I would notice even when I consumed even the tiniest amounts of it...aka the small amount of anchovy in caeser salad dressing. There are NO anchovies in this recipe - I know that's not traditional but I gotta do what I gotta do to accommodate my food allergies. I did add caper brine to the dressing though to give it an extra salty, briny flavor. Homemade croutons are a game changer. First of all, you can make them as big as you want and second of all, since they're homemade you don't have to worry about any additives or preservatives. I discovered Bread Srsly GF Sourdough Bread last year and that's what I used to make the croutons so this recipe doesn't contain any gluten!! I always keep a loaf of their sourdough in my freezer and I loveeee to make croutons and breadcrumbs with it. 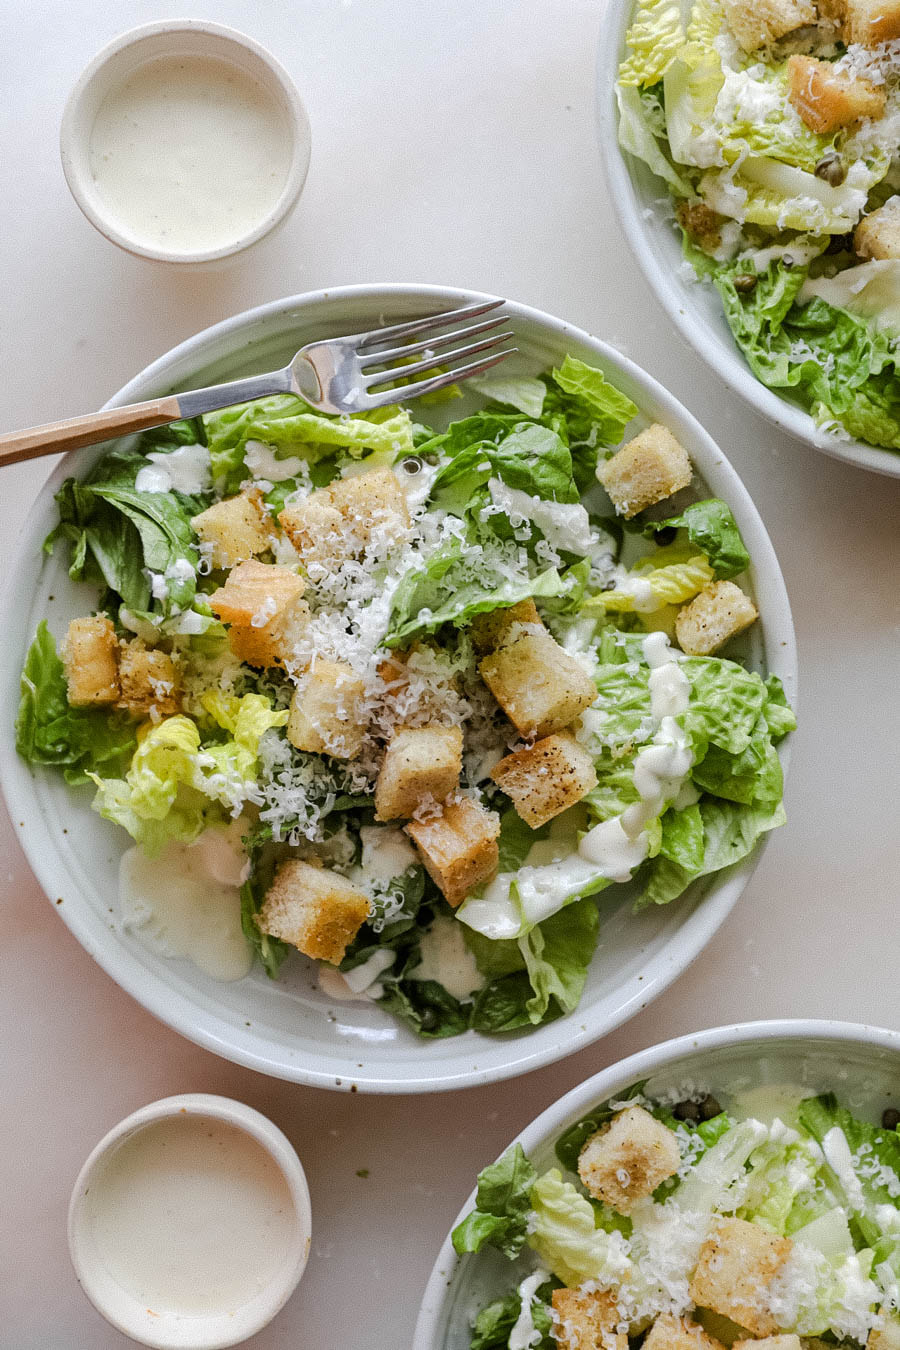 A few tips: make sure you use freshly grated parmigiano-reggiano cheese instead of just parmesan, makes a big difference, I think! Plus, the cheese looks prettier if you grate it yourself instead of just trying to sprinkle the fake powdery stuff on top. If you follow a plant based diet, I would suggest using vegan parmesan cheese (I like Violife) and vegan mayo! Super easy to swap these in to make it all vegan, especially since there's no anchovy. 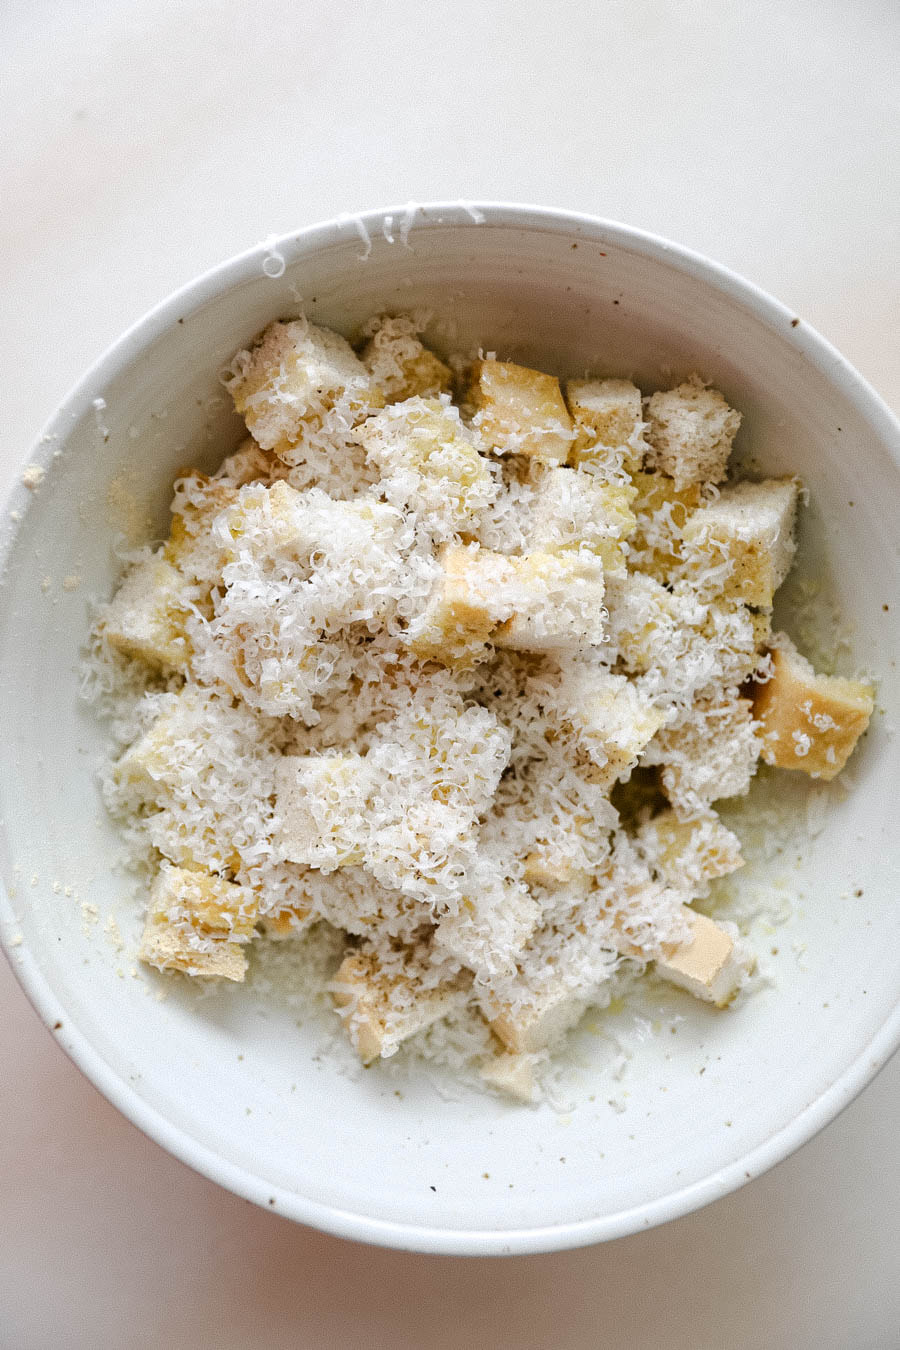 What you need For the breadcrumbs:
What to do
My family has eaten at this old school Italian restaurant by my parent's house called Nino's since as far back as I can remember. I've always loved that they put rotini noodles in their house salad...so much more fun to eat a salad when there's pasta in it, I mean... ;) This salad is inspired by the Nino's salad, but it's a little lighter. I used turkey pepperoni and brown rice rotini instead of regular pasta. (Note: if you use brown rice pasta, don't put it in the fridge, the texture hardens once it gets cold and that would ruin the salad.) Another thing, the dressing that Nino's uses is super rich, almost too rich where the amount of vinegar and oil can be rough on a sensitive stomach so I decided to pair my version of their salad with a much lighter vinaigrette. This recipe makes enough for 2 large salads or 4 side salads. (Since the size mainly depends on how much lettuce you chop up, it's very easy to eyeball and change the proportions to how large or small you want it.) The salad dressing can last for 7-10 days in the fridge. 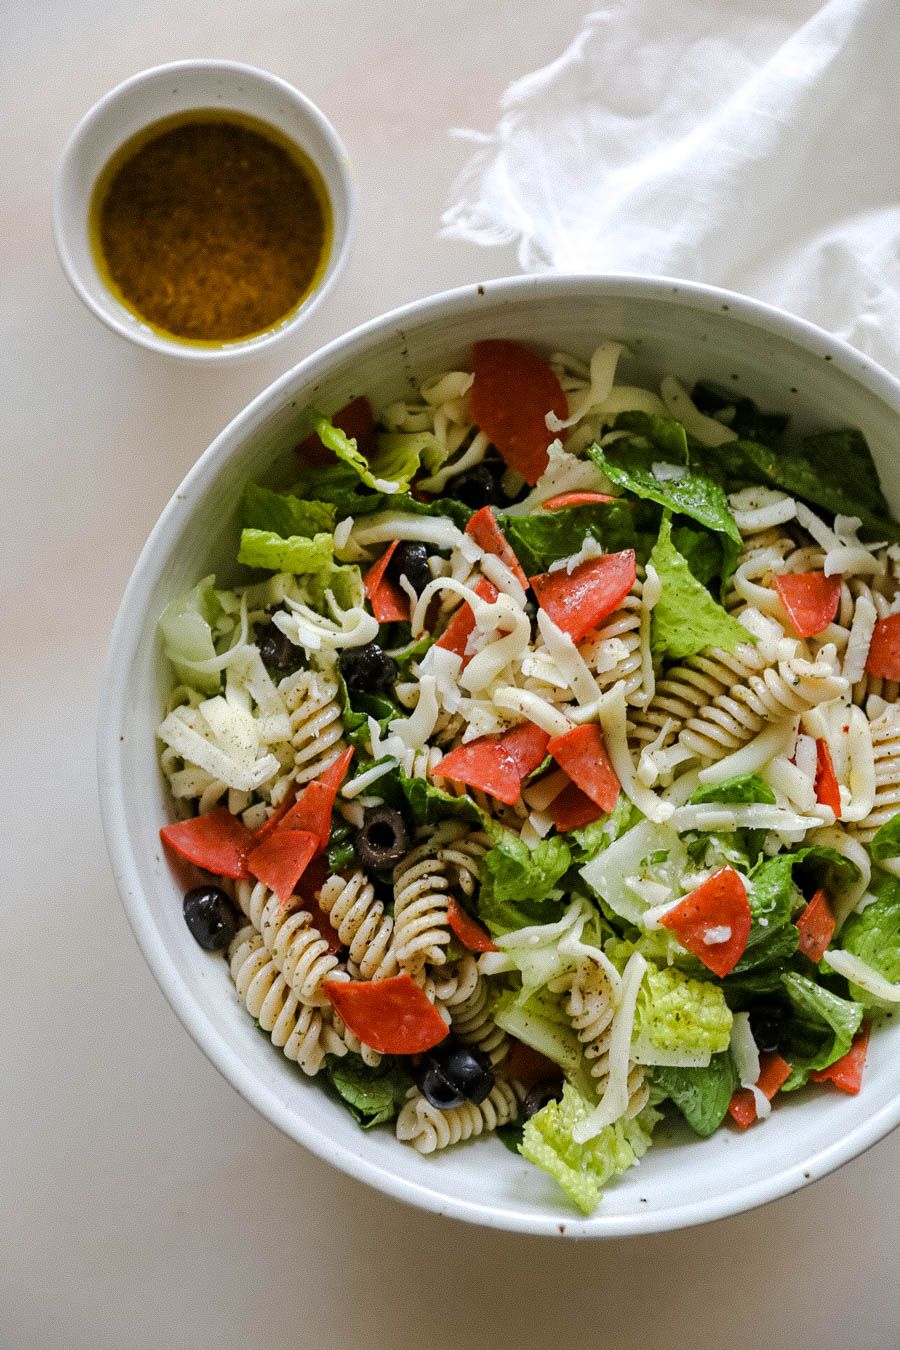 What you need: For the dressing:
What to do:
I started cleaning my entire house with Branch Basics during quarantine. I think everyone cleaned a lot during those months, but it feels so good to know that all the cleaning I did was with safe and non-toxic solutions instead of harsh chemicals!! Since Bryant and I have started our TTC journey, I have really been focusing on how I can make food/lifestyle changes that are healthier. Eliminating processed foods was the first step, and then I started eliminating other less obvious toxins in our home like laundry, deodorant and toothpaste. Cue, Branch Basics! My mom started using it a few months before I did and ALWAYSSSS mentioned how well it works. I was like, "Yeah, okay Mom! I'm glad you love it!" And thennnnn I got an email from Branch Basics asking if I wanted to sample the product and ever since my first spray and wipe - I've been OBSESSED. My absolute favorite part about Branch Basics besides the fact that it's non-toxic and is actually extremely effective is that one bottle of their mineral-based concentrate solution is all you need to clean your entire house. There are a few different empty bottles that come in the Starter Kit including the bathroom, all-purpose, streak-free, foaming wash and laundry bottle. Simply fill each bottle with certain amount of water + concentrate by following the directions on each one and then get to cleaning! You can read more about how the concentrate works here.  BedroomEvery week or so, we wash our sheets and pillowcases, but the bestttttt is when the comforter gets a wash too -- we especially love washing it at the start of a new year. We have white linen sheets, pillowcases and a white comforter. Our dog, Basil sleeps in our bed every single night. Dog + white bedding is a dangerous move but I NEVER have to worry because I haven't met a stain yet that Branch Basics Oxygen Boost couldn't solve. I usually pour two scoops of the oxygen boost and two cap-fulls of the laundry cleaner (two because the comforter is a heavy duty load) into my washer and let the cycle start by filling the machine with water. Add the comforter and let it soak for 30 minutes before closing the door to start the actual wash part of the cycle. Once it's done, you'll notice not only super clean bedding, but veryyy vibrantly white bedding! It restores the bright color every single time and looks brand new, I'm always so amazed. BathroomI think the second best thing to fresh bed sheets is a sparkling clean bathroom. Something about take a shower or bath in what feels like a new space just gives off all the clean vibes! My favorite way to use BB to clean the bathroom:
Windows & MirrorsNot to be dramatic, but the first time I used the Branch Basics glass cleaner, I gasped. I've never seen a window so clean and sparkly. The streak-free cleaner bottle directions say to fill with water and use ONE DROP of the concentrate. That's how powerful (yet safe) this stuff is!! If you windows are looking streaky then you probably accidentally spilled a little more concentrate into the bottle than just a drop and it needs more water. Feels weird to only add such a small amount to the water but trust me when I say that a drop is all you need. Don't forget you can use code "JANE" for 20% off of the Branch Basics Starter Kit. The starter kit comes with everything you need to start cleaning your whole house. (I make a small commission off of each purchase made with my code, so shopping with code "JANE" is a great way to support me at no extra cost to you! (This blog post was created in partnership with Branch Basics.)
Okay this reminds me so much of my vodka sauce recipe, except a vegan Thai version. In addition to tomato paste, there's Red Thai Curry Paste and a little lime juice and ginger. It's really good and different if you're in the mood for a creamy pasta but don't want to deal with heavy amounts of dairy. Sometimes, when I make coconut milk based sauces, I notice that leaving it over high heat can cause things to separate and get oily so that's why I added the starch into it. It holds together better that way! Per usual, this recipe is enough to feed two people, or it can be split into three smaller sides. For reference - a standard box of pasta is around 1 lb and I always make half a box which is the perfect amount for two entrees. 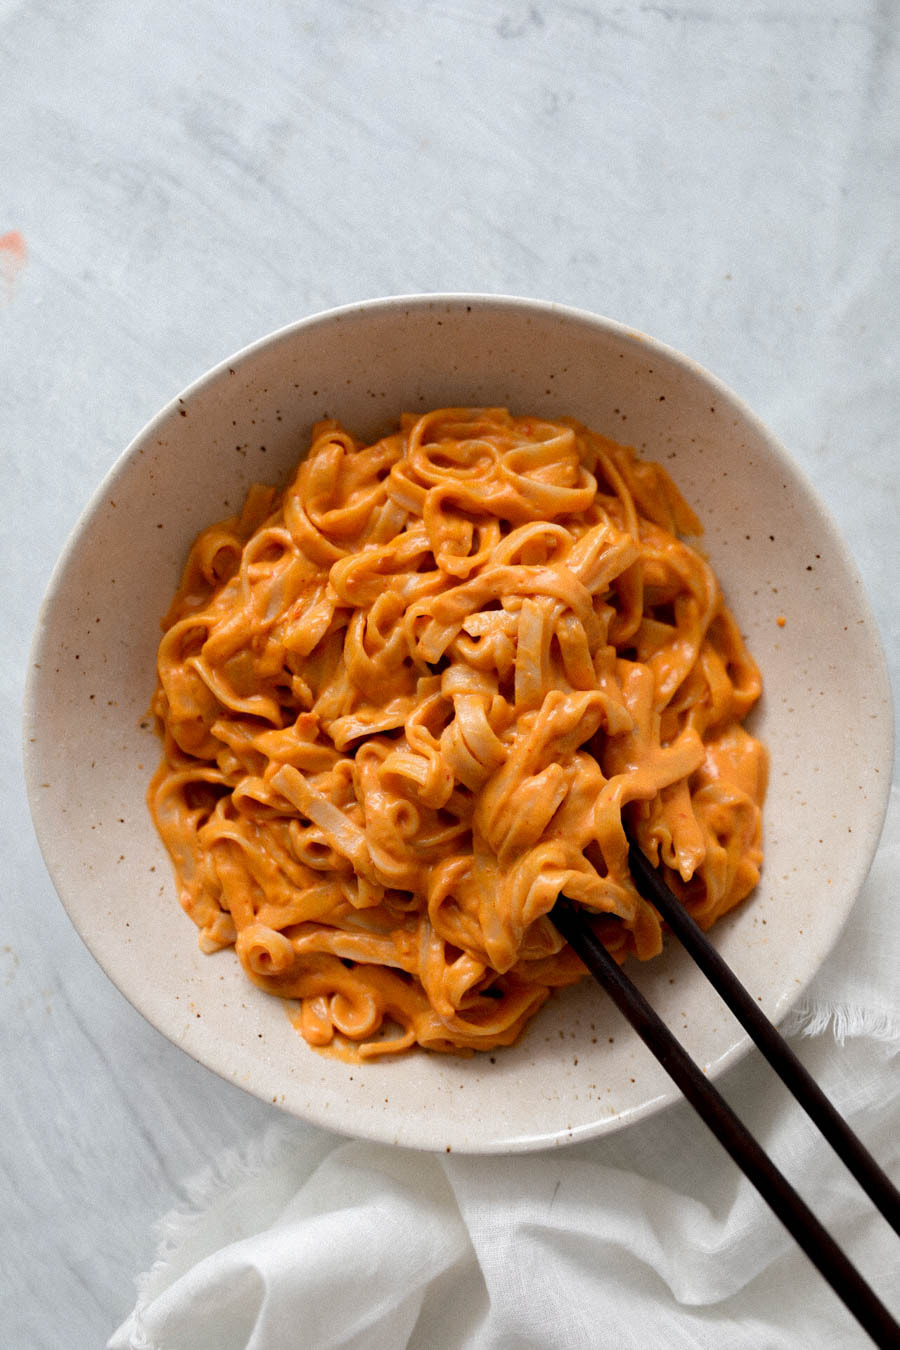
My kind of cereal. A few weeks ago, I made two different pasta recipes. One was regular-sized stuffed shells and the other was a creamy lemon pasta dish with medium-sized shell noodles. After making and eating both the lightbulb went off in my head and I was like OMG, what if I stuffed THE SMALLER SHELLS?!?! Usually, mini food recipes are somewhat impractical but besides being fun as hell to eat - this is actually one of the more successful mini recipes I've made, which is why it's deserving of an entire blog post! Here's why -- the ratio of shell to cheese is actually really nice with the mini version because in the regular version, there's A LOT of cheese. Which isn't necessarily a bad thing, but sometimes classic stuffed shells can be super heavy on the cheese since there's so much to fill, and for someone like my husband who thinks it's too much cheese and not enough pasta - the mini version is perfect. As far as process goes, using something to assist with filling the shells helps a lot. You could use a pastry or ziplock bag and cut a hole in the bottom corner to squeeze the ricotta cheese, but I just used an old fashioned ketchup bottle with a pointy tip. Whatever works, but I def wouldn't recommend trying to free hand it! 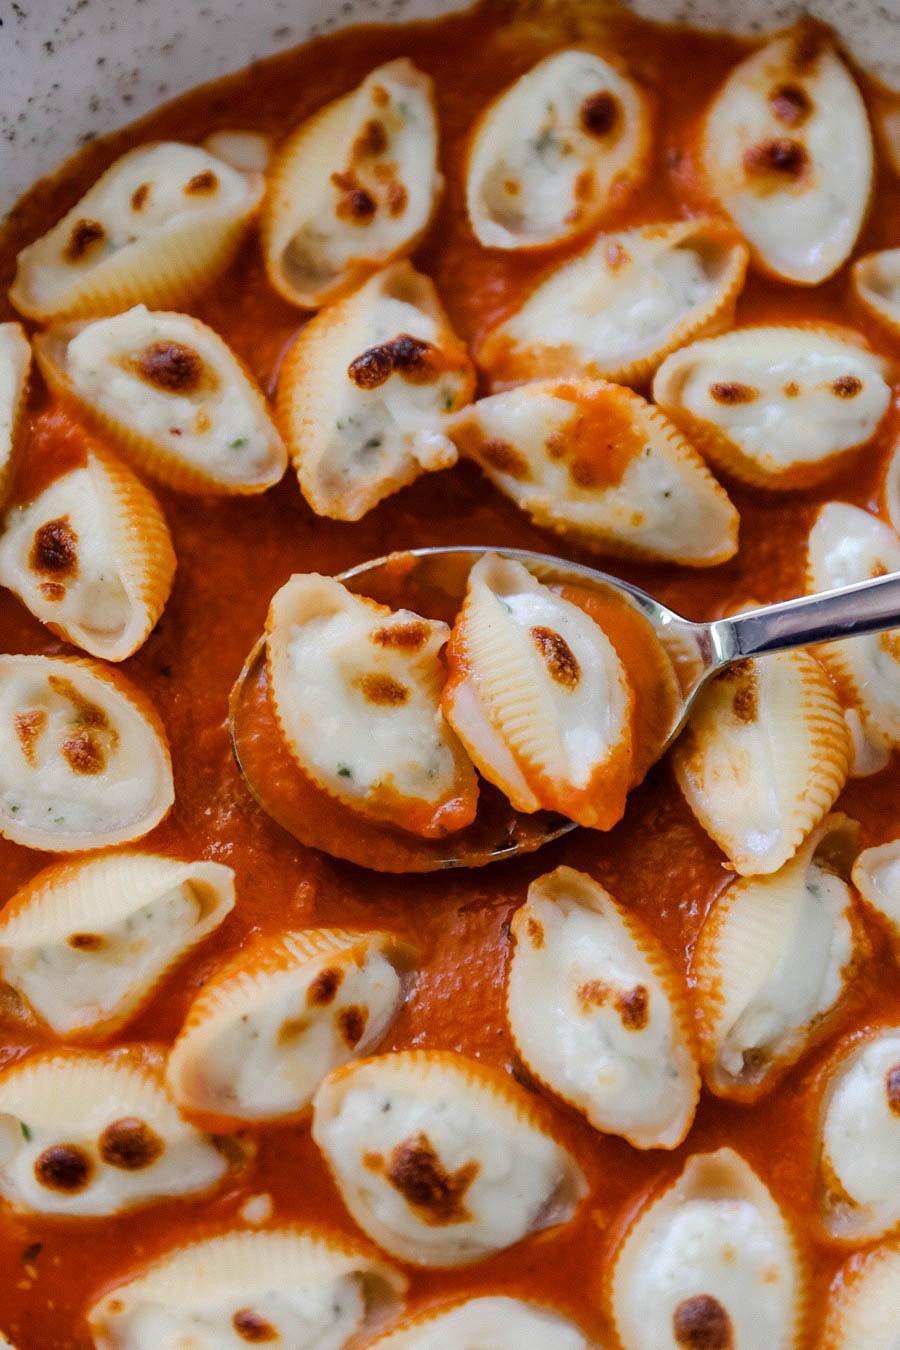
If you've ever been in the Southern U.S. States, you know that fried green tomatoes are huge. Every time I'm in Georgia or South Carolina I see them on every single menu. During a road trip to Florida, we stayed in a random hotel overnight to break up the drive and ordered takeout from a nearby place that had this awesome BLT Salad that I fell in love with and had to recreate to share with you guys! It was served with ranch dressing but I opted to add goat cheese instead. You could go either way!  What you need:
What to do:
If you missed it, I found out this year that despite my life-long seafood allergy, I can eat mollusks. Which means I can eat clams, mussels, scallops, oysters, calamari and octopus!!! I always felt like I was missing out on the seafood pasta dishes my family would order at Italian restaurants on vacation and now that I can eat some seafood, I've been ordering it like crazy and of course, I had to try and make it at home too. Most of the times I see this kind of dish on the menu at a restaurant, there's almost always shrimp in it - so that's pretty much the only thing missing from this dish as far as what's "typical." (Sadly, I can't have shrimp, crab or lobster.) Cooking time is a little more than my usual recipes since you have to pay close attention to preparing the scallops separately - but it's so worth it to get that tasty sear. If you're going to roast your own tomatoes and garlic like I suggest, that takes time too. You could use jarred marinara sauce but I truly think fresh is best for this one. I'd say the whole thing start to finish can be done in around 45 minutes. Like the rest of my recipes, this will serve 2 people. 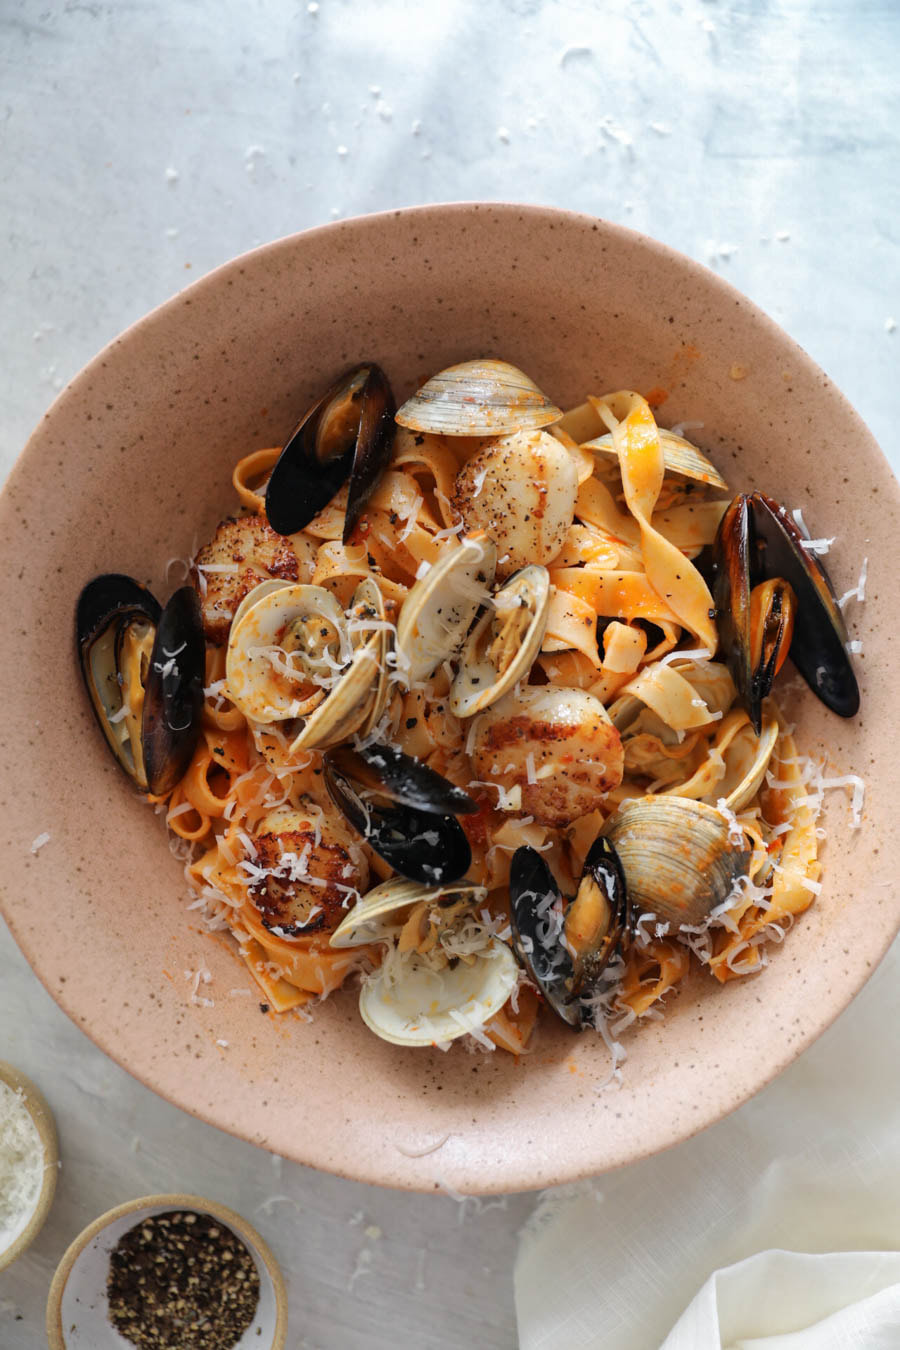 What you need:
What to do:
I am over the freaking moon. I cannot believe how good these little treats are!! First and foremost - there are no peanuts or tree nuts. I used my girl @AvoKween's vanilla granola butter which is honestly the best thing a person with a nut allergy could ever ask for. It can replace almost all nut butters in most recipes and it's freaking delicious. To firm up the consistency in order to make the 'caramel' part of the twix cup, I added pureed dates to the granola butter which helped hold the middle layer up a bit better than if I were to just use the melty granola butter. So, these granola butter 'twix' cups are naturally sweetened with a lil maple syrup + they are gluten free, grain free, dairy free and peanut allergy friendly. Amazing. Also, I almost ALWAYS forget to add flakey sea salt to any chocolate that I melt and put on things so if you're less forgetful than me I would def add some right before you stick them in the fridge to cool. 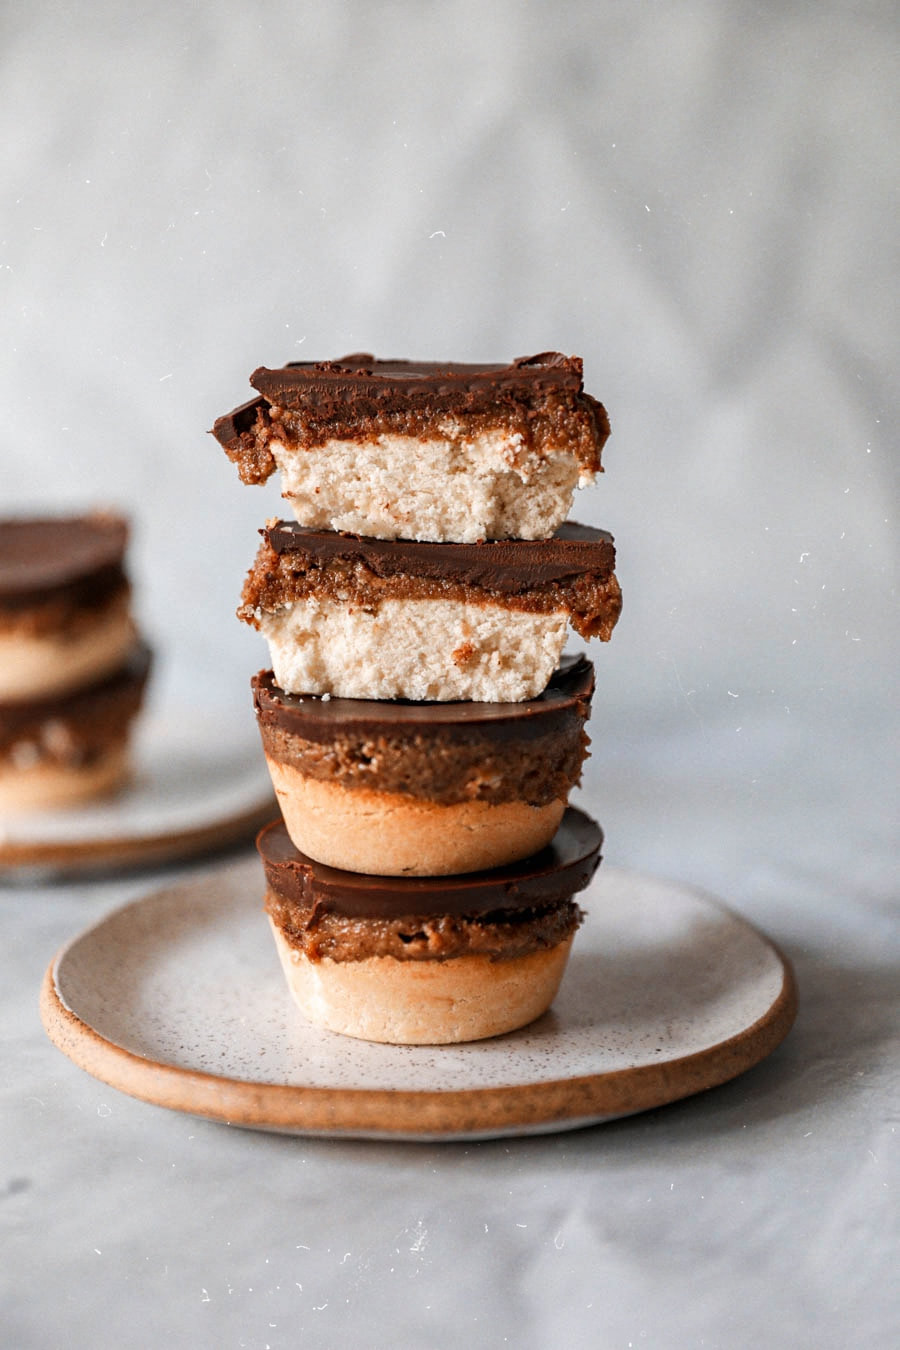
Peanut and tree nut free pesto!! It's also packed with all the green things and that's always a plus! I used arugula, spinach, basil, garlic, lemon juice and extra virgin olive oil. The whole arugula leaves you see mixed in there are coated in a super simple vinaigrette recipe so there's an extra little vinegar kick in the dish from the white wine vinegar I used too!! 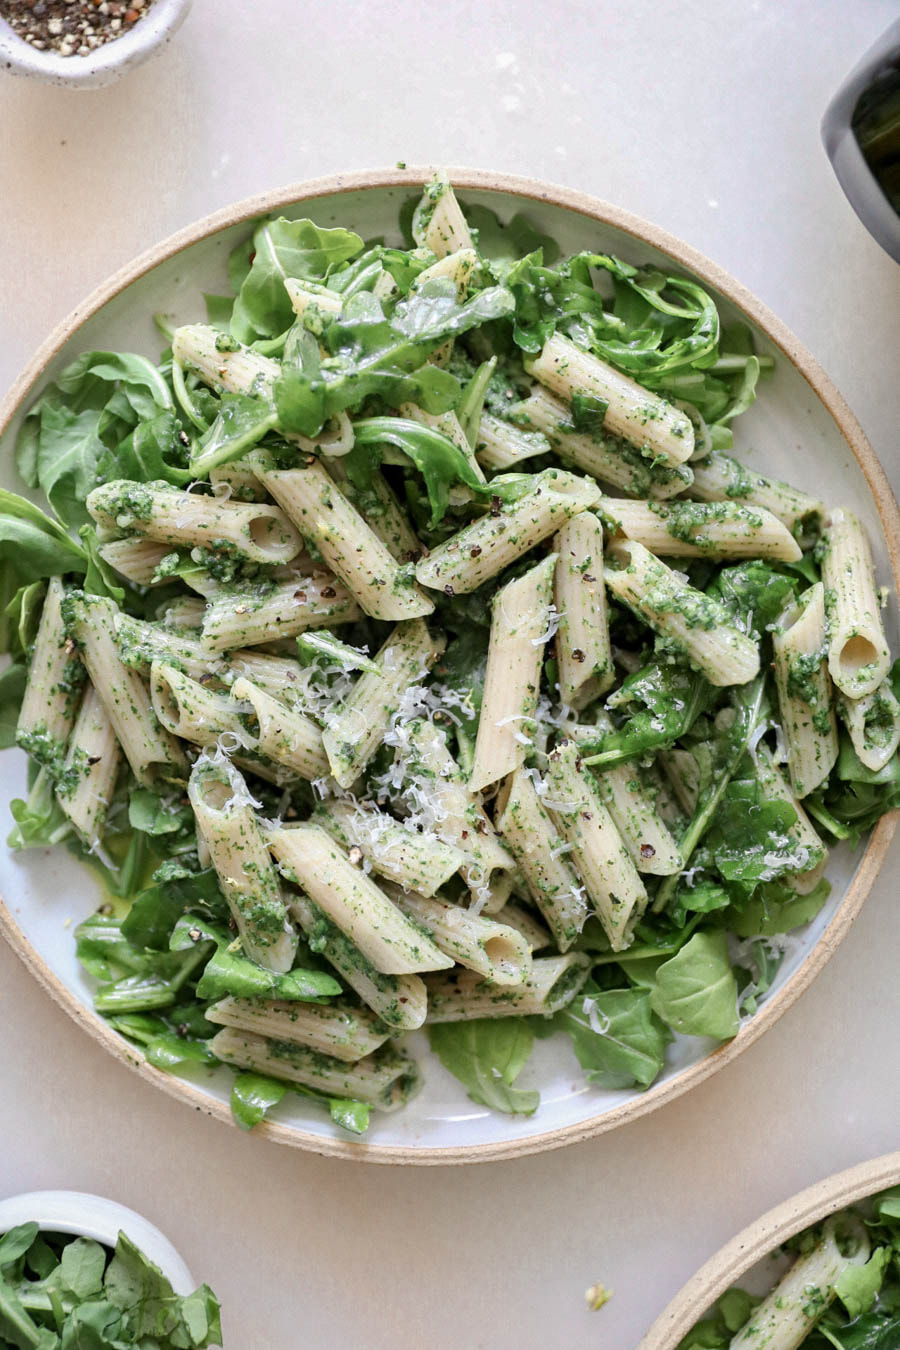
UGH. Vodka sauce. This is by far my most popular recipe and it's suuuuper easy to make and pretty much foolproof so that's why I think everyone loves it so much. I started making this a few years ago and I think my favorite part about the recipe I originally developed is that there are several different ways to customize it depending on whatever I'm in the mood for. Sometimes I like it spicy, sometimes I like it to be less cream-heavy, sometimes I'm avoiding dairy in general so I eat it a vegan version of it!! So I'll list below the different ways that I love to make it and let you decide which version you're feeling.
|
ConnectIf you’d like to use my photos & recipes, please ask or link back to this site. Thank You.
Calendar
November 2023
|
 RSS Feed