|
There are SO many different variations of chili oil noodles. I personally love the flavor of the spicy oil mixed in with garlic and butter and a touch of soy sauce, but I make different versions all the time depending on what I have at home or what I'm in the mood for. Sometimes I add Chinese black vinegar or rice vinegar to cut the fat from the butter and it's the best umami flavor bomb ever. Parmesan cheese is also amazing as a topping..same with crispy garlic or a fried egg!! One more thing. Cooking the noodles in chicken broth or adding a splash of broth into the mixture is also a major upgrade for adding even more flavor. 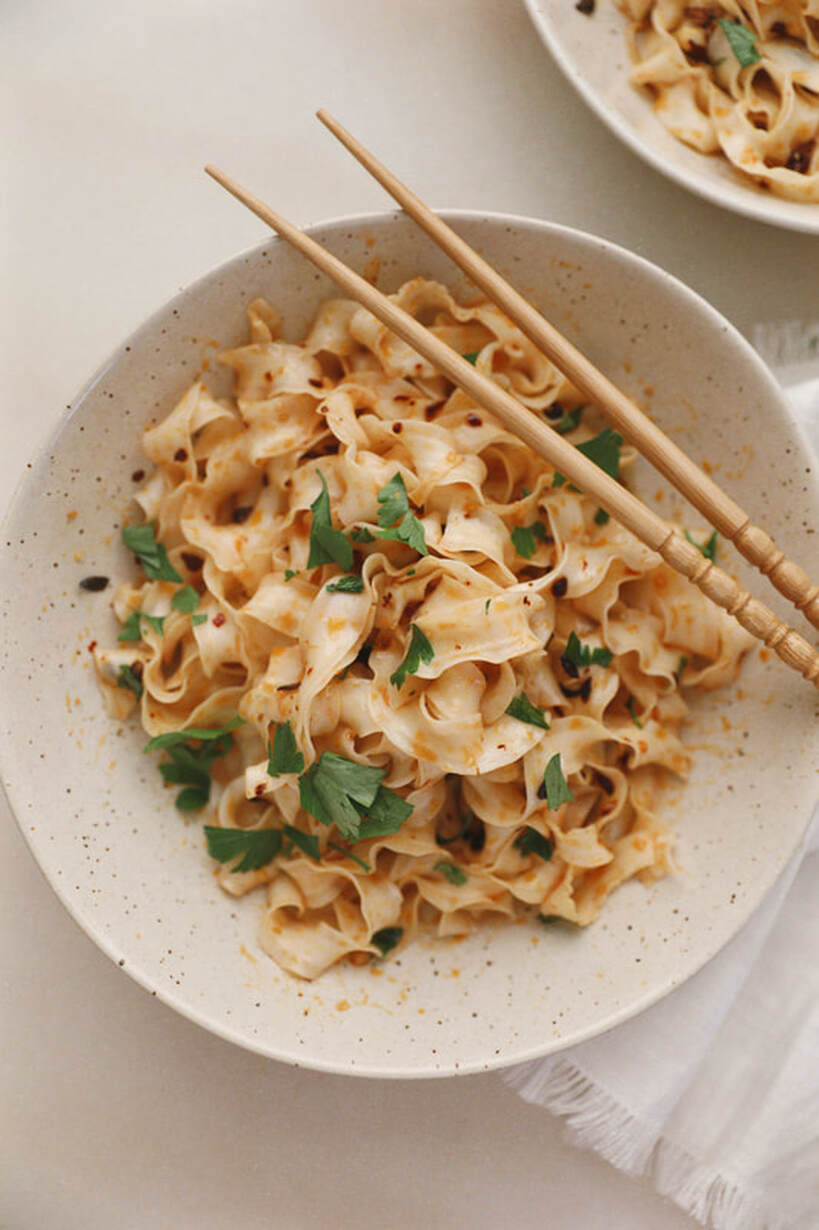 What you need:
What to do:
5 Comments
French onion dip x pasta salad. YEAAAAAH BABY. I was a little worried about it being to thick and creamy so I decided to thin out the dressing with white wine vinegar and a secret ingredient, soy sauce. The thin texture of these liquids helped a ton!! If you want your sauce to be even more thin, you could add in some cooled off pasta water 1 tbsp at a time until it reaches desired texture. 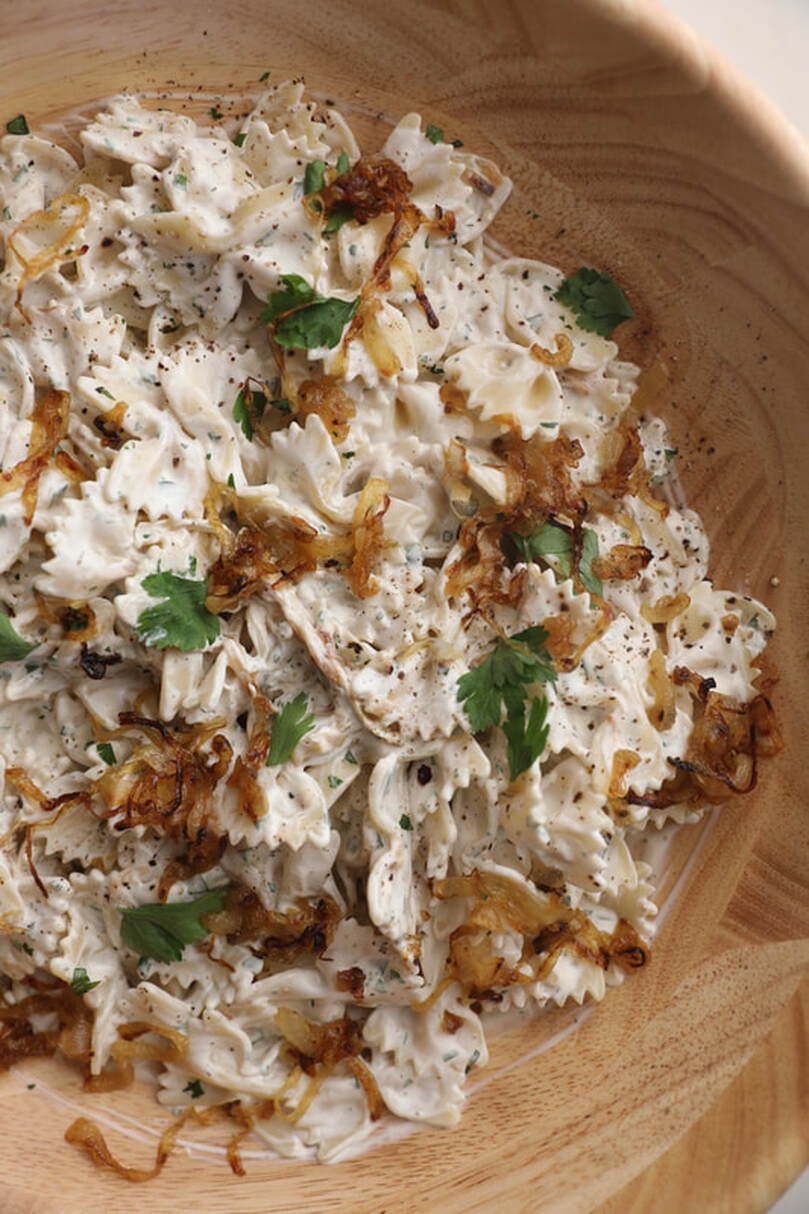 What you need:
What to do:
This is a good one!!! Think caprese salad vibes, but warm and with pasta!! I know no one likes to read past the first line of a recipe intro (I get it, because, same) but I have some vital info for this recipe so pay attention and I'll keep it short and sweet!! The burrata pieces that go into the pasta will stiffen up if it's too hot. So be sure to remove the pan from heat before you mix them in. You're going to want to add them to WARM pasta and sauce, not scalding hot pasta and sauce that is still cooking. Some might like the taste of a firmed up mozz, but I don't so just wanted to share this tip!! 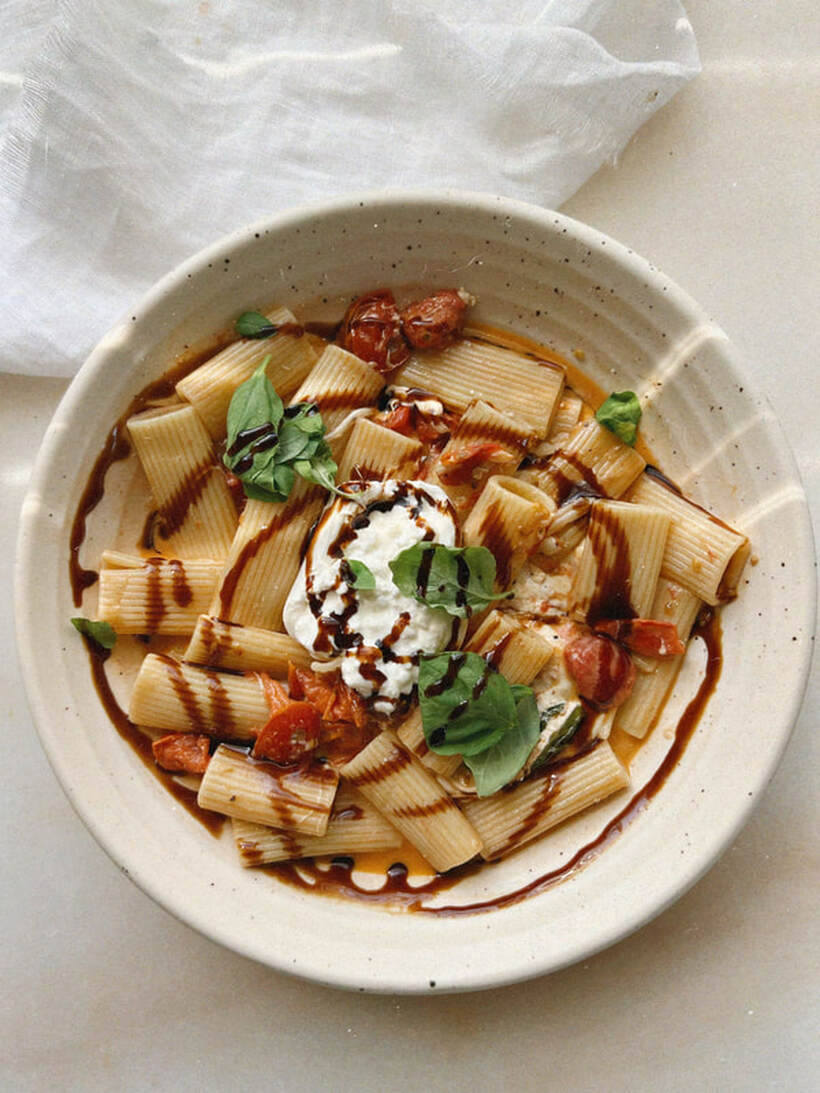 What you need:
What to do:
When I was in high school I was OBSESSED with the roasted garlic chicken pasta from The Cheesecake Factory lol. NGL, that's where I got the inspo for this bad boy. I think the restaurant version has mushrooms and peas in it but I left this one plain jane so that it's easy to customize! There will be leftover butter, the recipe is intended to make a batch of it. Use desired amount (or the amount I suggest for this quantity of pasta!) and then save the rest. Store it in the fridge for up to a week or store it in the freezer for even longer if you want flavored butter bombs at any time for future pasta dishes, grilled cheeses or amazinggggg toast! Since you have to make garlic confit for this recipe, I wanted to share a little more about that! My roasted garlic butter uses the garlic, but not the oil. You can store both together or separately (in air-tight containers) in the fridge for a couple of weeks according to google, lol. There are plenty of ways to use the leftover oil, I use it just regular olive oil for things like eggs, to crisp bread or as an oil garnish to top off a soup or pasta dish. 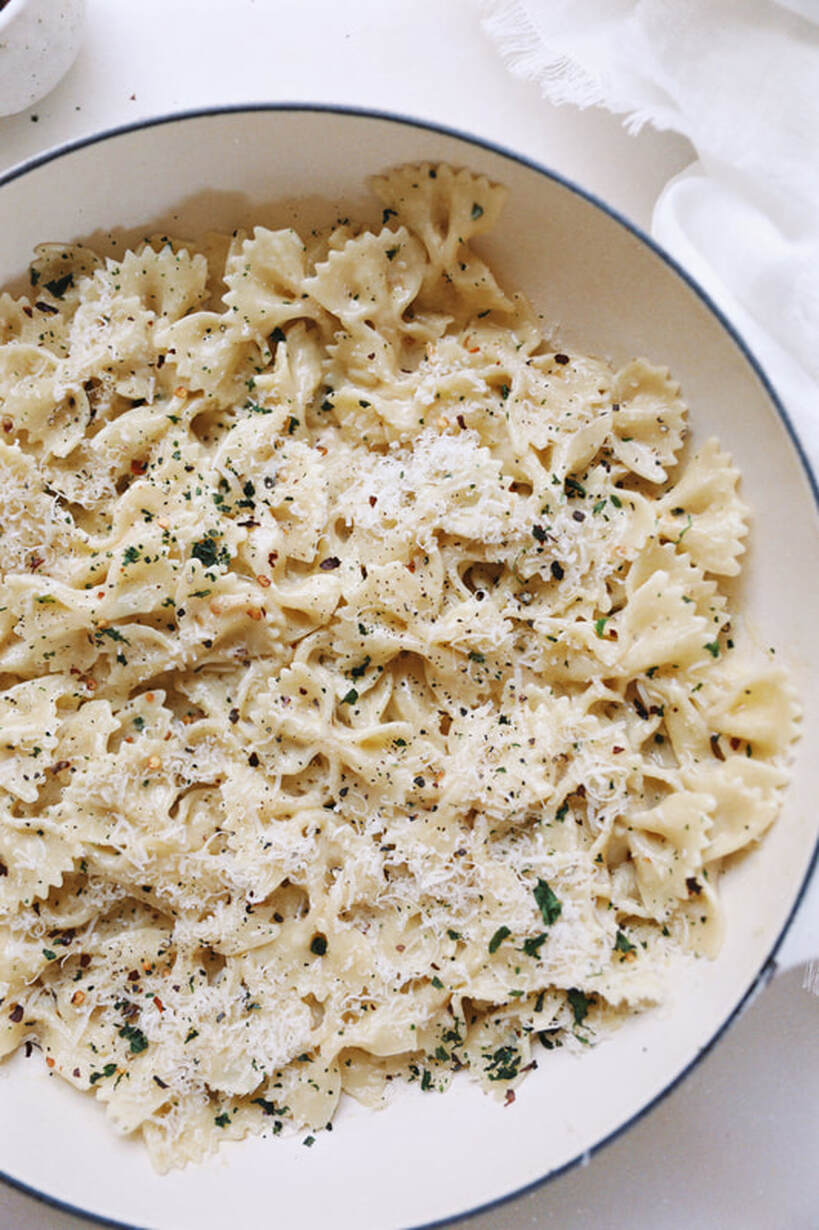 What you need:
What to do:
This one is a giant summertime hug in a bowl!! I love eating squash all year round but especially in the summer when they taste super fresh!! To make the breadcrumbs at home: rip up a few slices of your favorite bread (I did a demi baguette of ciabatta) and place them in a food processor. Blend until crumb size. Mix with 2 tbsp olive oil, 1/4 tsp garlic powder and a pinch of salt and pepper. Cook the bread crumbs in a skillet on medium heat until toasted and crispy - about 10 minutes. Be sure to stir them every few minutes so that they cook evenly and don't burn. 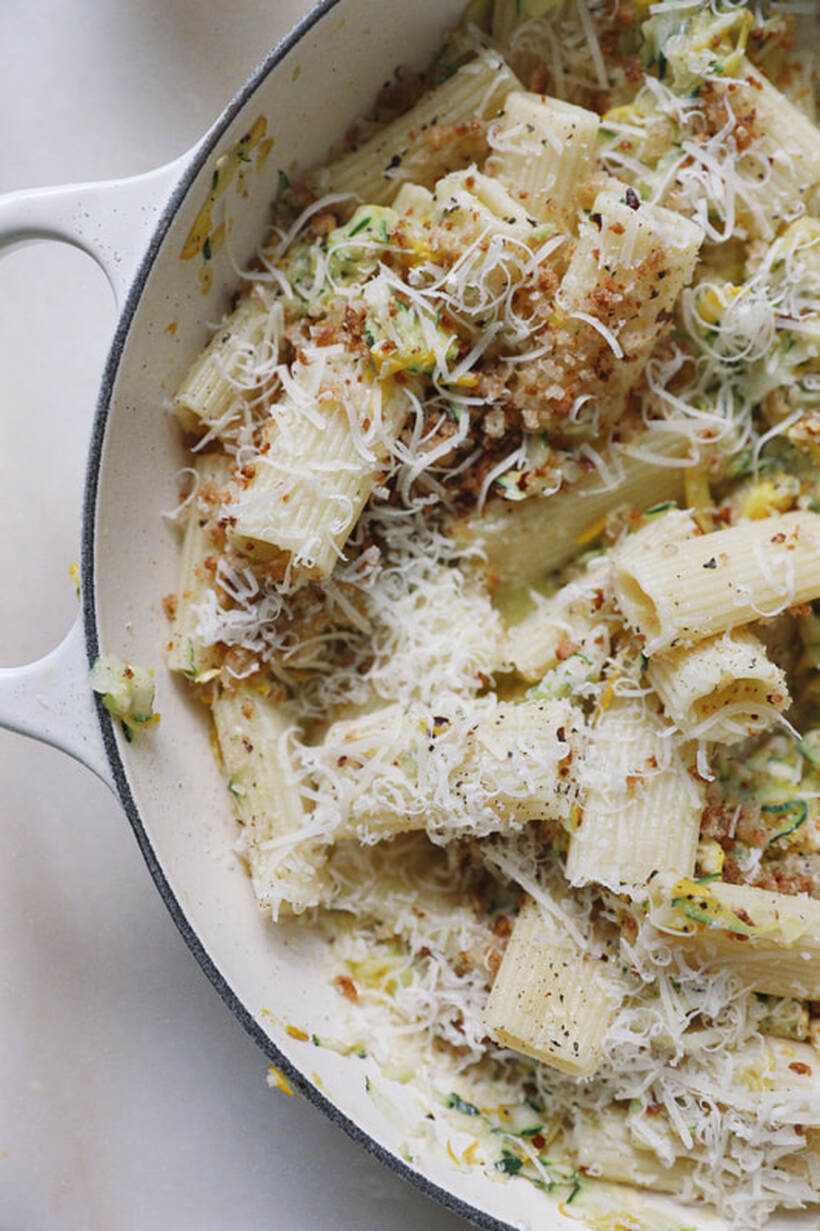 What you need:
What to do:
After spending a ton of time traveling in the southern states, I became a HUGE fan of fried green tomatoes. I've had everything from fried green tomato BLT salads to fried green tomato eggs benedict. I've been on such a pasta salad kick lately and really wanted to come up with a way to make the flavors work with pasta and boooom. (I also love a good caprese salad so I added in some elements of that as well - basil, fresh mozz, balsamic!) The tomatoes aren't actually fried (so much less work - and healthier!) but the addition of homemade crispy breadcrumbs mixed into every bite makes it feel like they are fried and creates that crispy texture! You can buy breadcrumbs, but I highly suggest making your own! Throw a few slices of your fave bread into a processor and toast them in olive oil on the stovetop until golden brown and crispy! Worth every second. 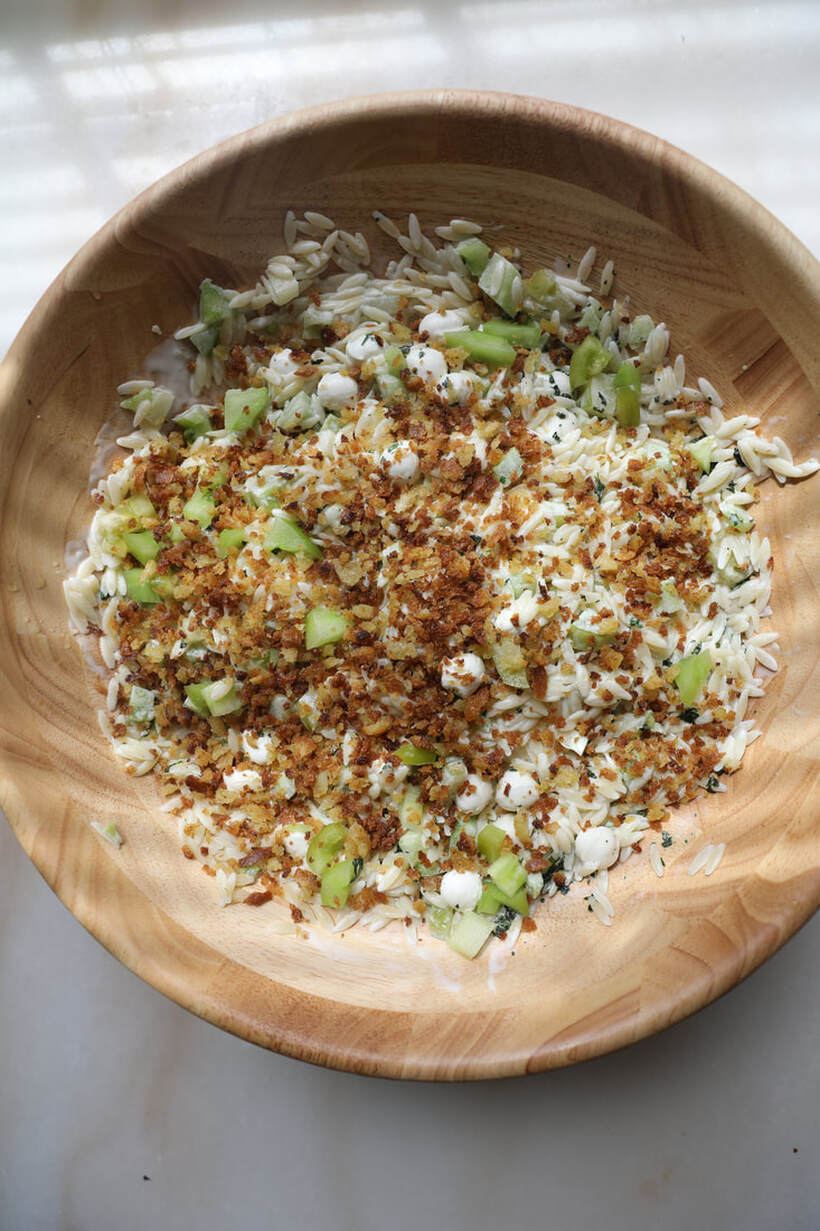 What you need:
What to do:
Hi, okay so this recipe is insane. Before all you food purists come at me - this dish is a combination of my 10 Min Mac & Cheese recipe AND it has elements of cacio e pepe in it to make the ultimate cheesy pasta hybrid !! If you don't like it, don't make it lol. I used pecorino romano cheese, toasted freshly-cracked black peppercorns, shredded mozzarella (instead of cheddar to keep the sauce white) and then heavy cream. Lots of people make mac and cheese different ways (with a roux, without a roux) but I personally think heavy cream is the ultimate creamy cheesy pasta sauce hero ingredient so that's the style I prefer. 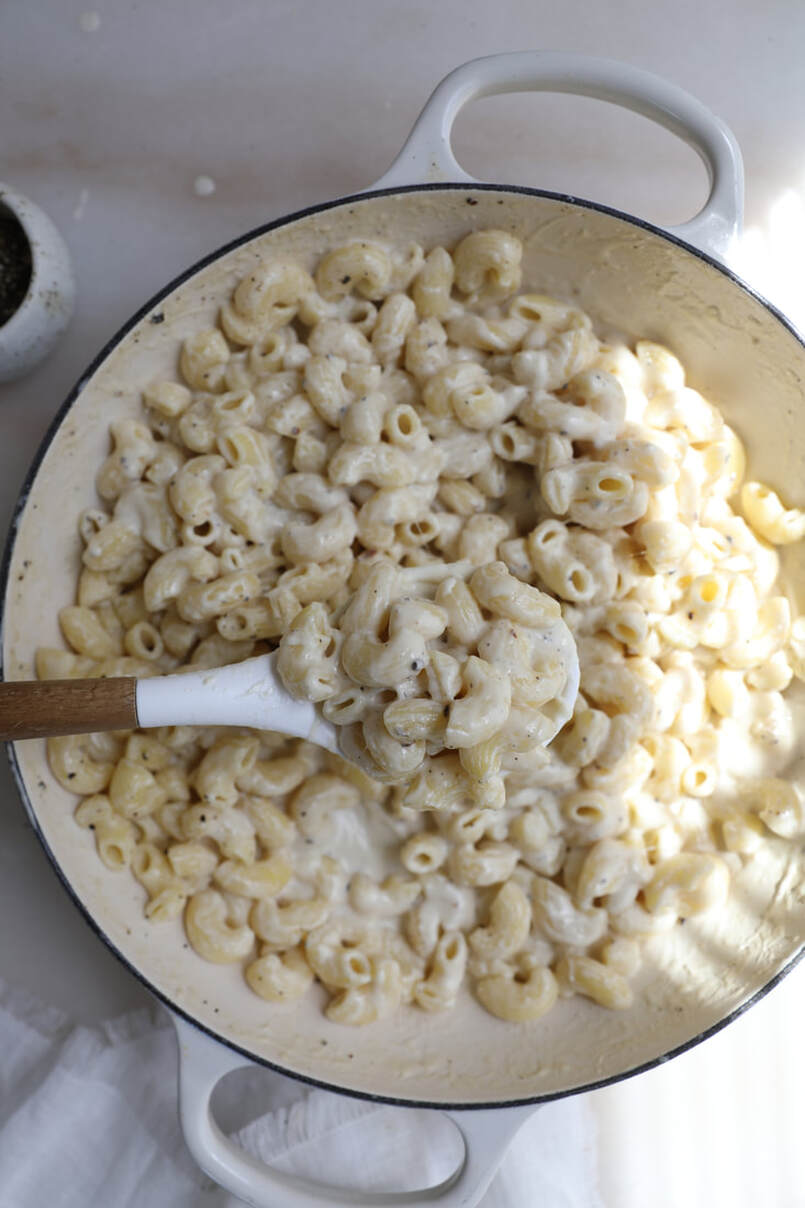 What you need:
What to do:
My first cold noodle salad!! I've been seeing these for years and always thought they looked so good despite the fact that most recipes for this dish contain nuts and sesame ingredients!! I also do NOT like soba noodles for some reason and it seems like a lot of cold noodles dishes are made with them. This version is very allergy friendly to those who can't have nuts or sesame! And also gluten!! I used brown rice ramen. PLZ take note that brown rice noodles don't refrigerate well so I usually get them super cool with an ice cold water rinse and then I eat the noodle salad immediately after assembly. 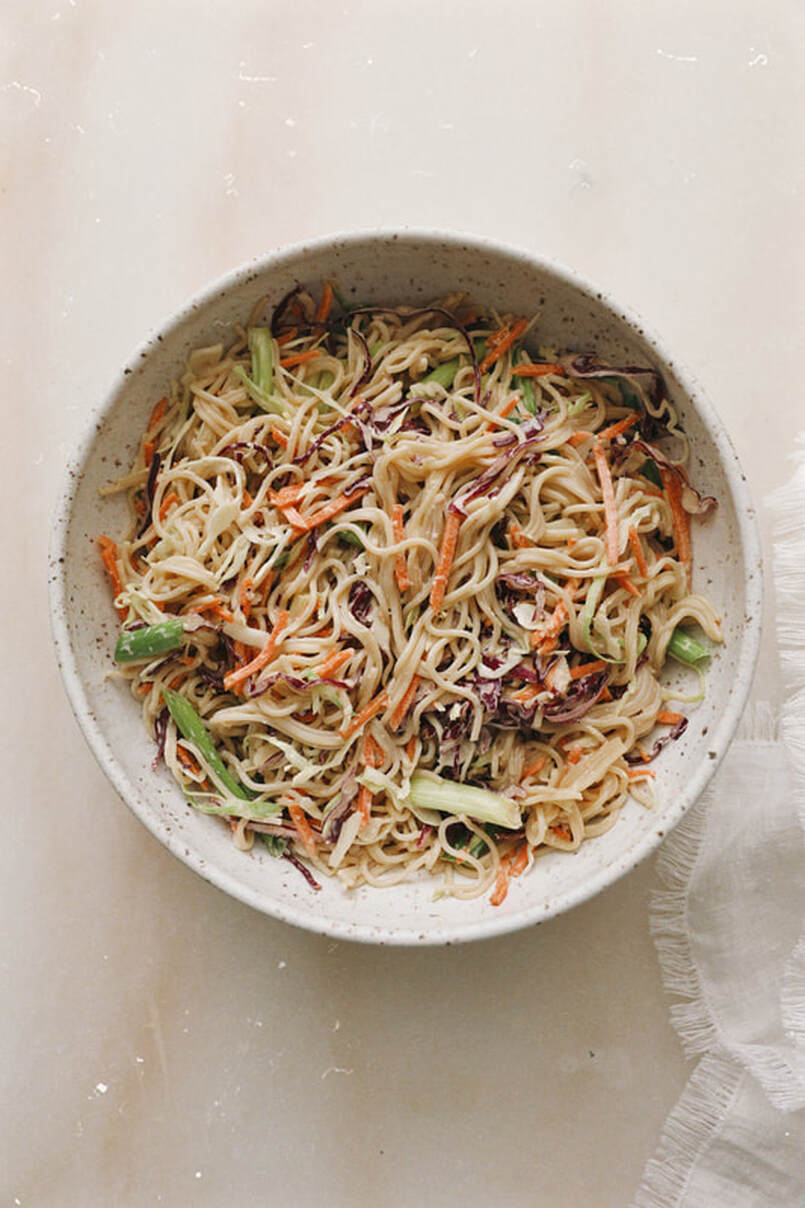 What you need:
What to do:
I LOVE noodles, it's truly no secret. These particular noodles that I used in this recipe are called knife cut noodles and I buy them from my local Chinese grocery store!! You can use any kind of noodle, but I love the wavy edges and the chewy texture of knife cut noodles the best! This dish is inspired by Chinese scallion noodles - I've seen the dish made a ton of different ways on the internet and even at local restaurants (LJ Shanghai has the BEST scallion noodles if you are a Clevelander) but this is how I like to make them at home. I also have allergies to sesame and peanut so you won't find any of that in any of my home cooking!! 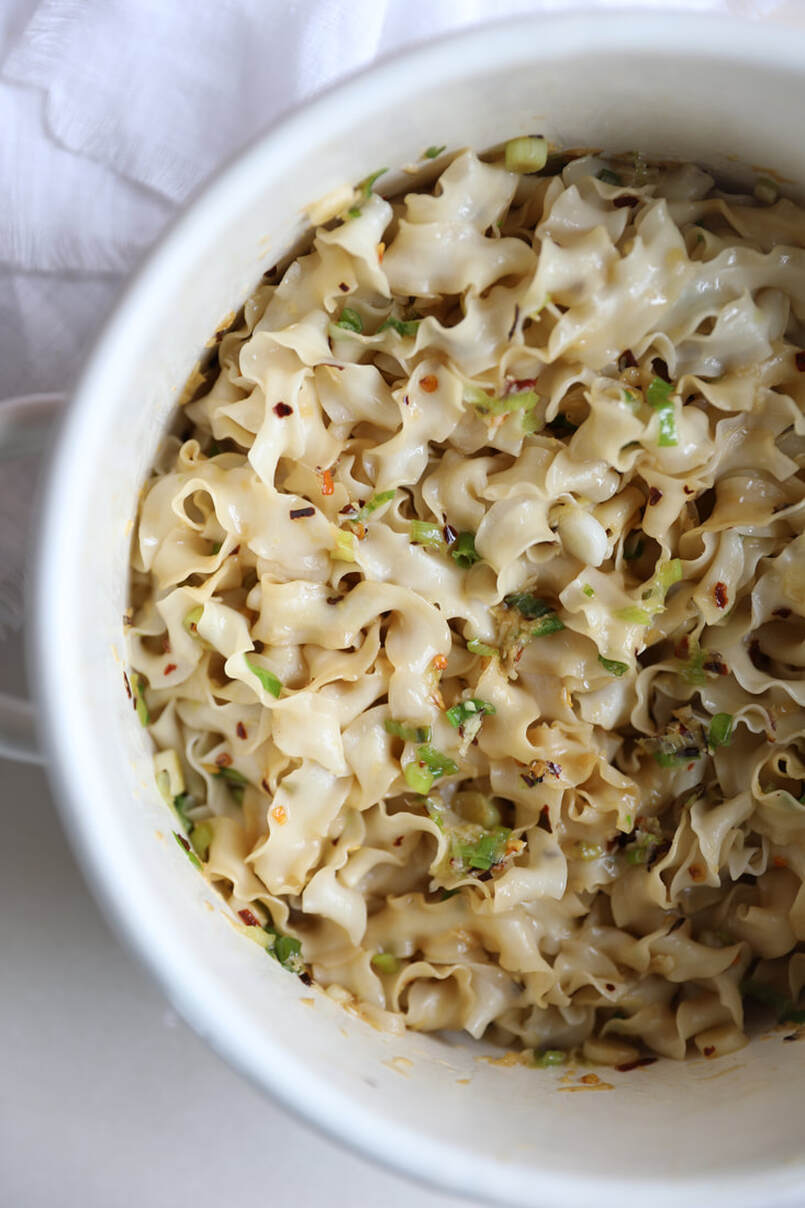 What you need:
What to do:
OKAY, so there are two ways I love to use this butter. It elevates every single dish you use it in...the roasted garlic and the chiles take everything to the next level!! ON BREAD (pictured below) The best freaking cheesy garlic bread you will ever eat. I promise. My favorite way to make cheesy garlic bread is to use this butter on ciabatta. I usually coat the ciabatta with a generous amount of butter and top with thick shredded mozzarella cheese before toasting in the oven. You can either stick them under the broiler setting until the mozz gets nice and melty or toast them at 400 degrees F for 10 minutes until golden. ON PASTA I love using this in my drunken buttered noodle recipe. Think white wine, parmesan, chiles, butter, roasted garlic!! Ah it's so good. Tap here to view my drunken buttered noodle recipe. It pairs so well with everything, especially seafood or roasted cherry tomatoes. 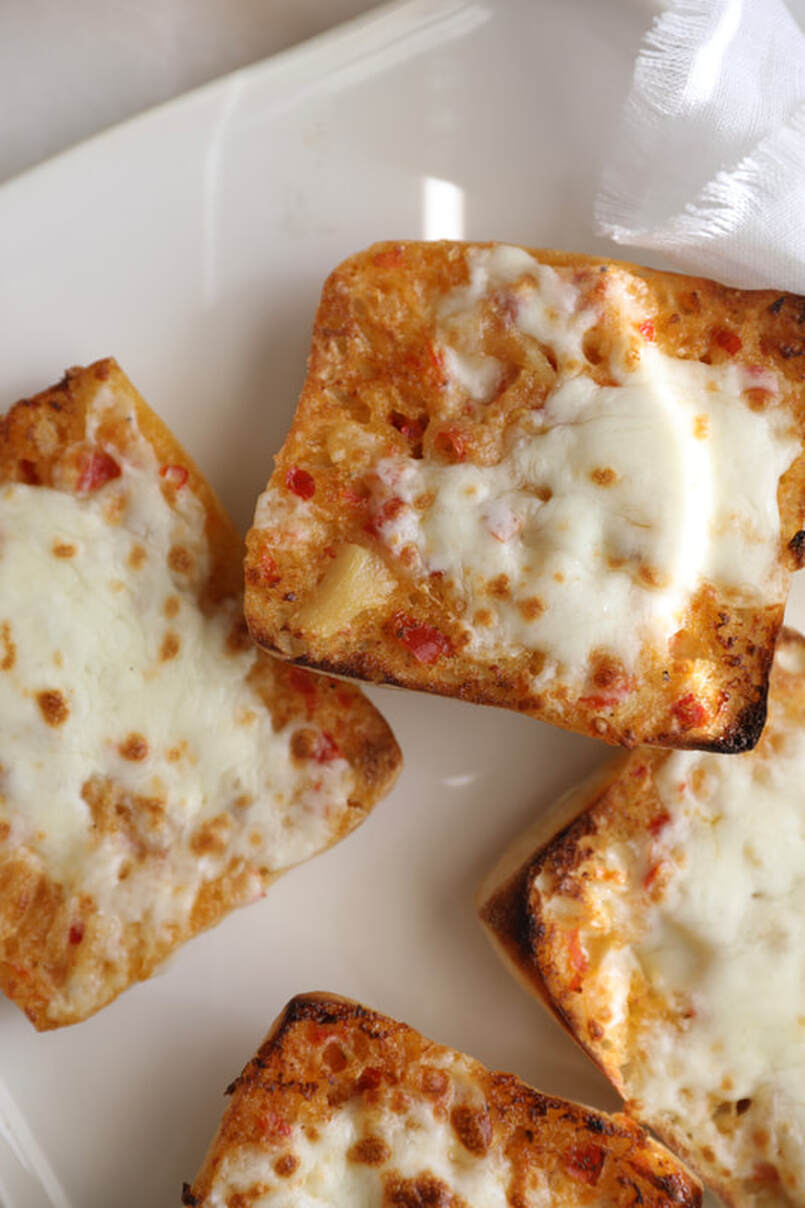 What you need:
What to do:
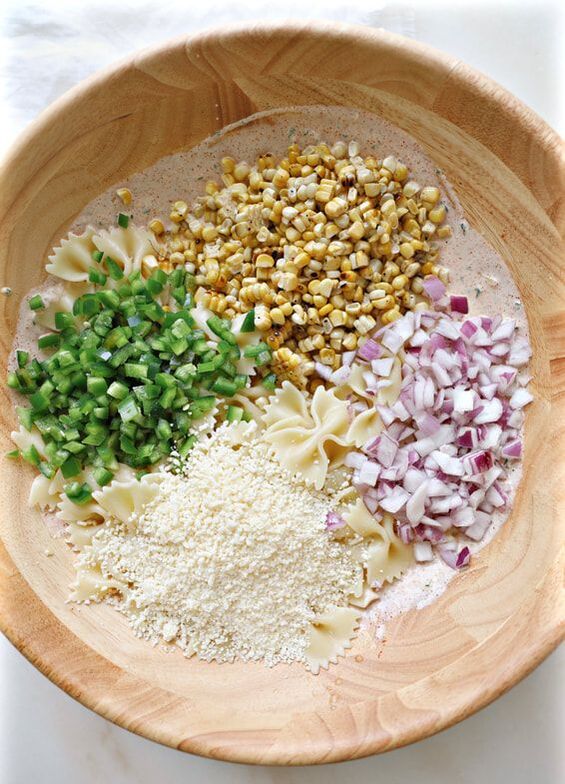
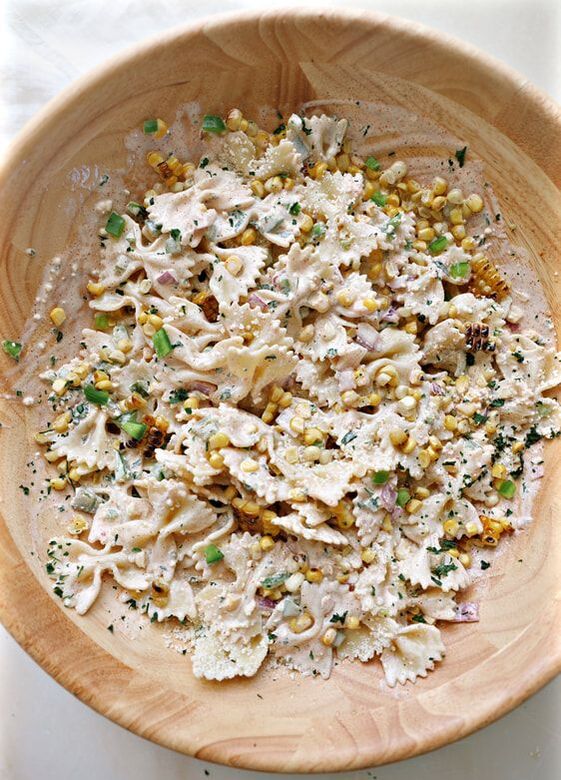
I love the flavors of Mexican elote so I used some components of it (mayo, lime, chili powder, cotija) to make a pasta salad!! I love using inspiration from different dishes that I love to eat and figuring out a way to combine those flavors with pasta. :) The recipe makes enough for 6 side dish servings, if you're planning on making for a large gathering you could definitely double it. It does refrigerate well, so you can def make it a day ahead of time. I suggest bringing it back to life with an additional 1/4 cup of mayo + a squirt of fresh lime juice before serving after chilling for a longer period of time.
What you need:
What to do:
I've been seeing a grinder sandwich recipe all over TikTok the last few weeks and I basically used the "salad" component of the sandwich as inspiration for this perfect summer pasta salad. I also added in diced salami and turkey deli meat, so it does in-fact taste SO much like a delicious deli sub, but in pasta salad form!!! Obviously feel free to customize but I wouldn't change the red wine vinegar and mayo base and I would def make sure to use iceberg lettuce!! My favorite part besides the dressing and the pasta would definitely be the turkey! SO weird because I don't even eat deli meat, like ever... but it works SO well here. Recipe makes enough for 4-5 sides of pasta salad!! 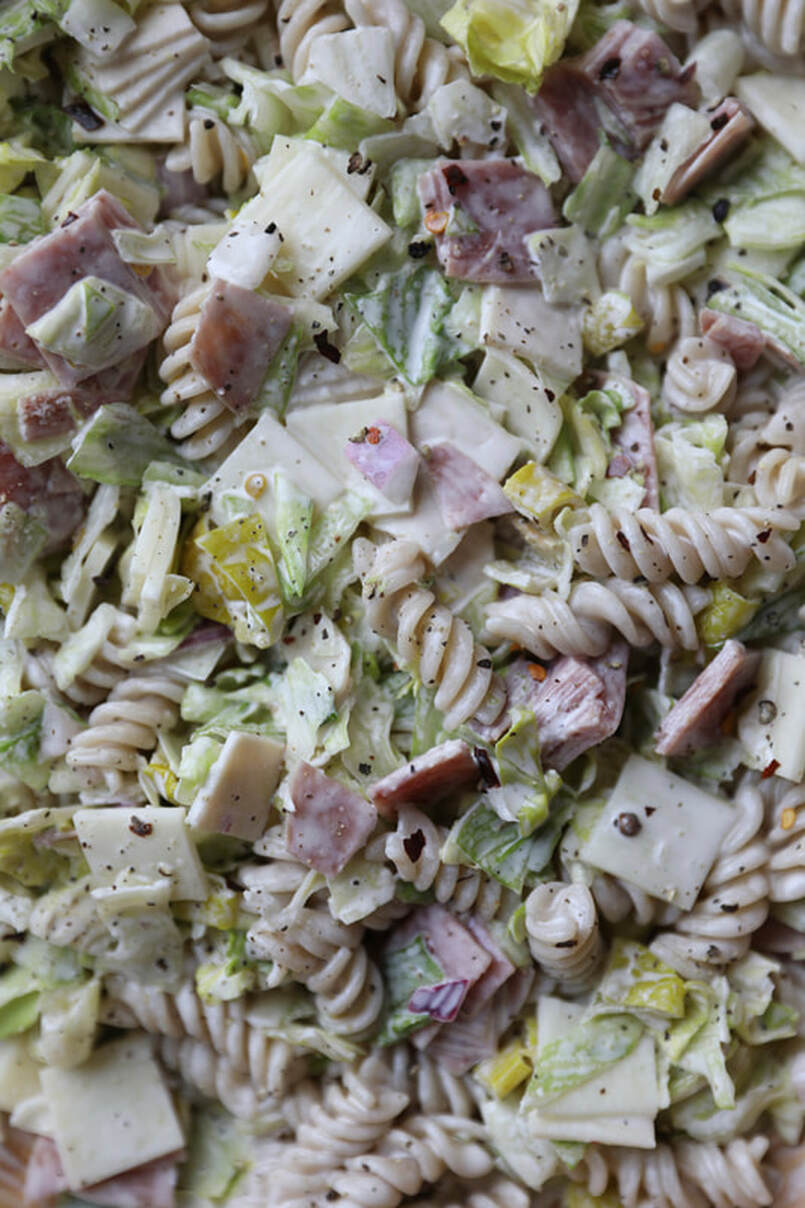 What you need:
What to do:
It's no surprise that my son's favorite food is pasta. At first I gave him a bite of my plain buttered stelline and then after realizing he loved it, I got sneaky with it and added a whole bunch of spinach. It's really easy to sneak half an avocado into the sauce too, but I usually am eating it with him and I'm allergic to avocados so most times I just mash a little bit of one up and stir it into his bowl! 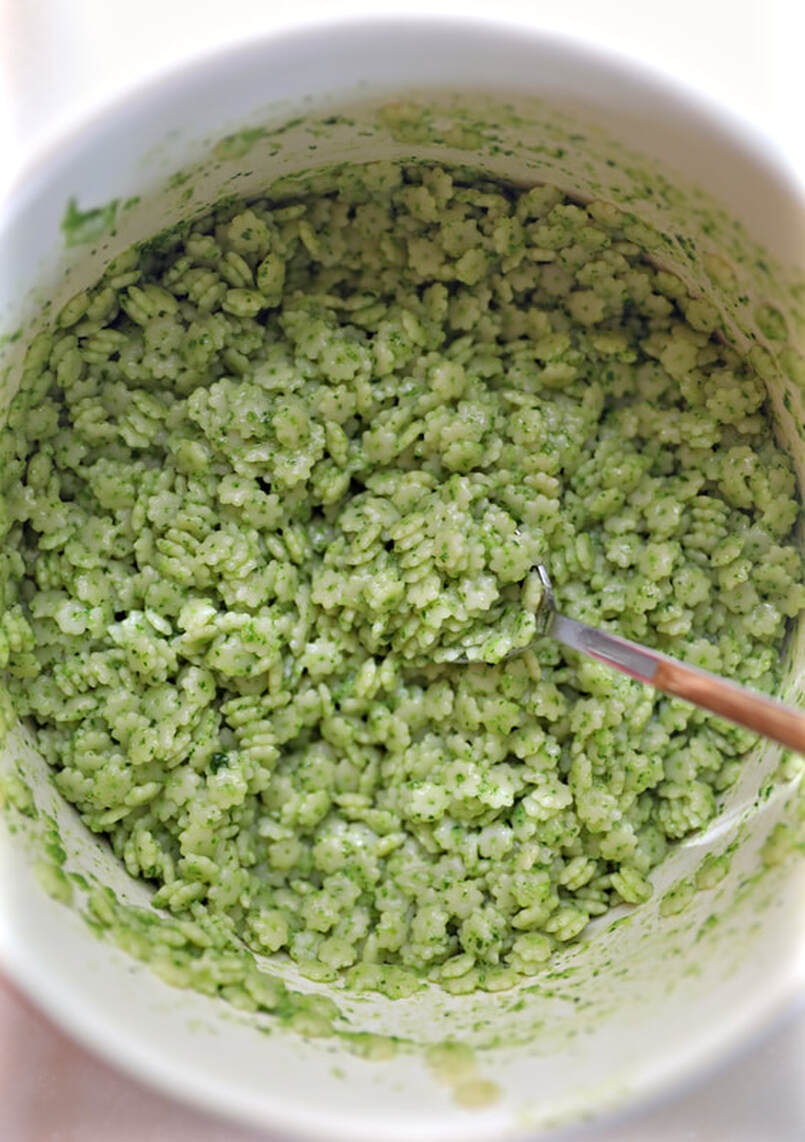 What you need:
What to do:
This is one of the better tasting versions of "pesto" I've ever tasted. It's nut-free and very light and silky tasting! Imagine a hybrid of buttered noodles and pesto pasta. LITERALLY SO EASY TOO! There are only 3 recipe steps, lol. A few important notes about the recipe:
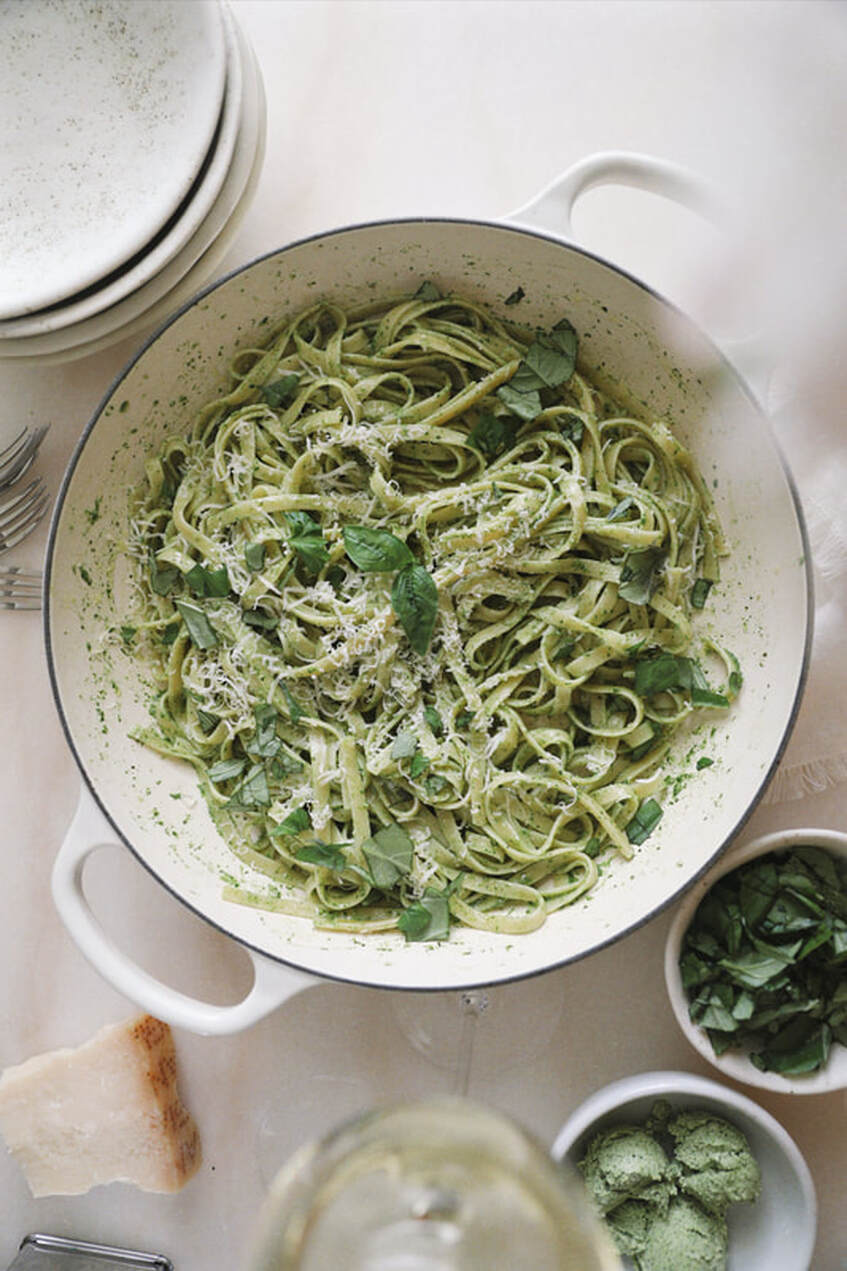 What you need:
What to do:
Okay SOOO, I've been making a lot of chicken with sazon seasoning lately (a staple in Latin-American cooking) and I love the flavor. It's like the most perfect tasting seasoned salt. The other day, I had some chicken bits and seasoning left over in a skillet after making chicken and I dropped some buttered pasta into the skillet as I was transferring it to a bowl and a lightbulb went off in my head!! Love when recipe creations are happy accidents! I kept things pretty simple but I think this dish would be REALLY good with mushrooms and or spinach also mixed into it. Maybe bacon too?? Can you tell that I'm laying in bed writing up this recipe right now and I'm soooo hungry? Lol. If you try and and add stuff to customize, let me know how it goes! 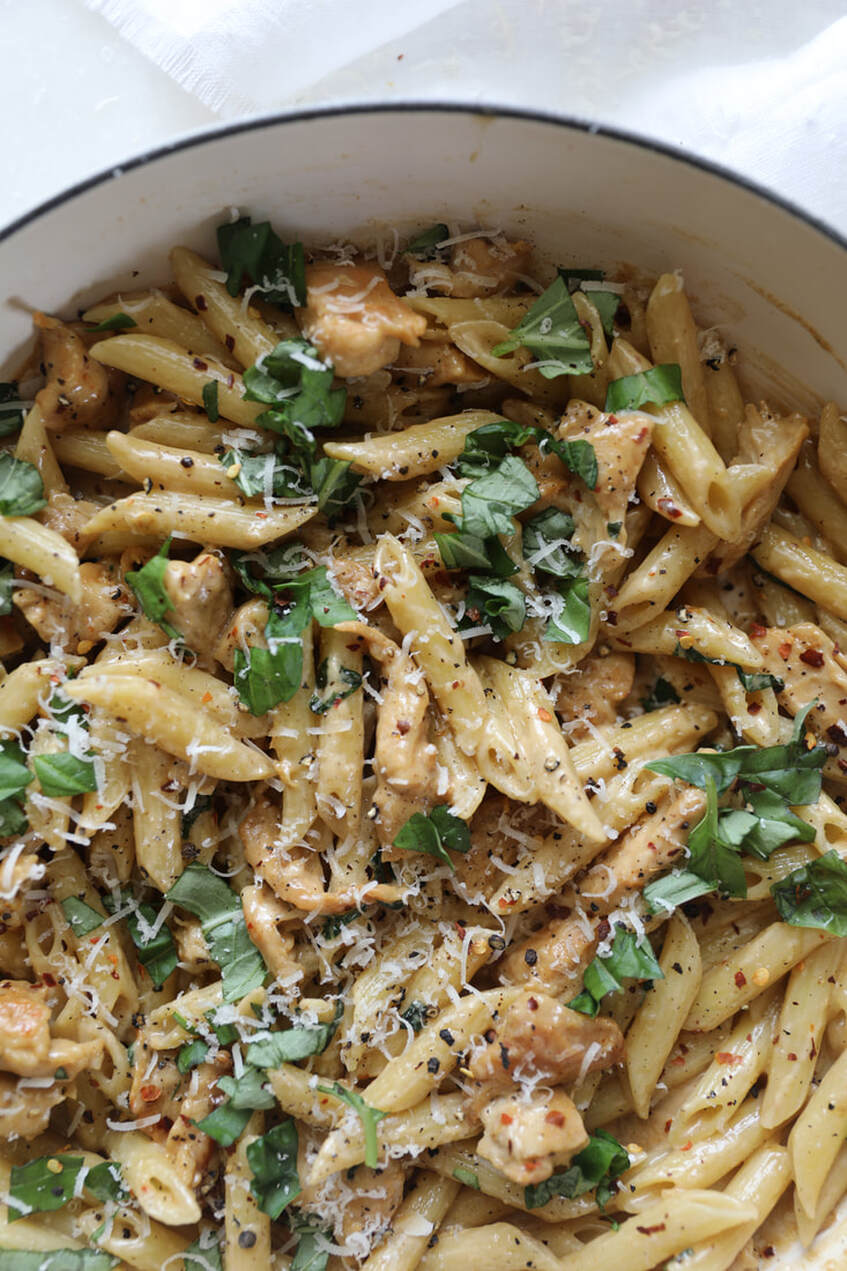 What you need:
What to do:
Saffron is THE BEST addition to a simple creamy pasta sauce. It's honestly impossible to explain the flavor but it's pretty subtle and a perfect compliment to a neutral sauce base. Have you ever heard of saffron before?? I hadn't until I saw a couple of my blogger friends shared it in their recipes a few years back! The spice originates from a flower called crocus sativus — aka "saffron crocus." After looking it up online, it seems that saffron originated in Greece, but today the spice is primarily grown in Iran, Greece, Morocco, and India. That means the saffron we have in the United States is imported!! 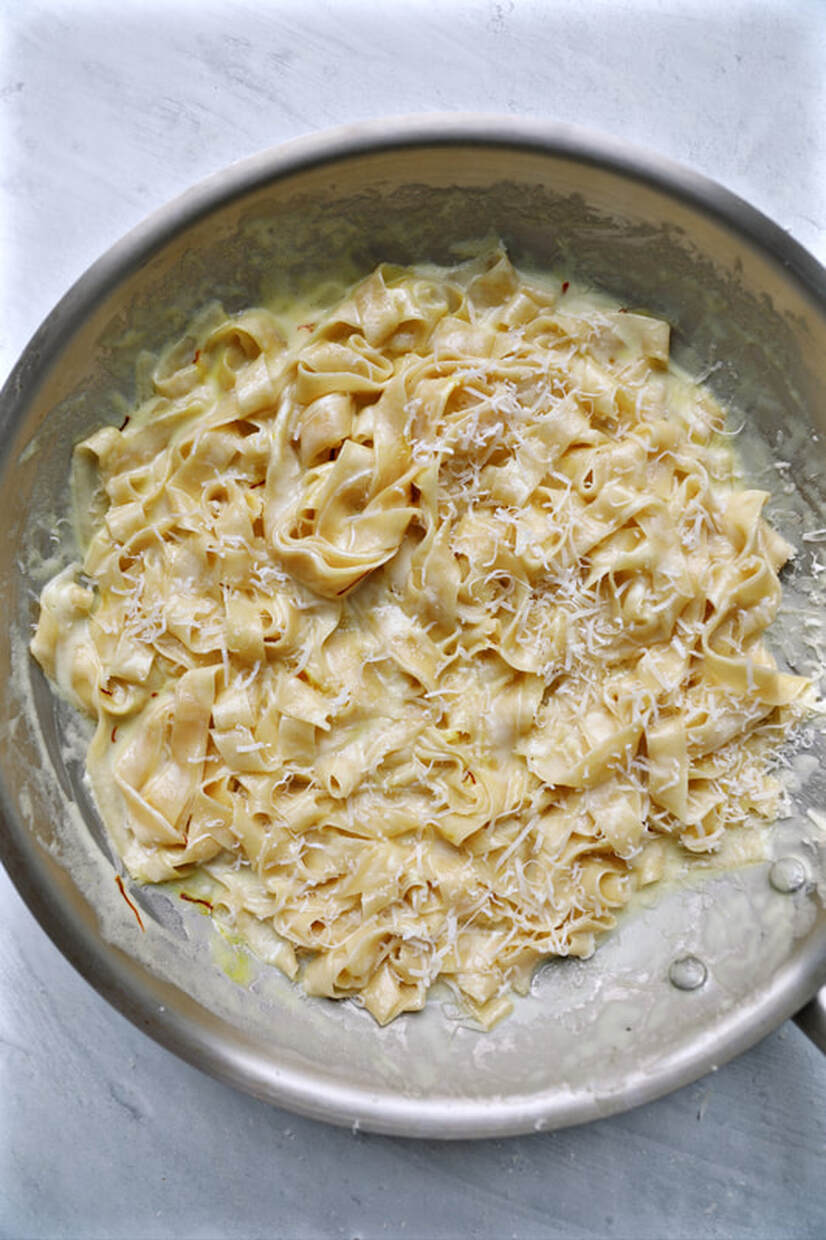 What you need:
What to do:
One pot meals have been my JAM since becoming a mom, they're just so quick and easy and I loveeee that there's not much to clean up afterwards!! So obsessed with the rustic flavor of sun-dried tomatoes right now, it's like sunshine in a bowl!! As always, the recipe makes enough for two large entrees or 3-4 smaller side dishes. 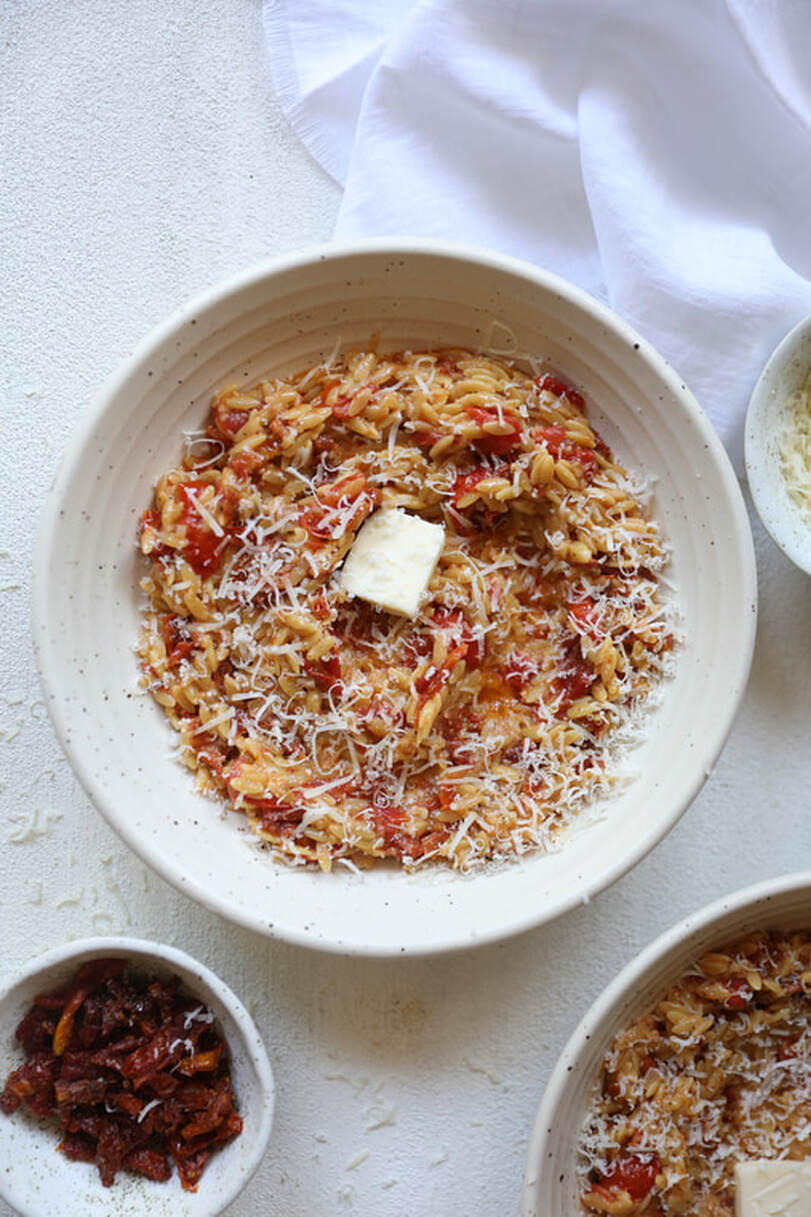 What you need:
What to do:
Had some spicy Italian sausage that I had to get rid of before it went bad and came up with the idea to make a meat sauce!! It's super simple - onions, red pepper flakes, crushed tomatoes and an optional splash of cream to make it a little pink! I like the meat in heartier sauces to be super fine, so I ended up running it through my food processor to make it super smooth and I LOVED the texture afterwards! So good and I highly recommend. 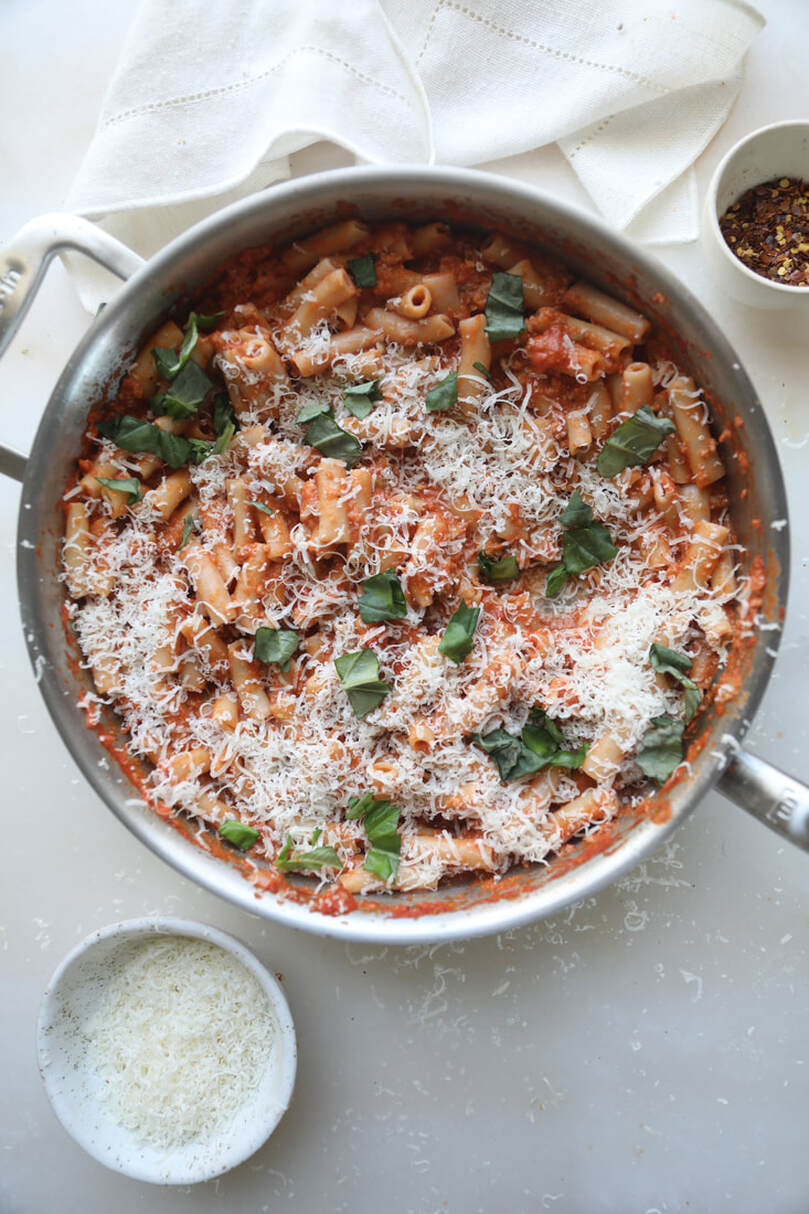 What you need:
What to do:
I've been obsessed with putting chipotle peppers into all my food lately!! They're so good mixed into pasta sauce...creamy, smokey, cheesy.. AHH!! Kept this one simple for you guys so that you could customize on your own if you want. Would be really good with spinach and then I was also thinking cilantro might be good in here, but unfortunately I am one of those people who got the "cilantro tastes like soap" genes. *At first when I made this recipe I blended 4 chipotle peppers in adobo sauce and it was WAY too spicy so I switched things up for you guys and suggest only using 2 tbsp of the adobo sauce - that way there's no need to get a blender dirty. You can freeze the leftover adobo peppers and save them for another time.. or make my copycat chipotle vinaigrette salad dressing recipe!! 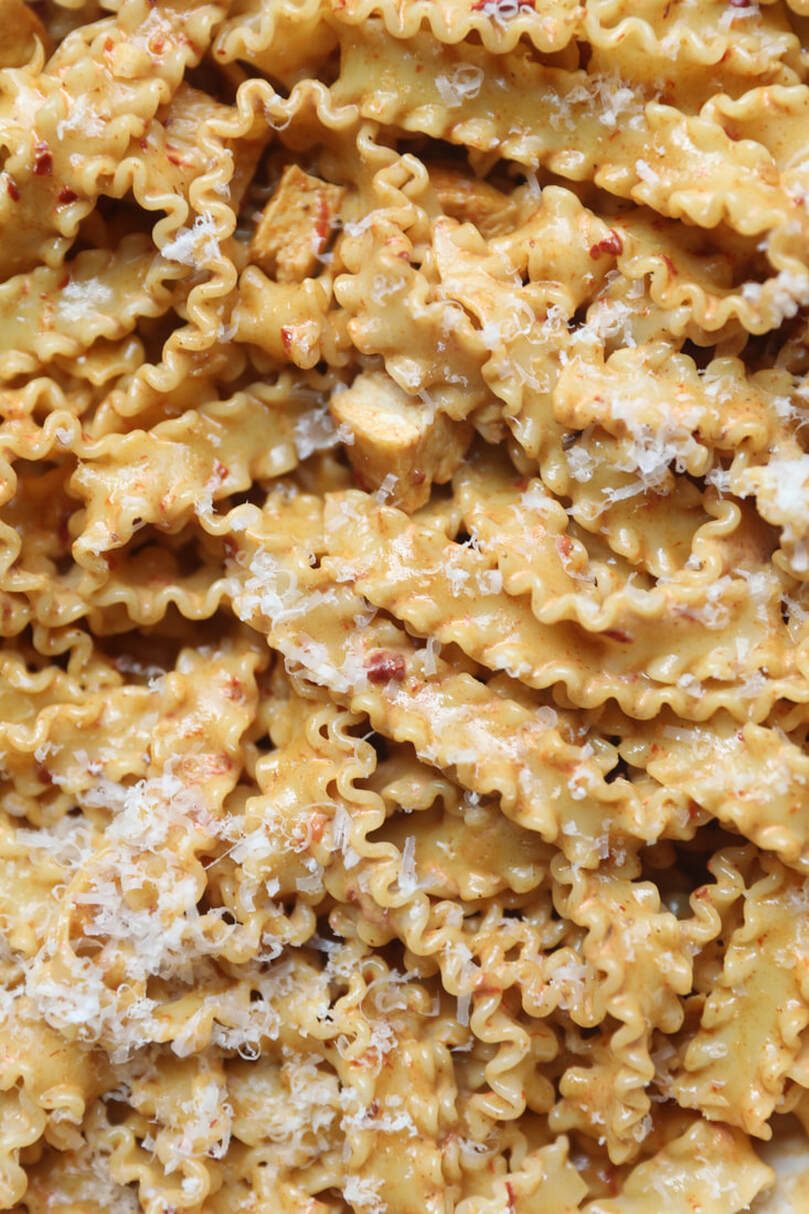 What you need:
What to do:
The “sauce” for this one is more of a gloss…which in my opinion is the BEST kind of pasta sauce. Butter + reduced broth and white wine mixed with the flavorful juices from the sausage. Also, the kale gets super soft while it cooks in the broth/wine and it’s probably the best tasting version of kale I’ve ever had!! 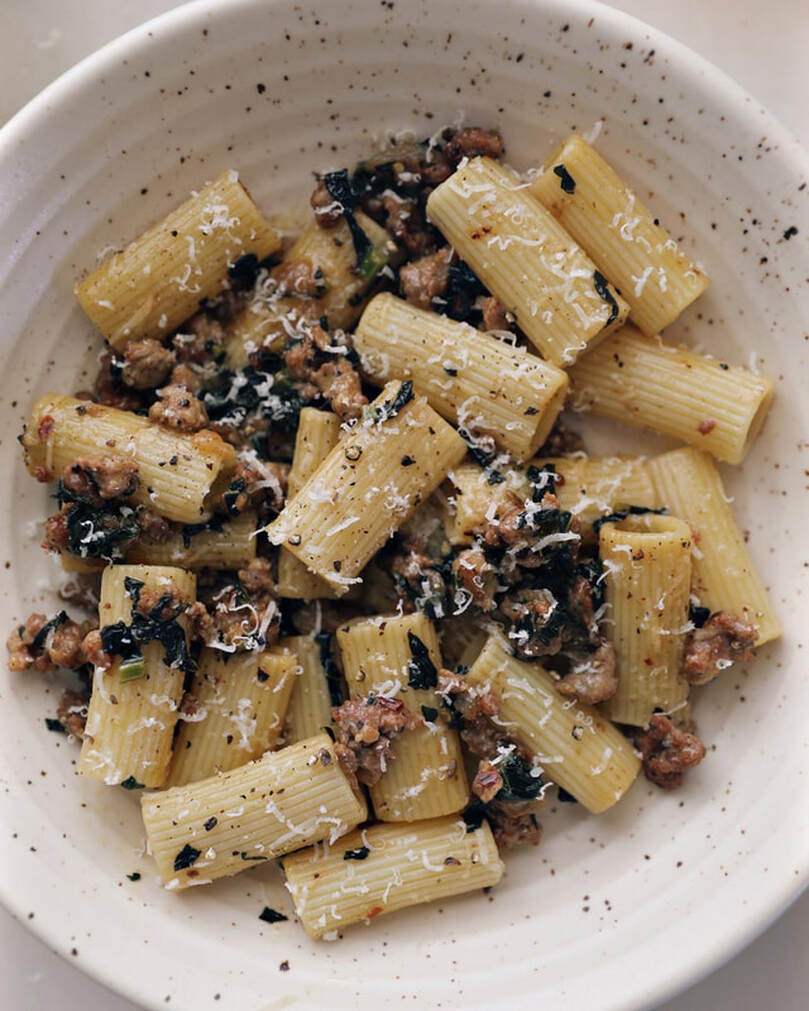 What you need:
What to do:
NGL, this dish is totally inspired by the creamy chicken Maruchan Ramen packets I used to eat as a child!! I remember when they first came out with the creamy flavor my family went crazy over it and we literally ate it EVERY day after school for weeks. The recipe concept is basically to cook noodles in chicken broth on the stove and then once the broth has reduced, add butter and cream to make a lush, creamy chicken flavored sauce!! It's so freaking good. A little tricky with what size and shape noodles you use so pay attention to the tip where I mention to drain out some broth if there's too much in the skillet by the time the noodles are finished. Last thing -- the noodles are not meant to be al dente, they're supposed to be slightly overcooked and pretty soft.  What you need:
What to do:
This chipotle chicken is a staple in our house!! We love to use it to make tacos, burritos, salads, nachos and/or burrito bowls!! The chicken can be paired with any sort taco/burrito faves but we like it with chopped romaine lettuce, white rice, my greek yogurt-based chipotle ranch sauce and then either monterey jack or white cheddar cheese. Basic, but amazing. 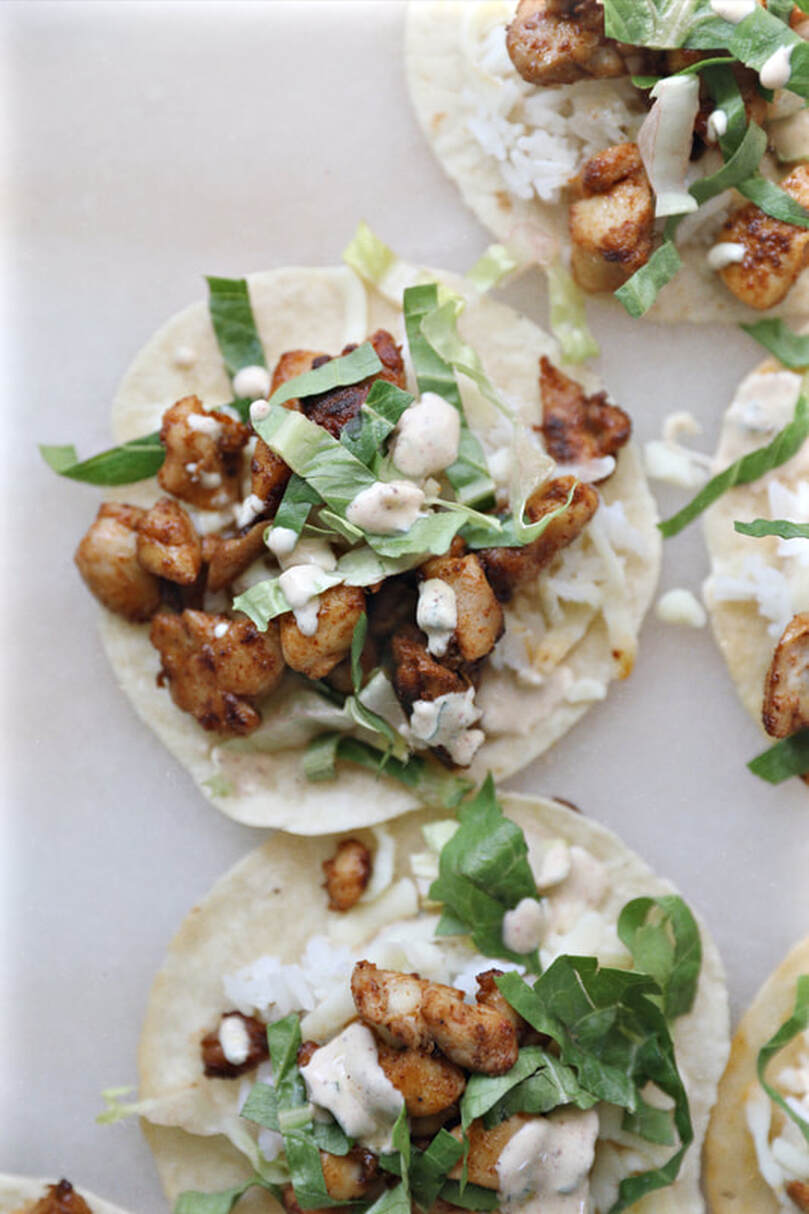 What you need: For the chicken
What to do:
I am HERE for the one pan/pot recipes!! Sometimes I don't like the texture of pasta sauce that's full blown pasta water but for this recipe it's absolutely necessary to mimic that thicker texture of the classic Spaghettio's in a can. Obviously, you can leave out the meatballs or use your own meatball recipe - and yes, it's pretty annoying to roll them into such tiny balls but hey, this recipe is fun and it's worth it in my opinion!! I didn't salt the pasta water since the meatballs are salty and the 1/4 cup of parm bring some saltiness into the dish as well. I highly recommend using freshly grated parm from a block - the pre-shredded stuff never melts as well or tastes as good and it's not great for texture. Also, if you don't grate the garlic there will be little chunks of it in there so that could throw off the texture too, FYI. Recipe makes enough for two and the whole thing is done in 20-25 minutes depending on how fast of a meatball roller you are, lol. 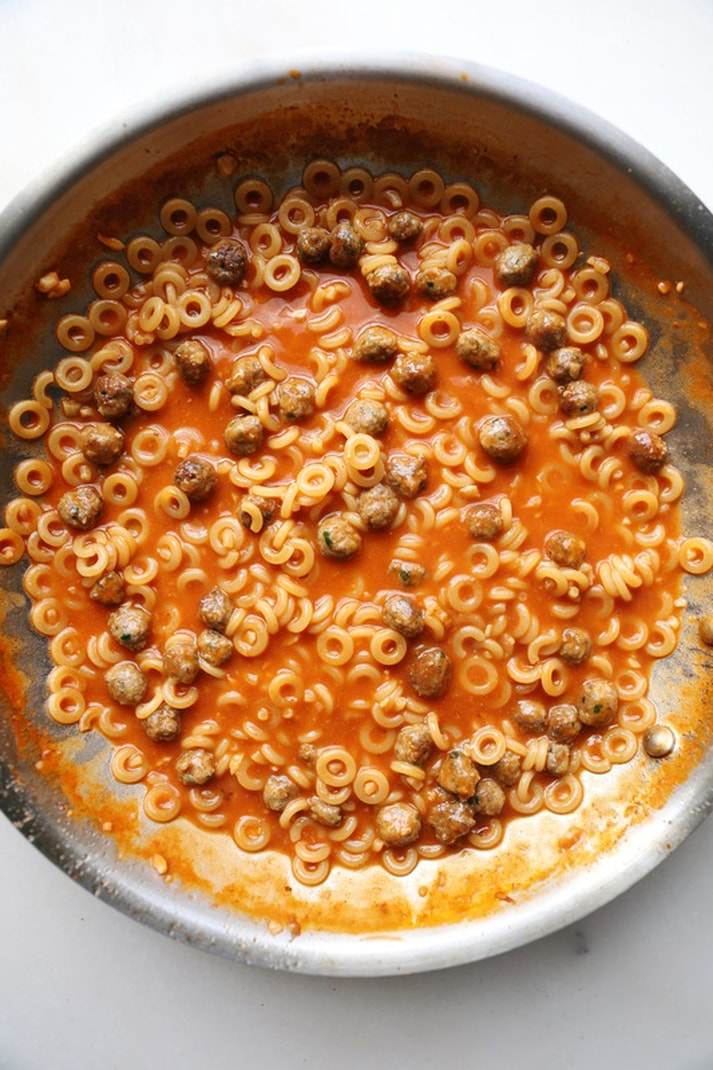 What you need: For the meatballs:
What to do:
Okay so I really wanted lasagna the other day but didn't want to do all the work of layering and mixing and baking! This isn't an exactly pure lasagna recipe so don't come at me -- just a quicker way to achieve lasagna vibes and it's SO good! 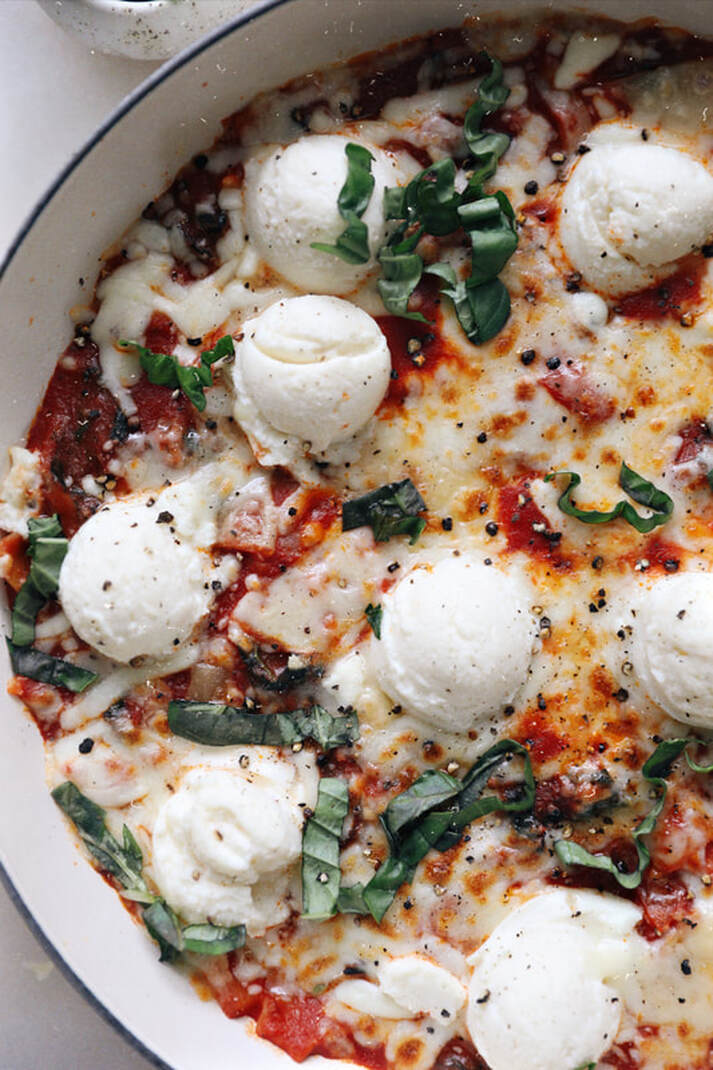 What you need:
What to do:
When it comes to garlic, the limit does not exist. Just cover me in garlic. This recipe is perfect for garlic lovers because it has TWO kinds of garlic. Fresh and then crispy fried garlic which is one of my all time favorite toppings. Pro tip: if you have or know someone with a nut allergy, crispy garlic can replace that crunchy nut factor in recipes like pad thai or pesto! Recipe makes enough for 2 entrees or 3-4 smaller side portions. Store any leftover fried garlic in an air-tight container for up to two weeks. 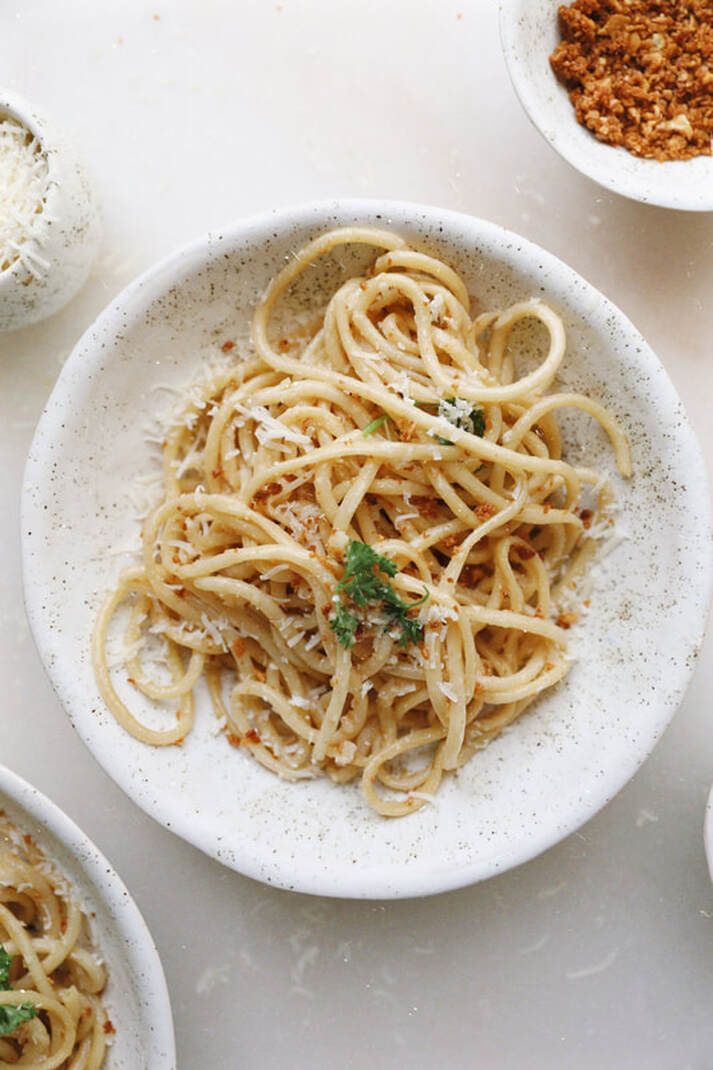 What you need:
What to do:
|
ConnectIf you’d like to use my photos & recipes, please ask or link back to this site. Thank You.
Calendar
November 2023
|
 RSS Feed